本文嘗試盡可能實作最佳實踐,但部分設定請依據自身需求調整。
大綱
建立一個簡易的 React 應用程式
設定 S3 提供靜態網站託管
部署
進階實戰 - SSL 搭配自訂網域
進階實戰 - S3
進階實戰 - CloudFront
進階實戰 - 自動化腳本
基本上前半段和後半段有蠻多重複的,如果您已經有些 AWS 的使用經驗,可直接跳至進階實戰。
準備
AWS 帳號
AWS IAM User
安裝 AWS CLI
設定 AWS 憑證
設定 AWS 帳號 註冊 或登入AWS Console ,點擊【服務/Services】搜尋【IAM】。
在【IAM】介面點擊左側的【使用者/Users】,我們需要為 Serverless Framework 建立一組使用帳號。這組帳號會授權我們的框架建立、更新、刪除 AWS 上的資源。
點擊【新增使用者/Add User】,輸入使用者名稱和 程式設計方式存取/Programmatic access 。下一步。
至【設定許可】點擊【直接連結現有政策/Attach existing policies directly】選取【AmazonS3FullAccess】。後續直接沿用預設值,建立使用者。授予的許可應該盡遵循最小權限原則,如果您只是針對測試需求可選取【AdministratorAccess】
取得【存取金鑰 ID/Access Key Id】和【私密存取金鑰/Secret Access Key】,後續我們會需要這兩個資料,即我們上面提到的 AWS 憑證。
開啟您的終端機程式:
1 2 3 4 5 6 7 8 9 10 11 12 13 14 $ brew install awscli $ aws configure AWS Access Key ID [None]: YOUR KEY AWS Secret Access Key [None]: YOUR KEY Default region name [None]: us-west-2 Default output format [None]: ENTER $ aws configure --profile serverless
憑證預設會存放在 ~/.aws 目錄下。
安裝 NodeJS 1 2 3 4 5 6 $ brew install node $ curl -o- https://raw.githubusercontent.com/nvm-sh/nvm/v0.34.0/install.sh | bash $ nvm install node
建立簡易的專案 1 2 3 $ npx create-react-app [YOUR_PROJECT_NAME] $ cd react-s3-demo $ npm start
設定 S3 Bucket 切換至 S3 介面
點擊【建立儲存貯體】
注意:儲存佇體名稱(Bucket name)必須要全域唯一。
設定選項,直接使用預設值
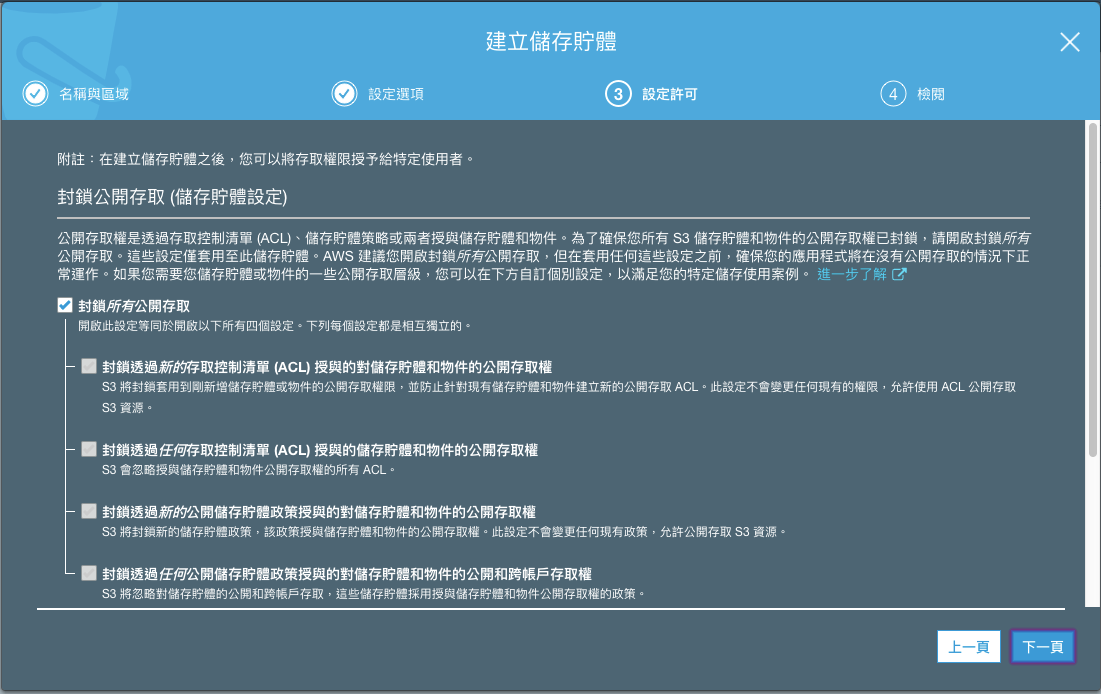
設定許可,取消所有封鎖
檢閱,點擊建立儲存佇體
回到列表頁面,選取剛剛建立的儲存佇體。點擊【屬性/Properties】頁籤。您應該可以看到【靜態網站託管/Static Website Hosting】點擊之後,選擇【使用此儲存貯體來託管網站/Use this bucket to host a website】。輸入 index.html。以 React 應用程式來說您的錯誤頁面也會是 index.html。
設定靜態網站託管
現在,儲存佇體已經可以託管靜態網站,我們還需要設定許可權限。點擊【許可/Permissions】接著 【儲存貯體政策/Bucket Policy】貼上下面的設定(取代您的 Bucket Name):
1 2 3 4 5 6 7 8 9 10 11 12 13 14 15 16 { "Version" : "2012-10-17" , "Statement" : [ { "Sid" : "AllowPublicReadAccess" , "Effect" : "Allow" , "Principal" : "*" , "Action" : [ "s3:GetObject" ], "Resource" : [ "arn:aws:s3:::YOUR_BUCKET_NAME/*" ] } ] }
到此步驟關於 AWS S3 的設定已經完成了。
建置與部署 開啟我們一開始建立的 React 專案
1 2 $ npm run build $ aws s3 sync build/ s3://react-s3-demo --acl public-read
您也可以將指令加入 package.json 。
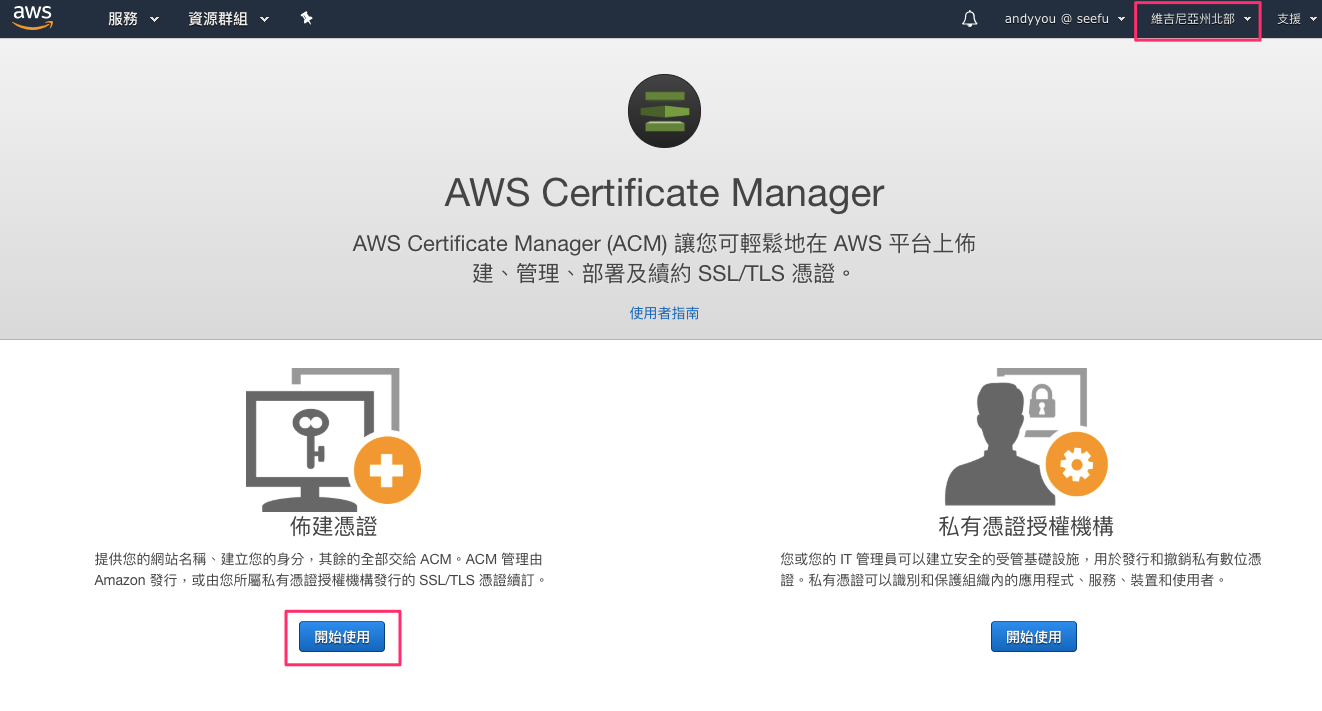
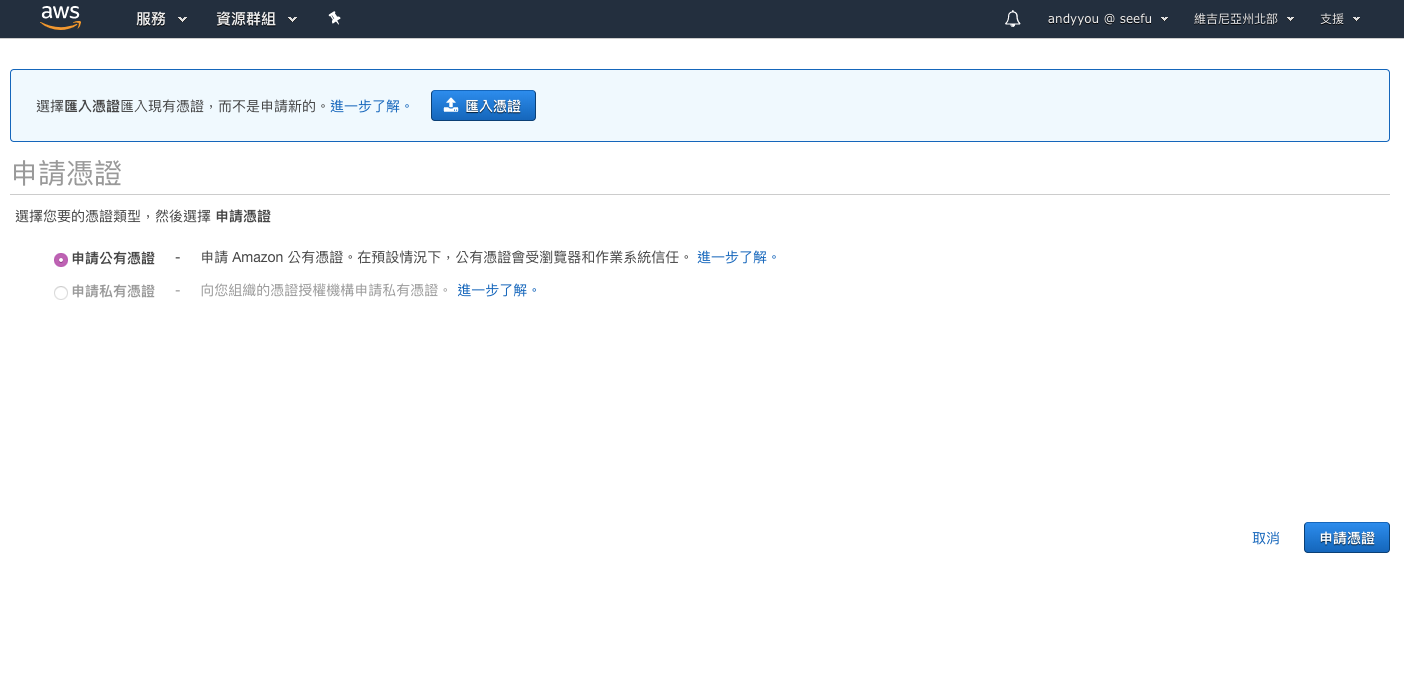
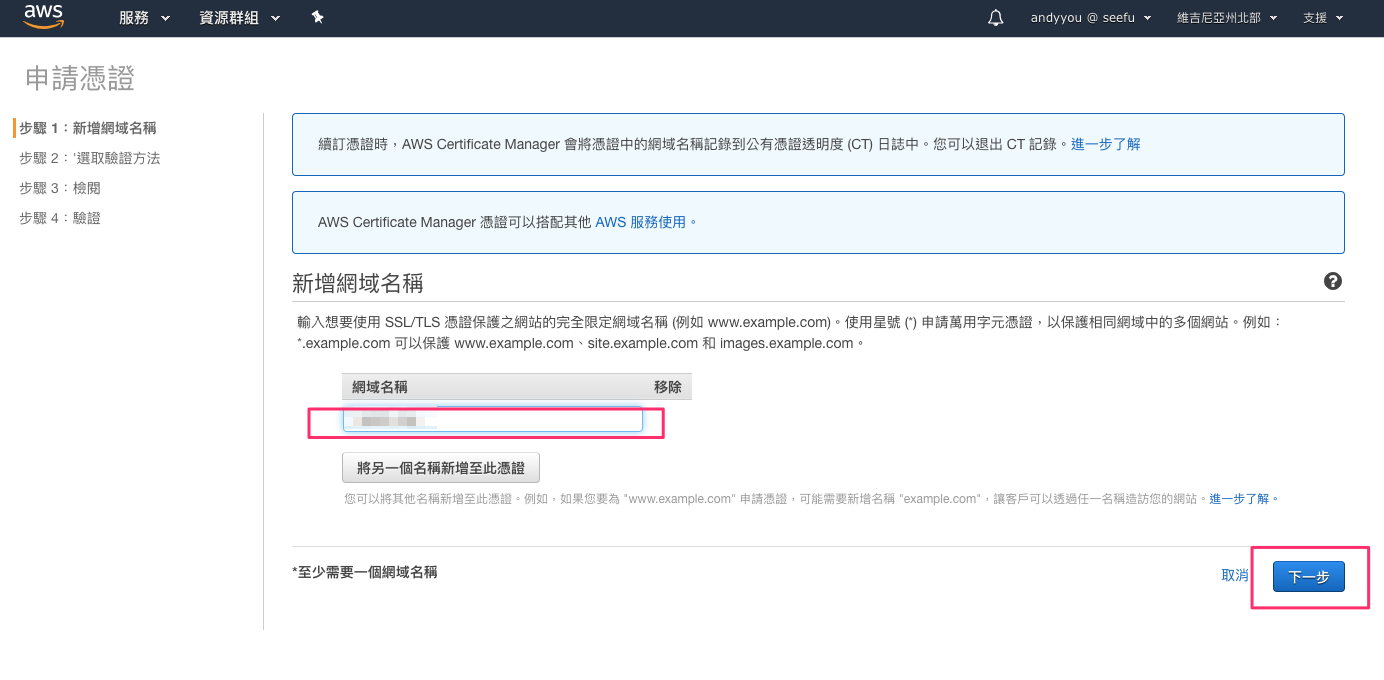
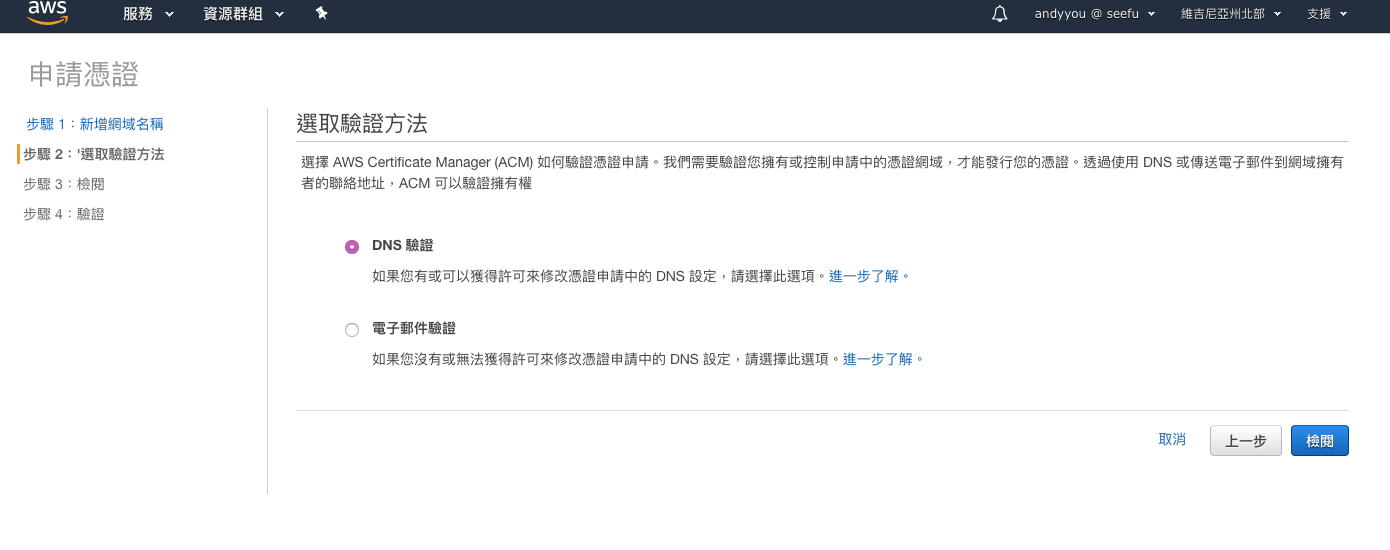
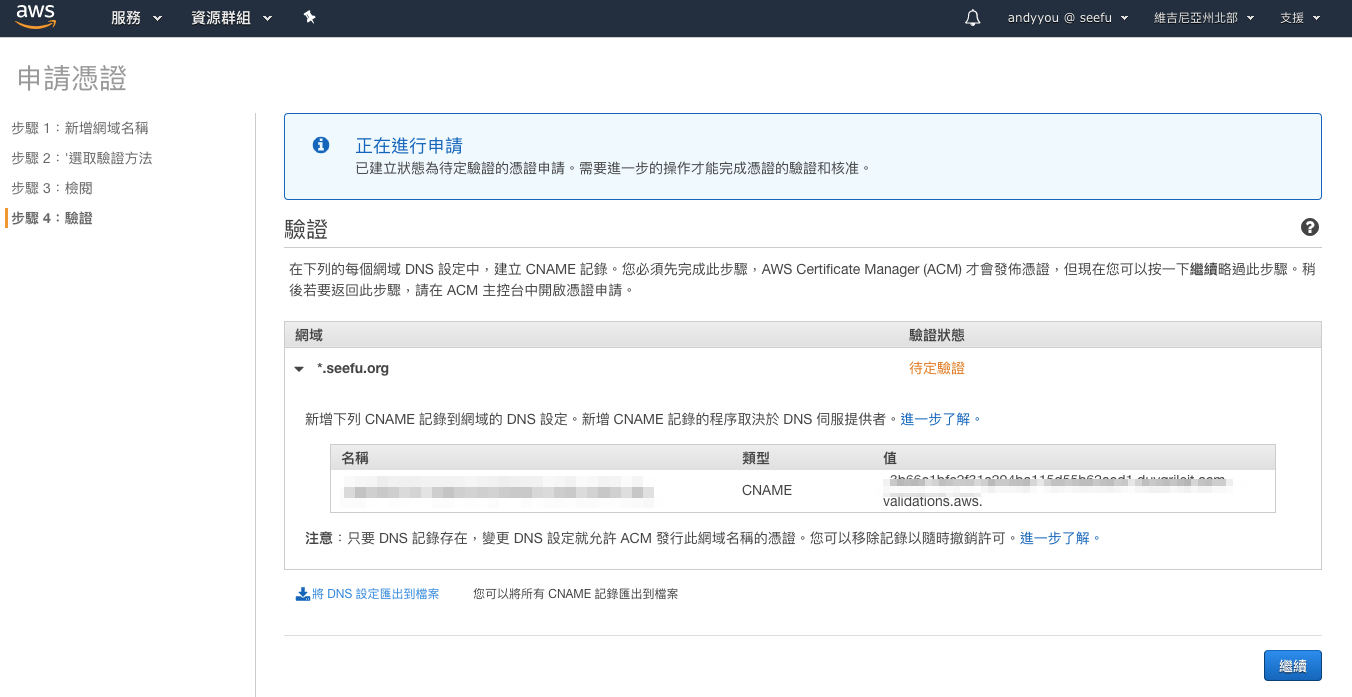
進階實戰 - SSL 搭配自訂網域 注意:藉由 Amazon Certificate Manager 建立的憑證若要給 CloudFront 使用。您可以使用儲存位於美國東部
步驟 2
步驟 3
步驟 4
步驟 5
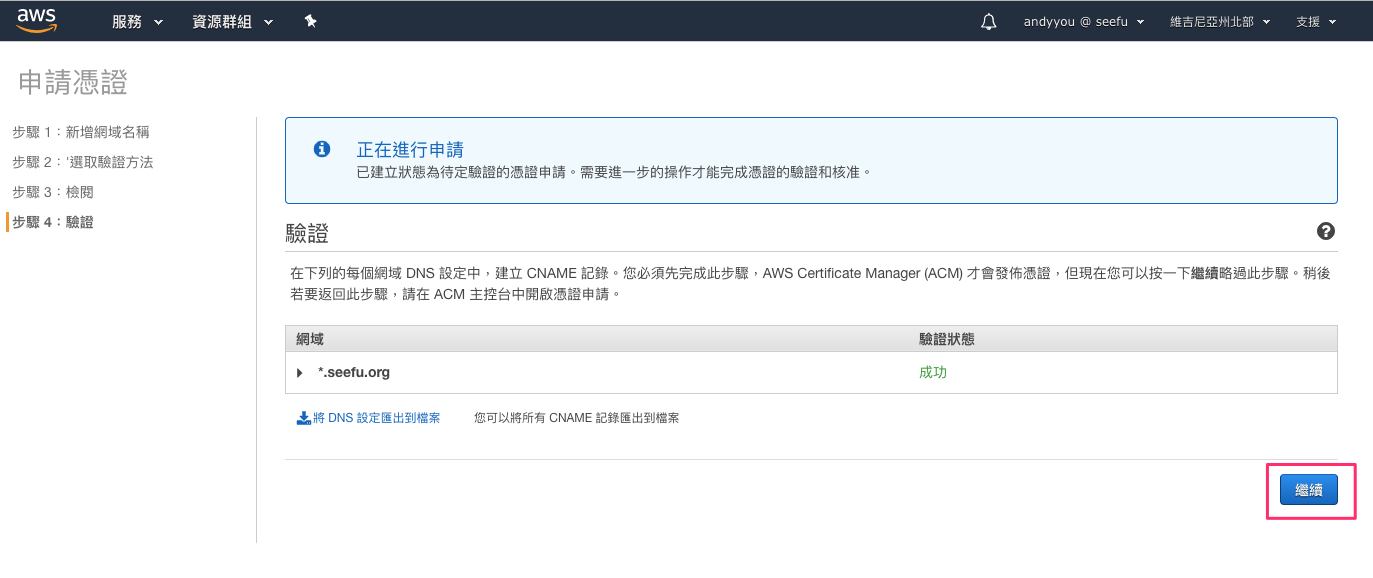
步驟 6 請至您的網域 DNS 管理介面加入 CNAME 紀錄,通過驗證。
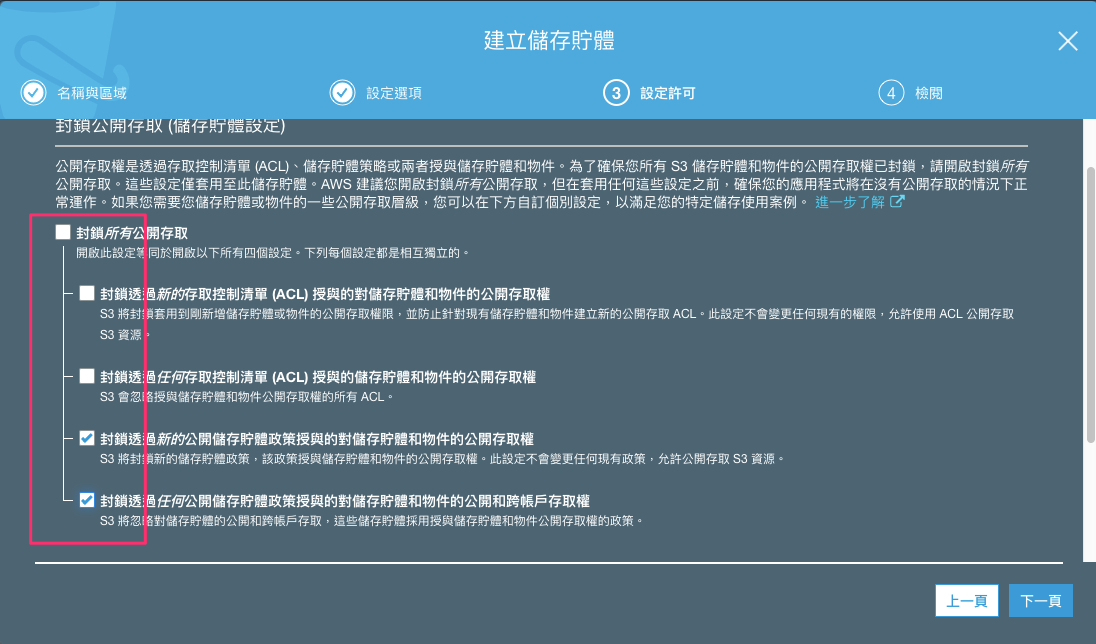
進階實戰 - S3 步驟 1 靜態網站搭配 Amazon CloudFront 時,我們可以限制儲存體的存取僅讓 CloudFront 存取即可。
步驟 2
步驟 3 保留預設值
1 2 $ aws s3 sync build/ s3://react-s3-demo
注意:封鎖公開存取之後,無法依據上面設定【設定 S3 Bucket】段落的公開的政策,託管的網址會無法取得檔案,另外 aws s3 sync 的 --acl 也會被拒絕。詳細的權限設定請參考下面參考資源。如果想要支援 --acl public-read,可以開啟兩個選項即可。
步驟 4
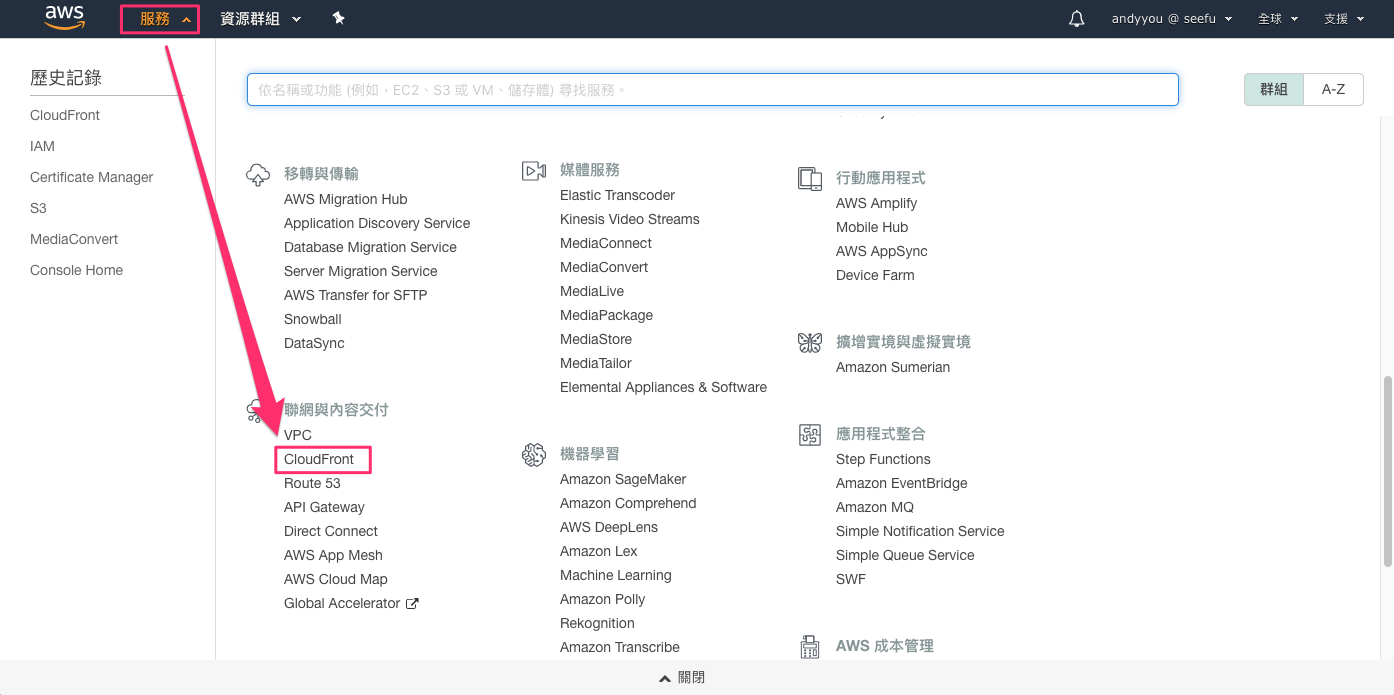
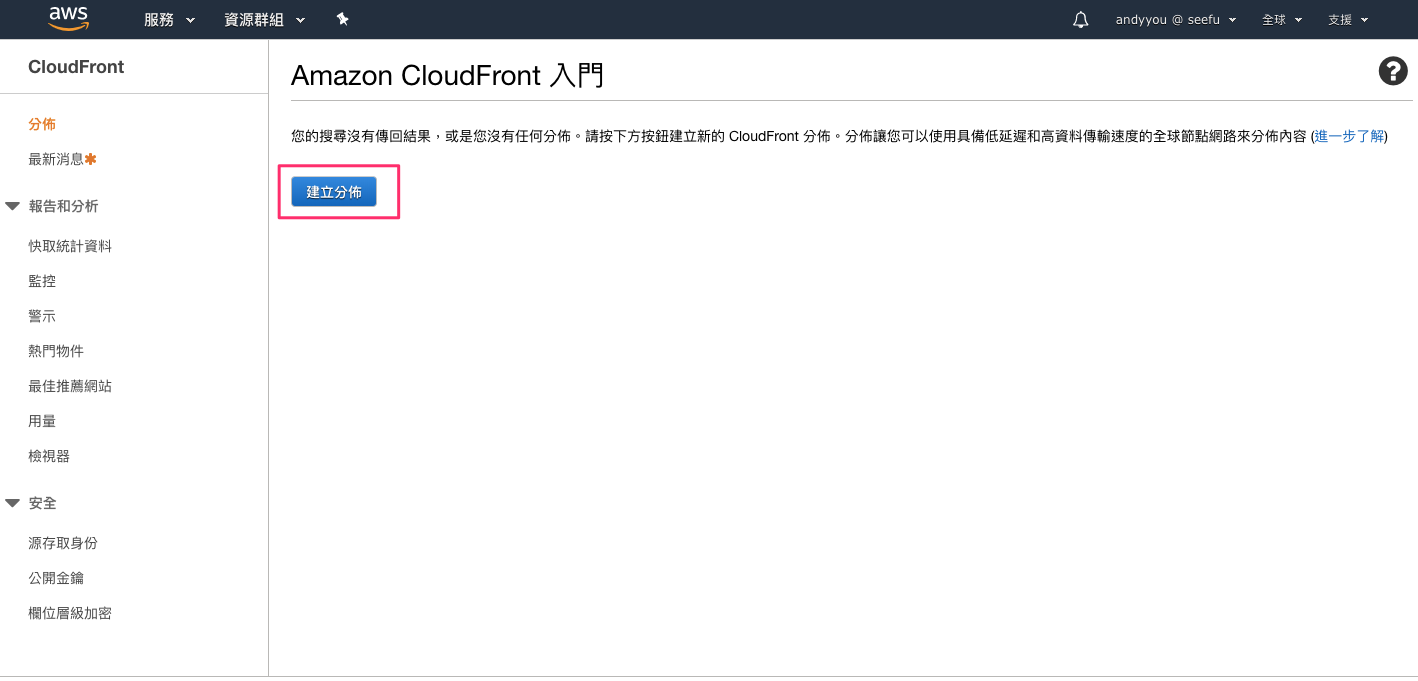
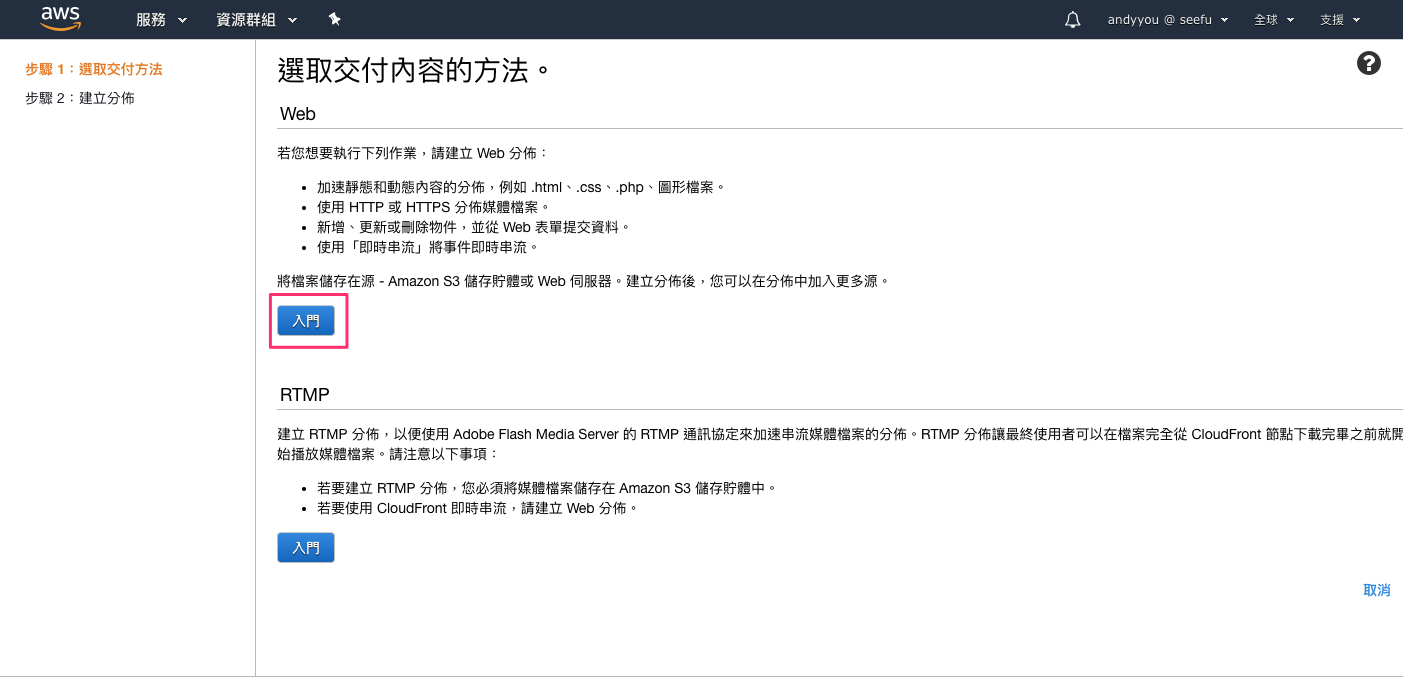
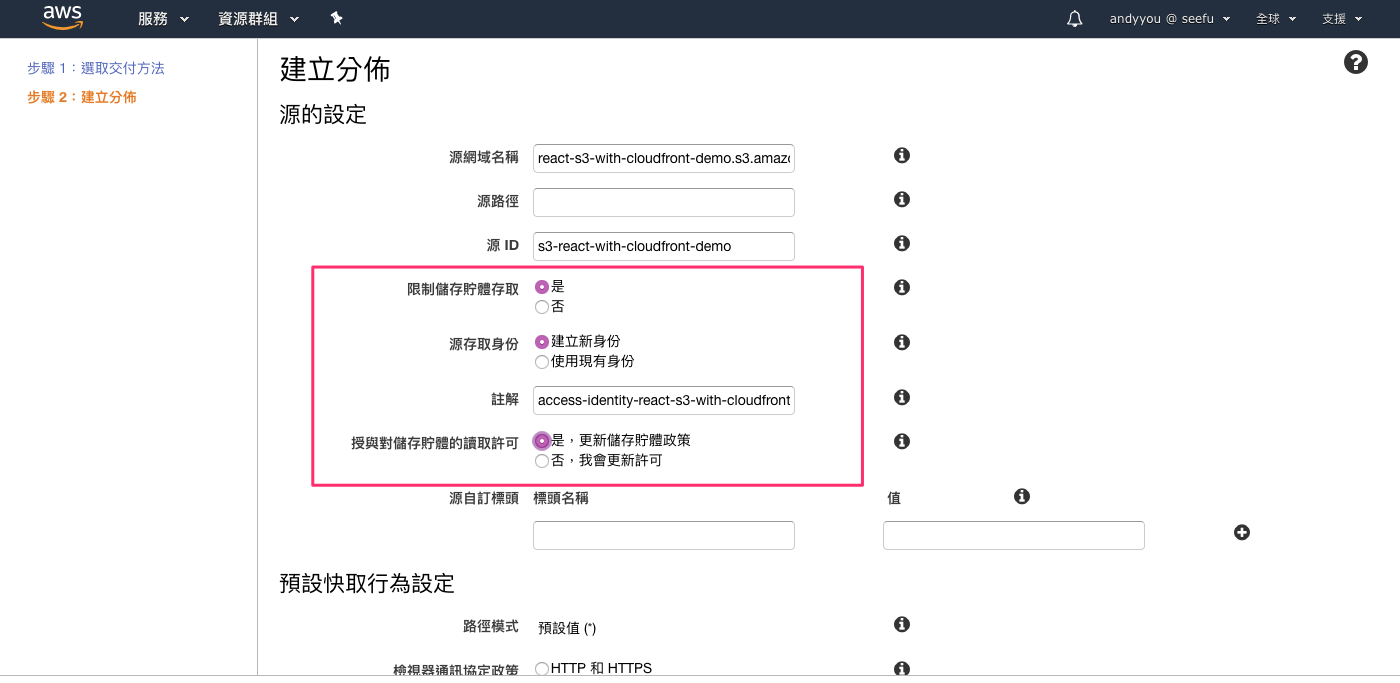
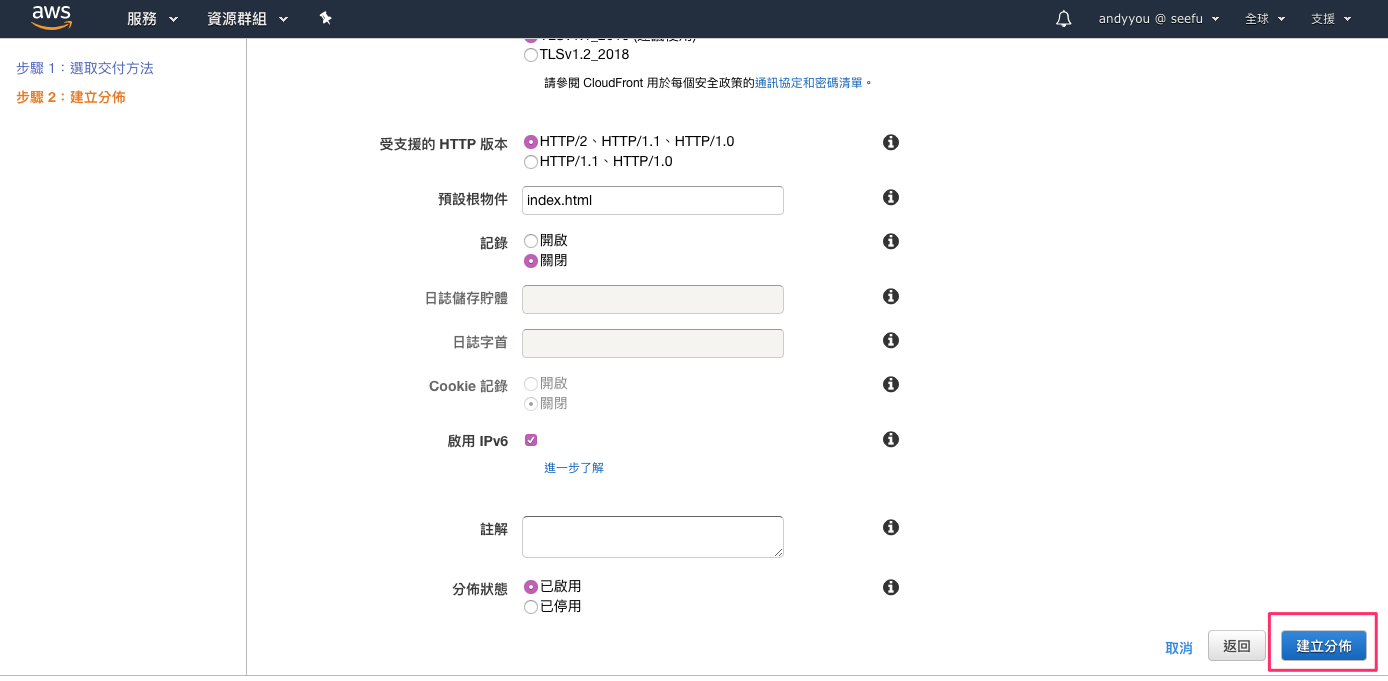
進階實戰 - CloudFront 建立分佈設定:
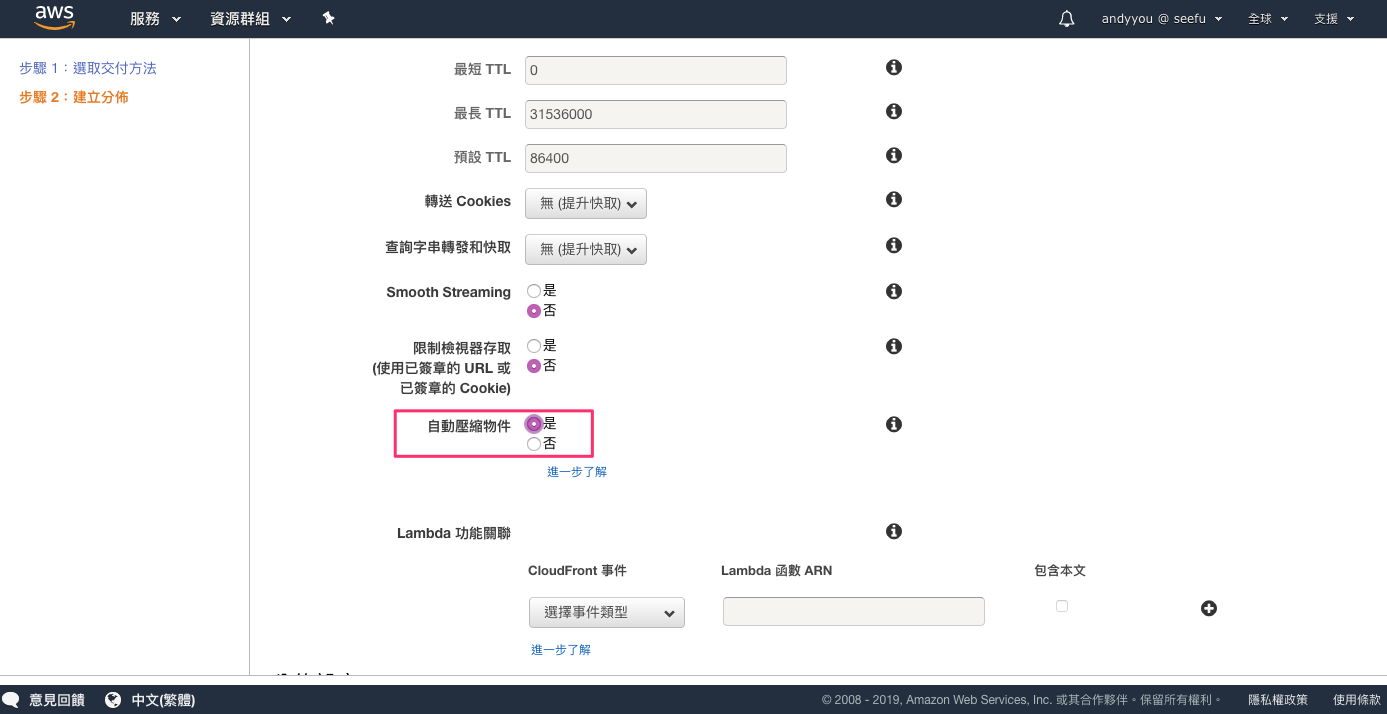
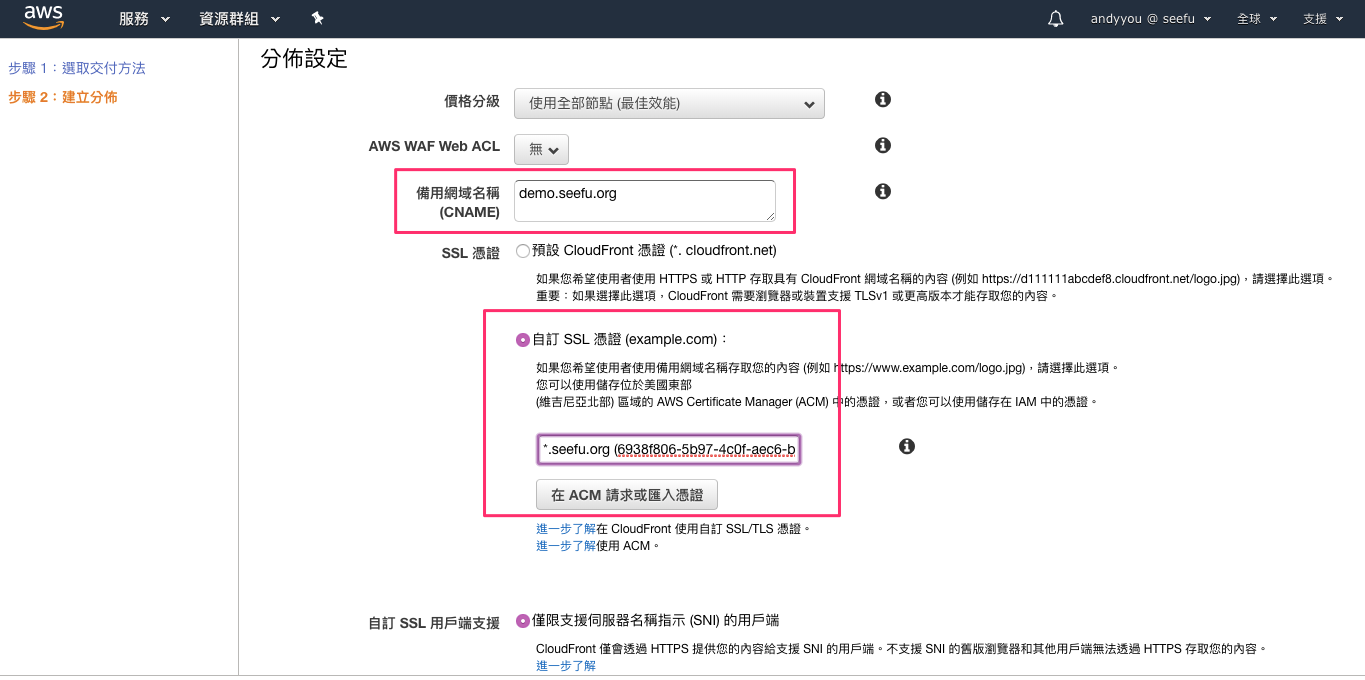
1 2 3 4 5 6 7 8 9 10 11 12 13 14 15 16 17 18 19 20 源網域名稱/Origin Domain Name: 您建立的 S3 Bucket 源 ID/Origin ID: 保留預設值或可自行設定名稱 限制儲存貯體存取/Restrict Bucket Access: 是,如此網站必須通過 CDN 存取 源存取身份/Origin Access Identity: 自行設定依據狀況新增或選擇既有 授與對儲存貯體的讀取許可/Grant Read Permissions on Bucket: 是,更新儲存貯體政策 檢視器通訊協定政策/Viewer Protocol Policy: 重新導向 HTTP 到 HTTPS 允許的 HTTP 方法/Allowed HTTP Methods: GET、HEAD、OPTIONS、PUT、POST、PATCH、DELETE 自動壓縮物件/Compress Objects Automatically: 是 備用網域名稱/Alternate Domain Names(CNAMEs): 您的網域 SSL 憑證/SSL Certificate: 自訂 SSL 憑證
步驟 1
步驟 2
步驟 3
步驟 4
步驟 5
步驟 6
步驟 7
步驟 8
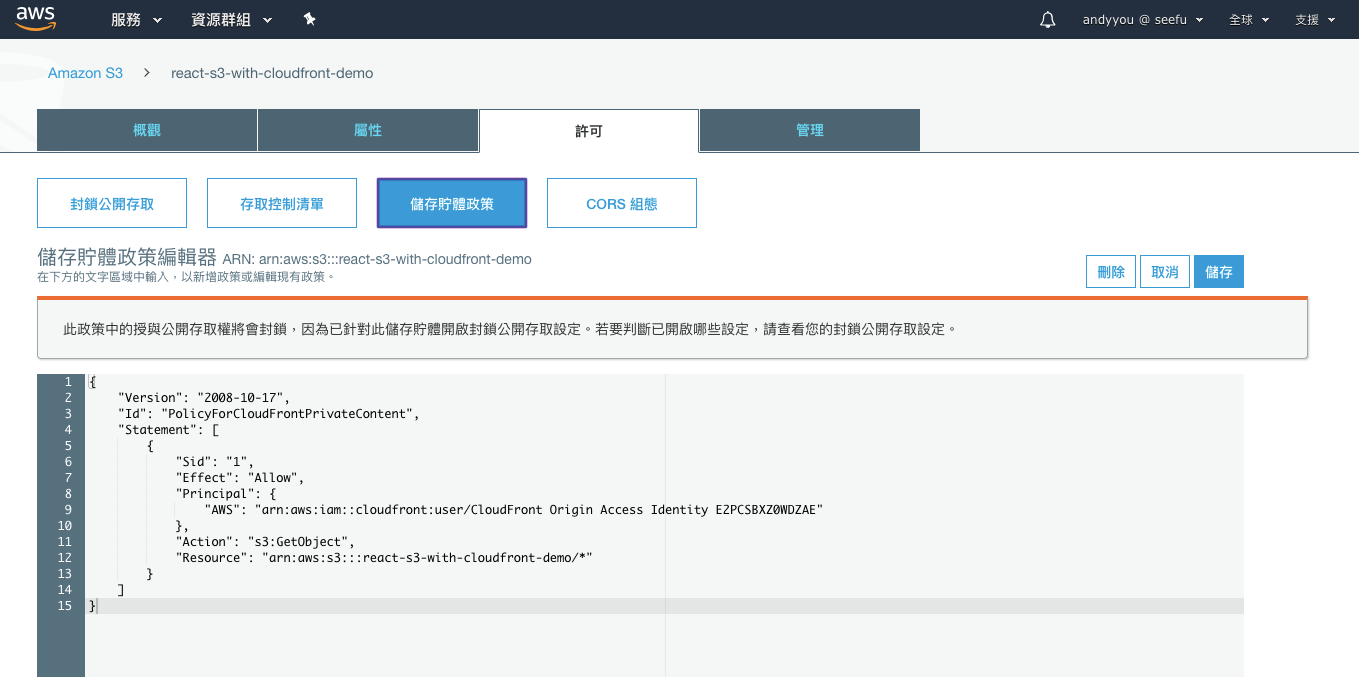
步驟 9 設定好之後檢查一下 S3 是否有自動更新政策。
如果您需要使用 AWS 提供的靜態網站託管網址或有其他原因,那麼記得設定【靜態網站託管】。否則不須設定。
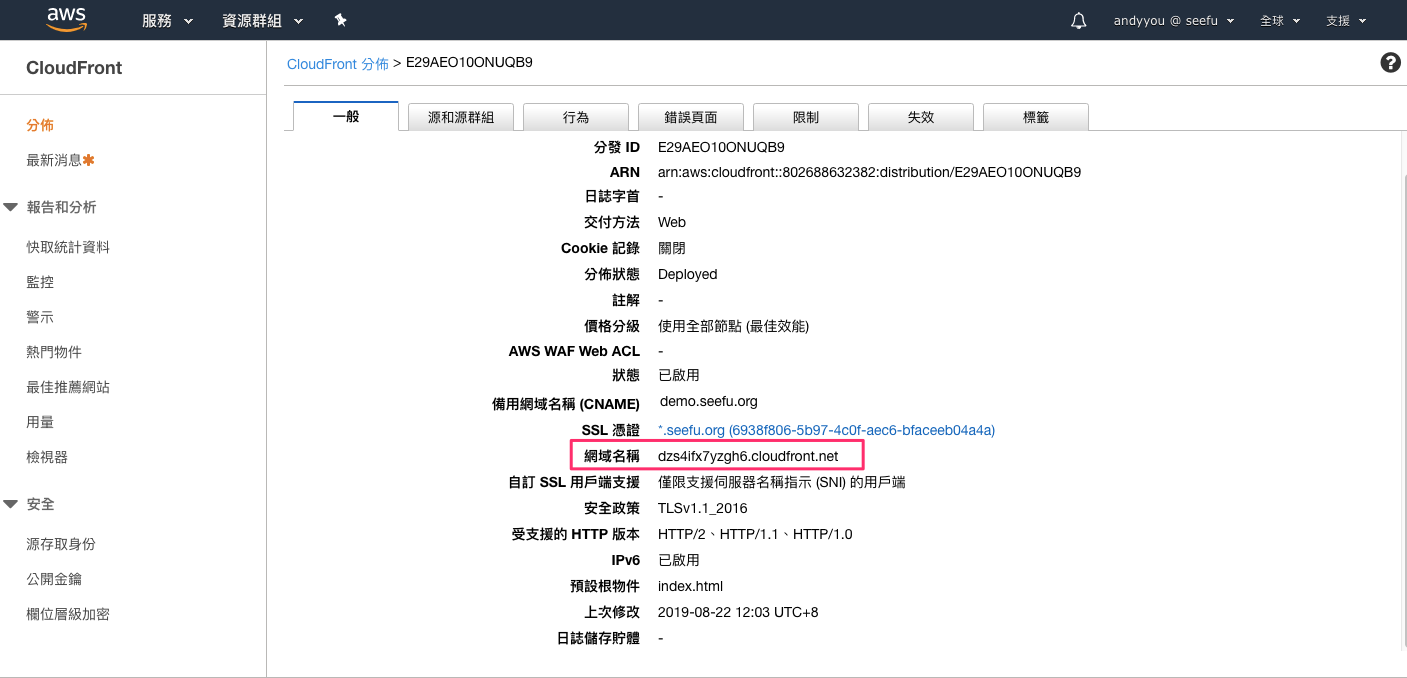
步驟 10 到 CloudFront 查看網域名稱
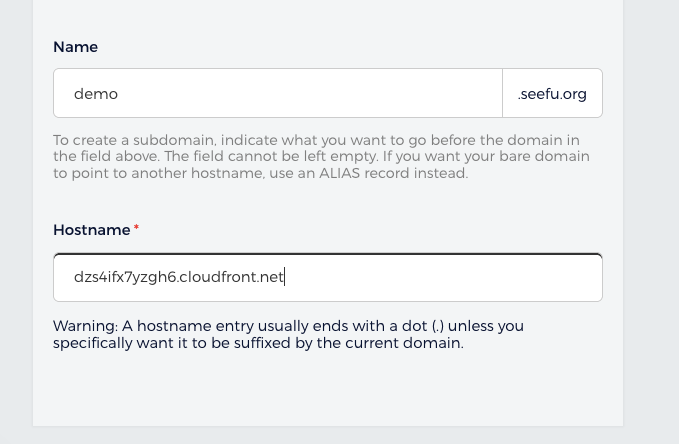
步驟 11 最後到您的網域 DNS 介面補上 CNAME 設定
等待約 10 - 20 分鐘即生效。
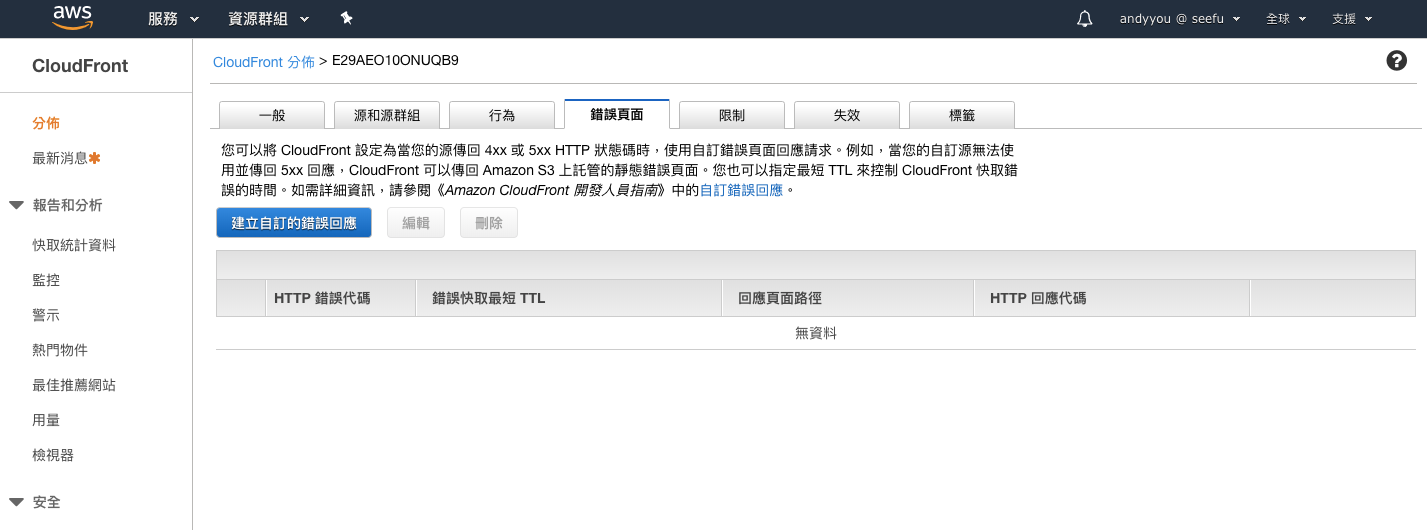
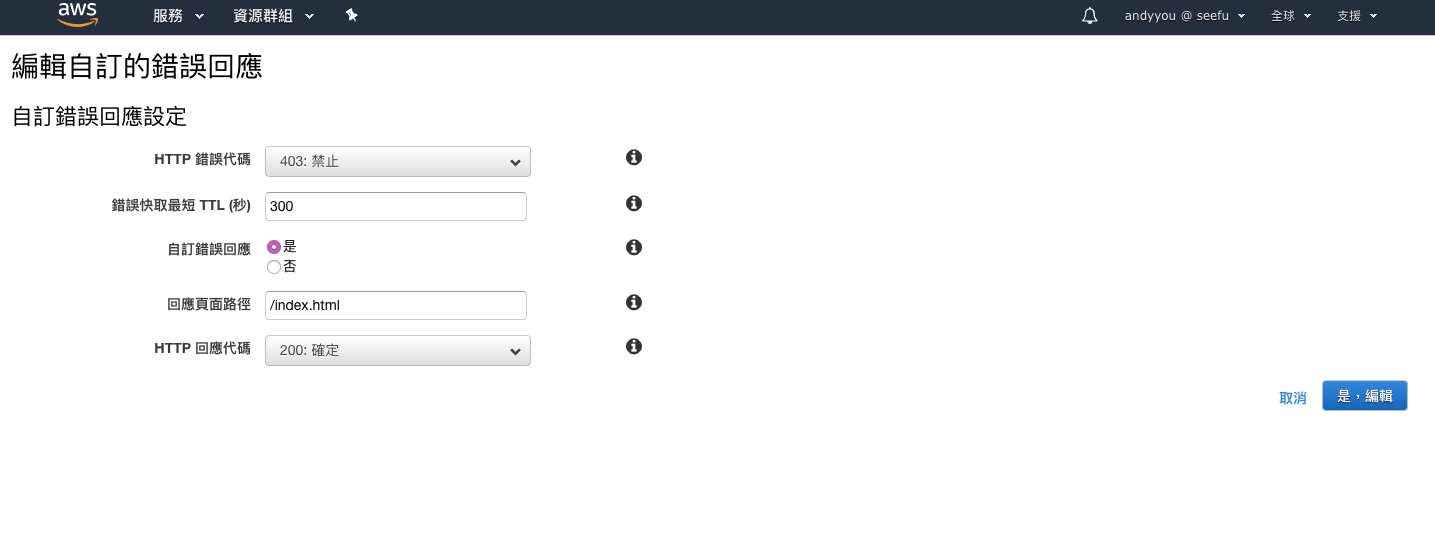
針對 React 應用程式的錯誤,CloudFront 記得要導向 index.html
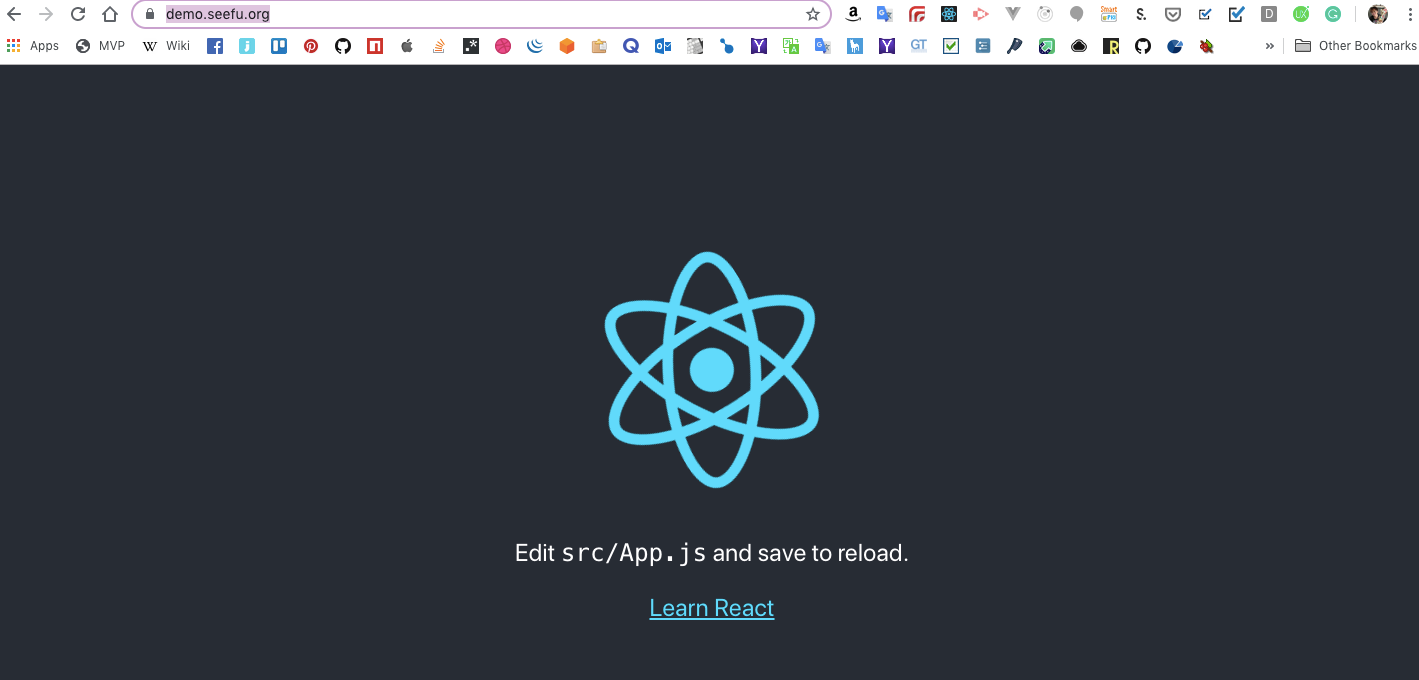
瀏覽
進階 - 自動化腳本 下面為 NodeJS 的自動化腳本,您需要安裝 AWS CLI。
⚠️警告:本腳步請勿直接複製使用 ,您應該理解並一步步調整成您的狀況。
1 2 3 4 5 6 7 8 9 10 11 12 13 14 15 16 17 18 19 20 21 22 23 24 25 26 27 28 29 30 31 32 33 34 35 36 37 38 39 40 41 42 43 44 45 46 47 48 49 50 51 52 53 54 55 56 57 58 59 60 61 62 63 64 65 66 67 68 69 70 71 72 73 74 75 76 77 78 79 80 81 82 83 84 85 86 87 88 89 90 91 92 93 94 95 96 97 98 99 100 101 102 103 104 105 106 107 108 109 110 111 112 113 114 115 116 117 118 119 120 121 122 123 124 125 126 127 128 129 130 131 132 133 134 const util = require ('util' );const exec = util.promisify(require ('child_process' ).exec);const fs = require ('fs' );const S3_BUCKET_NAME = '' ;const CLOUD_FRONT_ID = '' ;const TEMP_FOLDER = '.aws' ;const CONFIG_PATH = `${TEMP_FOLDER} /cloudfront.json` ;const PATCHED_CONFIG_PATH = `${TEMP_FOLDER} /patched-dist-config.json` ;const DEPLOY_FOLDER = 'build/' ;const INDEX_FILENAME_PATTERN = /index.*html/ ;const ERROR_FILENAME_PATTERN = /500.*html/ ;async function main ( createTempFolder(); await getCloudFrontDistributionConfig(); const { indexFilename, eTag } = modifyCloudFrontDistributionConfig(); await deployFilesToS3(); await updateS3StaticWebsiteHostingConfig(indexFilename); await updateCloudFrontDistributionConfig(eTag); await removeTempFolder(); } main(); function createTempFolder ( console .log('Creating temp folder...' ); if (!fs.existsSync(TEMP_FOLDER)) { fs.mkdirSync(TEMP_FOLDER); } } async function getCloudFrontDistributionConfig ( console .log('Downloading cloudfront distribution config...' ); await exec(`aws cloudfront get-distribution-config --id ${CLOUD_FRONT_ID} > ${CONFIG_PATH} --profile [IF_YOU_USE_DEFAUTL_PLEASE_REMOVE]` ); } function updateDistConfig (obj, newIndexFilename, newErrorFilename ) Object .keys(obj).forEach((key ) => { if (obj[key] !== null && typeof obj[key] === 'object' ) { updateDistConfig(obj[key], newIndexFilename, newErrorFilename); return ; } if (typeof obj[key] === 'string' ) { switch (key) { case 'DefaultRootObject' : obj[key] = newIndexFilename; break ; case 'ResponsePagePath' : if (obj[key].match(INDEX_FILENAME_PATTERN)) { obj[key] = `/${newIndexFilename} ` ; } if (obj[key].match(ERROR_FILENAME_PATTERN)) { obj[key] = `/${newErrorFilename} ` ; } break ; } } }); }; function modifyCloudFrontDistributionConfig ( console .log('Modify cloudfront distribution config...' ); let indexFilename = '' ; let errorFilename = '' ; const files = fs.readdirSync(DEPLOY_FOLDER); files.forEach(file => if (file.match(INDEX_FILENAME_PATTERN)) { indexFilename = file; } if (file.match(ERROR_FILENAME_PATTERN)) { errorFilename = file; } }); const { DistributionConfig, ETag } = JSON .parse(fs.readFileSync(CONFIG_PATH, 'utf8' )); updateDistConfig(DistributionConfig, indexFilename, errorFilename); fs.writeFileSync(PATCHED_CONFIG_PATH, JSON .stringify(DistributionConfig, null , 2 ), 'utf8' ); return { indexFilename : indexFilename, eTag : ETag, }; } async function deployFilesToS3 (bucketName ) console .log('Deploy files to AWS S3...' ); await exec(`aws s3 rm s3://${S3_BUCKET_NAME} --recursive --profile seefu` ); await exec(`aws s3 sync public/ s3://${S3_BUCKET_NAME} --acl public-read --profile [IF_YOU_USE_DEFAUTL_PLEASE_REMOVE]` ); } async function updateS3StaticWebsiteHostingConfig (indexFilename ) console .log('Updating AWS S3 static website hosting config...' ); await exec(`aws s3 website s3://app.uxtesting.io --index-document ${indexFilename} --error-document ${indexFilename} --profile [IF_YOU_USE_DEFAUTL_PLEASE_REMOVE]` ); }; async function updateCloudFrontDistributionConfig ( console .log('Updating cloudfront distribution config...' ); await exec(`aws cloudfront update-distribution --id ${CLOUD_FRONT_ID} --distribution-config file://${PATCHED_CONFIG_PATH} --if-match ${eTag} --profile [IF_YOU_USE_DEFAUTL_PLEASE_REMOVE]` ); } async function removeTempFolder ( if (fs.existsSync(TEMP_FOLDER)) { console .log('Removing temp folder...' ); if (fs.existsSync(CONFIG_PATH)) { fs.unlinkSync(CONFIG_PATH); } if (fs.existsSync(PATCHED_CONFIG_PATH)) { fs.unlinkSync(PATCHED_CONFIG_PATH); } fs.rmdirSync(TEMP_FOLDER); } };
參考資源


