本文為使用 Rails ActiveStorage 的實作範例筆記。詳細介紹請參考Active Storage 概要 ,本文僅針對官方教學提供一個對照的實作記錄,如需部署至 Heroku 請參考在 Heroku 使用 Active Storage 。
建立 Rails 專案與安裝 1 2 3 4 5 6 7 8 $ rails new active_storage_sample --webpack=stimulus --skip-coffee --skip-test $ rails active_storage:install $ rails db:migrate
由於 active_storage 會使用兩張 table 記錄資料所以需要 _migrate_。
我們在這個實作會練習使用 aws s3 來儲存檔案,即便不預先設定還是可以在使用本地磁碟的方式測試 。
如果您不想在這邊練習使用 aws 可以直接跳至下一節。
1 2 $ EDITOR=vim rails credentials:edit
config/storage.yml 設定
1 2 3 4 5 6 amazon: service: S3 access_key_id: <%= Rails.application.credentials.dig(:aws, :access_key_id) %> secret_access_key: <%= Rails.application.credentials.dig(:aws, :secret_access_key) %> region: ap-northeast-2 bucket: your_own_bucket
開啟 Gemfile 加入 aws-sdk-s3 並執行 bundle 安裝。
Active Storage 的核心功能需要以下權限:s3:ListBucket、s3:PutObject、s3:GetObject 和 s3:DeleteObject。如果你設定了其它上傳選項,如 ACL 設定,則可能需要額外的權限。
注意:記得要設定 config/environments/development.rb
1 config.active_storage.service = :amazon
標準 Form Post 方式 新增圖片(單檔/多檔) 使用官方提供的標準方式上傳檔案
1 2 3 $ rails g scaffold event name $ rails db:migrate
active_storage 的使用方式非常簡單:
1 調整 models/event.rb
1 2 3 4 class Event < ApplicationRecord has_one_attached :cover has_many_attached :banners end
2 調整 views/events/_form.html.erb
1 2 3 4 5 6 7 8 9 <div class ="field" > <%= form.label :cover %> <%= form.file_field :cover %> </div > <div class ="field" > <%= form.label :banners %> <%= form.file_field :banners, multiple: true %> </div >
3 調整 controllers/events_controller.rb
1 2 3 4 5 6 7 8 9 10 11 12 13 def event_params params.require (:event ).permit(:name , :cover , banners: []) end @event .attach(params[:cover ])@event .cover.purge@event .cover.purge_later
4 為了觀察結果與使用呈現的相關 _helpers_,調整 views/events/show.html.erb 加上
1 2 3 4 5 6 7 8 9 10 11 12 13 14 15 <p > <strong > Cover:</strong > <div > <%= image_tag @event.cover if @event.cover.attached? %> </div > </p > <p > <strong > Banners:</strong > <div > <% @event.banners.each do |banner| %> <%= image_tag banner %> <% end %> </div > </p >
以上就是最基本的使用方式,我們可以啟動 rails s 並瀏覽 localhost:3000/events來觀察目前的結果。
調整圖片尺寸 1 要使用調整圖片尺寸的功能須先安裝 mini_magick,在 Gemfile 解開註解並安裝。
1 2 gem 'mini_magick' , '~> 4.8'
2 接著就可以在 views/events/show.html.erb 使用 .variant(resize: '100x100') 方法。
1 <%= image_tag @event .cover.variant(resize: '100x100' ) if @event .cover.attached? %>
刪除圖片 1 config/routes.rb 新增路由
1 2 3 resources :events do delete :destroy_cover , on: :member end
2 controllers/events_controller.rb 新增 action 與設定 :set_event
1 2 3 4 5 6 7 8 before_action :set_event , only: [:show , :edit , :update , :destroy , :destroy_cover ] def destroy_cover @event .cover.purge respond_to do |format| format.html { redirect_to event_url(@event ), notice: 'Event Cover was successfully destroyed.' } format.json { head :no_content } end end
3 views/events/show.html.erb 加入刪除按鈕
1 <%= link_to '刪除', destroy_cover_event_path(@event), method: :delete if @event.cover.attached? %>
多檔上傳刪除單張圖片 1 config/routes.rb 新增路由
1 2 3 4 5 resources :events do delete :destroy_cover , on: :member delete '/banners/:banner_id' => 'events#destroy_banner' , as: :destroy_banner , on: :member end
2 controllers/events_controller.rb 新增 action 和設定 :set_event
1 2 3 4 5 6 7 8 9 before_action :set_event , only: [:show , :edit , :update , :destroy , :destroy_cover , :destroy_banner ] def destroy_banner @event .banners.find(params[:banner_id ]).purge respond_to do |format| format.html { redirect_to event_url(@event ), notice: 'Event banner was successfully destroyed.' } format.json { head :no_content } end end
3 views/events/show.html.erb
1 2 3 4 <% @event.banners.each do |banner| %> <%= image_tag banner.variant(resize: '100x100') %> <%= link_to '刪除', destroy_banner_event_path(@event, banner), method: :delete %> <% end %>
多檔上傳刪除多張圖片 1 config/routes.rb 新增路由
1 2 delete :destroy_banners , on: :member
完整路由
1 2 3 4 5 6 7 8 9 10 11 12 Rails.application.routes.draw do resources :events do delete :destroy_cover , on: :member delete :destroy_banners , on: :member delete '/banners/:banner_id' => 'events#destroy_banner' , as: :destroy_banner , on: :member end end
. controllers/events_controller.rb 新增 action 和設定 :set_event
1 2 3 4 5 6 7 8 9 10 11 12 13 14 15 16 before_action :set_event , only: [ :show , :edit , :update , :destroy , :destroy_cover , :destroy_banner , :destroy_banners ] def destroy_banners params[:event ][:banners ].each do |banner_id| @event .banners.find(banner_id).purge end respond_to do |format| format.html { redirect_to event_url(@event ), notice: 'Event banners was successfully destroyed.' } format.json { head :no_content } end end
3 views/events/show.html.erb
1 2 3 4 5 6 7 8 9 10 11 12 <%= form_for(@event , url: destroy_banners_event_path, method: :delete ) do |form| %> <% @event .banners.each do |banner| %> <%= check_box_tag :banners , banner.id, false , name: 'event[banners][]' %> <%= image_tag banner.variant(resize: '100x100' ) %> <%= link_to '刪除' , destroy_banner_event_path(@event , banner), method: :delete %> <% end %> <% if @event .banners.attached? %> <input type ="submit" value ="刪除多張圖片" > <% end %> <% end %>
到此我們已經示範了完整的基本使用方式。
Direct Upload 預設的 active storage 的流程是將圖片先送到後端,一併處理建立資料庫紀錄和上傳。但如何使用雲端服務的話,這個流程就顯得多此一舉。因此 active storage 也提供 direct upload 的方式直接把圖片從使用者端直接送往雲端服務。而我們接著要實作 ajax 方式的範例也會使用 direct upload。
安裝 activestorage.js 1 安裝套件
1 2 $ yarn add activestorage
2 新增 javascript/packs/direct_upload.js
1 2 import * as ActiveStorage from 'activestorage' ;ActiveStorage.start();
3 views/layouts/application.html.erb 加入 pack
1 <%= javascript_pack_tag 'direct_upload', 'data-turbolinks-track': 'reload' %>
標準 Direct Upload 使用方式 為了範例單純,這邊我們建立一個新的 Post scaffold 其包含一個 cover 和 images 但是這次我們使用不一樣的流程來完成。cover 我們使用標準的 Direct Upload 作法,images 我們整合 ajax 與 stimulus 的作法。
1 建立 scaffold
1 2 $ rails g scaffold post title $ rails db:migrate
2 models/post.rb 加上設定
1 2 3 4 class Post < ApplicationRecord has_one_attached :cover has_many_attached :images end
3 views/posts/_form.html.erb 加上
1 2 3 4 <div class ="field" > <%= form.label :cover %> <%= form.file_field :cover , direct_upload: true %> </div >
到這邊除了 direct_upload 參數跟原本的作法沒有不同,但使用 direct_upload 之後我們多了一些 hooks 可以使用。
direct_upload: true 會在渲染的 HTML 加上 data-direct-upload-url 屬性。
4 controllers/posts_controller.rb 加入 permit
1 2 3 def post_params params.require (:post ).permit(:title , :cover , images: []) end
5 完成的 javascript/packs/direct_upload.js 如下,這是官方提供的範例
1 2 3 4 5 6 7 8 9 10 11 12 13 14 15 16 17 18 19 20 21 22 23 24 25 26 27 28 29 30 31 32 33 34 35 36 37 38 39 import * as ActiveStorage from 'activestorage' ;ActiveStorage.start(); addEventListener("direct-upload:initialize" , event => const { target, detail } = event; const { id, file } = detail; target.insertAdjacentHTML("beforebegin" , ` <div id="direct-upload-${id} " class="direct-upload direct-upload--pending"> <div id="direct-upload-progress-${id} " class="direct-upload__progress" style="width: 0%"></div> <span class="direct-upload__filename">${file.name} </span> </div> ` );}); addEventListener("direct-upload:start" , event => const { id } = event.detail; const element = document .getElementById(`direct-upload-${id} ` ); element.classList.remove("direct-upload--pending" ); }); addEventListener("direct-upload:progress" , event => const { id, progress } = event.detail; const progressElement = document .getElementById(`direct-upload-progress-${id} ` ); progressElement.style.width = `${progress} %` ; }); addEventListener("direct-upload:error" , event => event.preventDefault(); const { id, error } = event.detail; const element = document .getElementById(`direct-upload-${id} ` ); element.classList.add("direct-upload--error" ); element.setAttribute("title" , error); }); addEventListener("direct-upload:end" , event => const { id } = event.detail; const element = document .getElementById(`direct-upload-${id} ` ); element.classList.add("direct-upload--complete" ); });
加入 css
1 2 3 4 5 6 7 8 9 10 11 12 13 14 15 16 17 18 19 20 21 22 23 24 25 26 27 28 29 30 31 32 33 34 35 36 37 .direct-upload { display : inline-block; position : relative; padding : 2px 4px ; margin : 0 3px 3px 0 ; border : 1px solid rgba (0 , 0 , 0 , 0.3 ); border-radius : 3px ; font-size : 11px ; line-height : 13px ; } .direct-upload--pending { opacity : 0.6 ; } .direct-upload__progress { position : absolute; top : 0 ; left : 0 ; bottom : 0 ; opacity : 0.2 ; background : #0076ff ; transition : width 120ms ease-out, opacity 60ms 60ms ease-in; transform : translate3d (0 , 0 , 0 ); } .direct-upload--complete .direct-upload__progress { opacity : 0.4 ; } .direct-upload--error { border-color : red; } input [type=file] [data-direct-upload-url] [disabled] { display : none; }
整合 Stimulus 1 views/layouts/application.html.erb 加入 application
1 <%= javascript_pack_tag 'application' , 'data-turbolinks-track' : 'reload' %>
2 新增 javascript/controllers/uploads_controller.rb
1 2 3 4 5 6 7 8 9 10 11 import { Controller } from 'stimulus' ;export default class extends Controller connect ( console .log('connect to uploads' ); } start ( console .log('start upload' ); } }
3 views/posts/show.html.erb 加入我們的 upload 元素 並使用 stimulus 的 controller。
1 2 3 4 5 6 <p > <strong > Images</strong > <div data-controller ="uploads" > <input type ="file" multiple ="true" data-action ="change->uploads#start" > </div > </p >
這裡我們預計使用一個 input ,當其取得檔案的時候在搭配 stimulus 執行對應的操作。接著,我們先來處理上傳檔案的部分。
4 確認 controller 中 params 和 before_action 是否取得我們需要的資料,修改 controllers/posts_controller.rb ,我們會需要使用 ajax 來對 update 發出請求,所以我們需要對其做一些調整。一個流程我們從路由開始,我們沿用 update ,接著 controller#action 的行為。再回到前端處理。
注意:本文旨是在協助您練習可能的作法,不一定適合您的正式環境。
1 2 3 4 5 6 7 8 9 10 11 12 13 14 15 16 17 18 19 def update respond_to do |format| if @post .update(post_params) format.html { redirect_to @post , notice: 'Post was successfully updated.' } format.json { image = ActiveStorage::Blob.find_signed(post_params[:images ].first) image_url = Rails.application.routes.url_helpers.rails_representation_url(image.variant(resize: '100x100' ), only_path: true ) render json: { status: :ok , url: image_url, id: image.id } } else format.html { render :edit } format.json { render json: @post .errors, status: :unprocessable_entity } end end end
5 新增 javascript/libs/uploader.js 。這裡為了可以顯示進度,我們參考官方教學的作法。
注意:如果您是直接跳至本節,請記得安裝 activestorage.js
1 2 3 4 5 6 7 8 9 10 11 12 13 14 15 16 17 18 19 20 21 22 23 24 25 26 27 28 29 30 31 32 import { DirectUpload } from 'activestorage' ;export default class constructor (file, url, element ) this .file = file; this .url = url; this .element = element; this .directUpload = new DirectUpload(this .file, this .url, this ); } upload ( return new Promise ((resolve, reject ) => { this .directUpload.create((error, blob ) => { if (error) { reject(error); } else { resolve(blob); } }); }); } directUploadWillStoreFileWithXHR (request ) request.upload.addEventListener("progress" , event =>this .directUploadDidProgress(event)); } directUploadDidProgress (e ) let progress = this .element.querySelector('.progress-bar' ); progress.style.width = ((e.loaded / e.total) * 100 ) + '%' ; } }
6 views/posts/show.html.erb 由於 js 需要一些參數,這邊我們使用 stimulus 的 data api
1 2 3 4 5 6 7 8 9 <p> <strong > Images</strong > <div data-controller ="uploads" data-uploads-model ="<%= @post.to_json %>" data-uploads-direct-upload-url ="<%= rails_direct_uploads_path %>" > <input type ="file" multiple ="true" data-action ="change->uploads#start" > </div > </p >
7 javascript/controllers/uploads_controller.js
1 2 3 4 5 6 7 8 9 10 11 12 13 14 15 16 17 18 19 20 21 22 23 24 25 26 27 28 29 30 31 32 33 34 35 36 37 38 39 40 41 42 43 44 45 46 47 48 49 50 51 52 53 54 55 56 57 58 59 60 61 62 63 64 65 66 67 68 69 70 71 72 73 import { Controller } from 'stimulus' ;import Uploader from 'libs/uploader' ;export default class extends Controller start (event ) const { target } = event; const _this = this ; [...target.files].forEach(file => let wrapper = document .createElement('div' ); wrapper.classList.add('img-wrapper' ); wrapper.insertAdjacentHTML('afterbegin' , ` <div class="progress"> <div class="progress-bar" style="width: 0%;"></div> </div> ` ); const insertTarget = _this.element.querySelector('input[type=file]' ); _this.element.insertBefore(wrapper, insertTarget); const uploader = new Uploader(file, _this.directUploadUrl, wrapper); uploader.upload() .then(blob => fetch(`/posts/${_this.model.id} .json` , { headers : { 'X-CSRF-Token' : _this.csrf, 'Content-Type' : 'application/json' , 'X-Requested-With' : 'XMLHttpRequest' }, method : 'PUT' , body : JSON .stringify({ post : { images : [blob.signed_id] } }), credentials : 'same-origin' }) .then(res => .then(data => wrapper.innerHTML = ` <div class="lds-dual-ring"></div> ` ; let img = document .createElement('img' ); img.src = data.url; img.onload = () => { wrapper.innerHTML = '' ; wrapper.appendChild(img); wrapper.insertAdjacentHTML('beforeend' , ` <a href="/posts/${_this.model.id} /images/${data.id} " data-action="click->uploads#destroy"> 刪除 </a> ` ); }; }); }); }); target.value = '' ; } get model () { return JSON .parse(this .data.get('model' )); } get directUploadUrl () { return this .data.get('directUploadUrl' ) } get csrf () { return document .querySelector('meta[name="csrf-token"]' ).getAttribute('content' ); } }
8 scss 的部分
1 2 3 4 5 6 7 8 9 10 11 12 13 14 15 16 17 18 19 20 21 22 23 24 25 26 27 28 29 30 31 32 33 34 35 36 37 38 39 40 41 42 43 44 45 46 47 48 49 50 51 52 53 54 55 56 57 58 59 60 61 62 63 64 65 66 .uploads { display : flex; flex-wrap : wrap; } .img-wrapper { display : inline-flex; border : 1px solid #d9d9d9 ; min-width : 100px ; min-height : 100px ; border-radius : 3px ; margin-right : 15px ; padding : 5px ; align-items : center; flex-direction : column; justify-content : center; .progress { width : 80% ; height : 10px ; background-color : #ccc ; border-radius : 5px ; position : relative; .progress-bar { position : absolute; top : 0 ; left : 0 ; bottom : 0 ; opacity : 0.8 ; border-radius : 5px ; background : #0076ff ; transition : width 120ms ease-out, opacity 60ms 60ms ease-in; transform : translate3d(0 , 0 , 0 ); } } } .lds-dual-ring { display : inline-flex; width : 64px ; height : 64px ; justify-content : center; align-items : center; } .lds-dual-ring :after { content: " " ; display : block; width : 46px ; height : 46px ; margin : 1px ; border-radius : 50% ; border : 5px solid #327ccb ; border-color : #327ccb transparent #327ccb transparent; animation : lds-dual-ring 1.2s linear infinite; } @keyframes lds-dual-ring { 0% { transform : rotate(0deg ); } 100% { transform : rotate(360deg ); } }
9 刪除功能 - config/routes.rb
1 2 3 resources :posts do delete '/images/:image_id' => 'posts#destroy_image' , as: :destroy_image , on: :member end
10 controllers/posts_controller.rb
1 2 3 4 5 6 7 before_action :set_post , only: [:show , :edit , :update , :destroy , :destroy_image ] def destroy_image @post .images.find(params[:image_id ]).purge render json: { status: :ok } end
11 javascript/controllers/uploads_controller.js 加入刪除功能
1 2 3 4 5 6 7 8 9 10 11 12 13 14 15 16 17 destroy (e ) e.preventDefault(); const url = e.target.href; fetch(url, { headers : { 'X-CSRF-Token' : this .csrf, 'Content-Type' : 'application/json' , 'X-Requested-With' : 'XMLHttpRequest' }, method : 'DELETE' , credentials : 'same-origin' }) .then(res => .then(data => e.target.parentElement.remove(); }); }
12 調整 views/posts/show.html.erb
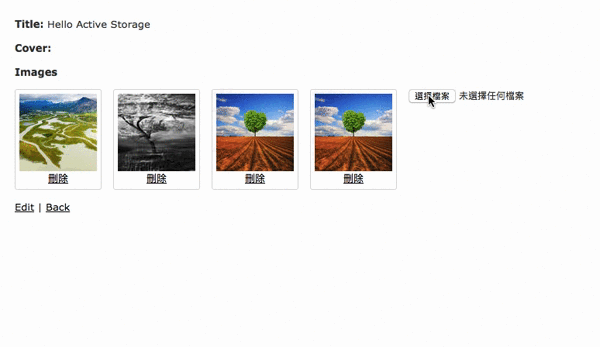
1 2 3 4 5 6 7 8 9 10 11 12 13 14 15 16 17 18 <p > <strong > Images</strong > <div class ="uploads" data-controller ="uploads" data-uploads-model ="<%= @post .to_json %>" data-uploads-direct-upload-url ="<%= rails_direct_uploads_path %>" > <% @post .images.each do |image| %> <div class ="img-wrapper" > <%= image_tag image.variant(resize: '100x100' ) %> <a href ="<%= destroy_image_post_path(@post , image) %>" data-action ="click->uploads#destroy" ></a > </div > <% end %> <input type ="file" multiple ="true" data-action ="change->uploads#start" > </div > </p >