React 國際化 快速概覽:如何建置一個國際化的 React 應用程式。通過本文的協助您可以學會如何偵測使用者的本地資訊,將其儲存在 cookie 並允許使用者變更,提供不同語言的介面,適當的貨幣格式同時也包含一些常見問題的列表。
注意:本文為React Internationalization – How To 的翻譯/專案實作更新,大部分文章為翻譯原文,專案與實作則進行簡化與更新。該文由 react-intl 官方文件所推薦。
術語說明與準備 Internationalization 是一個很長的單字,比較常見的兩個縮寫為 intl 或 i18n 。Localization 則為 l10n 。
國際化應用程式一般被分為三個主要的功能:
偵測使用者的地區、語系 (locale)
介面上的翻譯
內容格式例如日期,貨幣,數字
本文會聚焦在前端的部分,我們會建立一個簡易的 Universal React Application 並支援多地區多語系(locale)。
讓我們使用樣版專案 作為我們的起點,這邊我們使用 Express 實作 Server-Side 渲染,webpack 單純使用 Babel 搭配 @babel/preset-env 和 @babel/preset-react 編譯 Client 端的 JavaScript,然後由 Express 取得編譯結果。使用 nodemon 執行開發環境下的 Express,還有 webpack-dev-server 用於提供資源檔。
簡化更新版 - 除了更新 babel 並移除了 better-npm-run 等套件目標在單純化樣版專案,專注於 react-intl 的學習。原文專案
Server 端的進入點時 server.js。這裡使用了 @babel/polyfill 以支援我們使用一些新的 JavaScript 特性與語法。至於 Server 端的邏輯則位於 src/server.js。在此我們設定了 Express 並監聽 3001 埠。最後,我們渲染一個非常簡單的元件 components/App.js。
簡化版使用相同目錄結構,但 .jsx 一律變更為 .js。
Client 端的進入點是 src/client.js ,這裡我們將 components/App.js 掛載至 root 元素上,該 HTML 由 Express 產生。
簡化版在命名上作了一些調整,但整體邏輯不變。
在下載完檔案庫的專案之後,執行 npm install 並執行 npm start 即可
1
2
3
4
5
6
$ git https://github.com/andyyou/simplify-smashing-react-i18n $ cd simplify-smashing-react-i18n $ npm install $ git reset d0d971d --hard $ npm start
然後瀏覽 localhost:3001 可以檢視網站。到此我們完成了基本的準備,可以開始進入主題了。
1. 偵測使用者 locale 資訊 有兩種可能的方式可以完成這個需求。基於某些理由,大部分知名的網站包含 Skype 和 NBA 使用 IP 地理位置來判斷使用者的所在地並基於這個訊息去推測使用者使用的語言。然而這個方式不只實作上消耗比較多的資源而且也不是很準確。在人們常旅遊的現代,意味著所在地並不能代表使用者的 locale 。
locale 通常代表使用者的語系、地區、偏好等資料的集合
取而代之的是我們會使用第二種方式,通過在伺服器端擷取 HTTP 標頭的 Accept-Language 來取得使用者偏好的語系。現今主流瀏覽器會在每一個請求加上該資訊。
Accept-Language 請求標頭 Accept-Language 請求標頭會提供回應該請求時 偏好的語系。還可以替每個語系提供權重,這意味著可以建立使用者偏好的語系列表,預設權重(Quality)為 1 q=1 例如:Accept-Language: da, en-gb;q=0.8, en;q=0.7 表示我偏好丹麥語,但我也接受英式英文和其他類型的英文。我們可以去判斷使用者指定的語言範圍是否符合或前綴字符合 (- 之前)。
值得一提的是這種方式仍然不完美。舉例來說,一個使用者可能在網咖或利用公共電腦使用您的網站。因此為了解決這個問題通常需要提供使用者可以方便變更語系的方式。
實作 這裡的範例使用 Express ,我們使用 accept-language 套件來協助我們從 HTTP 標頭比對並取得最接近網站支援的語系。如果都找不到則使用預設語系。對於造訪過的用戶則檢查 cookie 來取回之前的設定。
安裝相依套件:
1 $ npm i accept-language cookie-parser js-cookie
接著,修改 src/server.js
1
2
3
4
5
6
7
8
9
10
11
12
13
14
15
16
17
18
19
20
21
22
23
24
25
26
27
28
29
30
31
32
33
34
35
36
37
38
39
40
41
42
43
44
45
46
import express from 'express' ;import React from 'react' ;import ReactDOMServer from 'react-dom/server' ;import cookieParser from 'cookie-parser' ;import acceptLanguage from 'accept-language' ;import App from './components/App' ;const assetUrl = process.env.NODE_ENV !== 'production' ? 'http://localhost:8050' : '/' ;const renderHTML = componentHTML =>` <!DOCTYPE html> <html> <head> <meta charset="utf-8"> <meta name="viewport" content="width=device-width, initial-scale=1.0"> <title>Hello React</title> </head> <body> <div id="root">${componentHTML} </div> <script type="application/javascript" src="${assetUrl} /public/assets/bundle.js"></script> </body> </html> ` ;const detectLocale = (req ) => { const cookieLocale = req.cookies.locale; return acceptLanguage.get(cookieLocale || req.headers['accept-language' ] || 'en' ); }; acceptLanguage.languages(['en' , 'ru' ]); const app = express();app.use(cookieParser()); app.use((req, res ) => { const locale = detectLocale(req); const componentHTML = ReactDOMServer.renderToString(<App /> res.cookie('locale' , locale, { maxAge : (new Date () * 0.001 ) + (365 * 24 * 3600 ), }); return res.end(renderHTML(componentHTML)); }); const PORT = process.env.PORT || 3001 ;app.listen(PORT, () => { console .log(`Server listening on: ${PORT} ` ); });
這一步,我們匯入了 accept-language 套件並設定支援英文和俄文 en 和 ru 。然後實作了 detectLocale 函式,首先讀取 cookie 如果沒有則接著查 Accept-Language 標頭,最後如果都沒有則設定 en 為預設。在處理完請求之後加入 Set-Cookie 用於後續的請求。
2. 介面翻譯 本文使用 react-intl 來完成我們的需求。這是 React 生態中目前比較流行並經過實戰檢驗的 i18n 套件。它和多數的 React 套件使用相同的方式: 提供 High order components 高階元件加上 React Context 的功能注入多國語系的函式來處理訊息、時間、數字、貨幣格式。
第一步需要設定 Provider,為了完成這步我們將要安裝套件與變更 src/server.js 和 src/client.js 檔案。
下面是 src/server.js 主要是加入 react-intl
1
2
3
4
5
6
7
8
9
10
11
12
13
14
15
16
17
18
19
20
21
22
23
24
25
26
27
28
29
30
31
32
33
34
35
36
37
38
39
40
41
42
43
44
45
46
47
48
49
import express from 'express' ;import React from 'react' ;import ReactDOMServer from 'react-dom/server' ;import cookieParser from 'cookie-parser' ;import acceptLanguage from 'accept-language' ;import { IntlProvider } from 'react-intl' ;import App from './components/App' ;const assetUrl = process.env.NODE_ENV !== 'production' ? 'http://localhost:8050' : '/' ;const renderHTML = componentHTML =>` <!DOCTYPE html> <html> <head> <meta charset="utf-8"> <meta name="viewport" content="width=device-width, initial-scale=1.0"> <title>Hello React</title> </head> <body> <div id="root">${componentHTML} </div> <script type="application/javascript" src="${assetUrl} /public/assets/bundle.js"></script> </body> </html> ` ;const detectLocale = (req ) => { const cookieLocale = req.cookies.locale; return acceptLanguage.get(cookieLocale || req.headers['accept-language' ] || 'en' ); }; acceptLanguage.languages(['en' , 'ru' ]); const app = express();app.use(cookieParser()); app.use((req, res ) => { const locale = detectLocale(req); const componentHTML = ReactDOMServer.renderToString( <IntlProvider locale ={locale} > <App /> </IntlProvider > ); res.cookie('locale' , locale, { maxAge : (new Date () * 0.001 ) + (365 * 24 * 3600 ), }); return res.end(renderHTML(componentHTML)); }); const PORT = process.env.PORT || 3001 ;app.listen(PORT, () => { console .log(`Server listening on: ${PORT} ` ); });
接著是 src/client.js
1
2
3
4
5
6
7
8
9
10
11
12
13
14
import React from 'react' ;import ReactDOM from 'react-dom' ;import { IntlProvider } from 'react-intl' ;import Cookie from 'js-cookie' ;import App from './components/App' ;const locale = Cookie.get('locale' ) || 'en' ;ReactDOM.render( <IntlProvider locale ={locale} > <App /> </IntlProvider > , document .getElementById('root' ), );
現在,IntlProvider 的子元件都可以存取多語系國際化功能的函式。讓我們加入一些翻譯文字到程式中搭配一個按鈕可以變更 locale。這裡我們有兩個方式:不管是 FormattedMessage 元件或者 formatMessage 函式都可以協助我們轉換語系。差別是元件內容會被 span 包起來,這個在作為標籤的內容是沒問題的,但是針對 HTML 屬性例如 alt title 則需要函式。
先讓我們在 src/components/App.js 加入一些範例看看:
1
2
3
4
5
6
7
8
9
10
11
12
13
import React from 'react' ;import { FormattedMessage } from 'react-intl' ;const App = () => ( <div className ="App" > <FormattedMessage id ="app.hello_world" defaultMessage ="Hello World!" description ="Hello world header greeting" /> </div > ) export default App;
注意到 id 在整個應用程式中必須要是唯一值,因此很合理的是我們可以建立一些命名規則例如: componentName.uniqueIdInComponent。接著,defaultMessage 會使用在預設語系,description 則是用來給那些翻譯者一些資訊。
重新執行 npm start 並重新載入頁面,您一樣可以看到 Hello World 的訊息,不過如果您開啟開發者工具檢視會看到現在文字被 span 包起來了。這種情況下多一個 span 不是什麼太大的問題,不過有時候我們只想要文字本身不要任何標籤。要完成這個需求我們需要直接存取 react-intl 提供的物件。
讓我們回到 src/components/App.js:
1
2
3
4
5
6
7
8
9
10
11
12
13
14
15
16
17
18
19
20
21
22
23
24
25
26
import React from 'react' ;import { FormattedMessage, intlShape, injectIntl, defineMessages } from 'react-intl' ;const messages = defineMessages({ helloWorld2 : { id : 'app.hello_world2' , defaultMessage : 'Hello World 2!' , }, }); const App = (props ) => ( <div className ="App" > <FormattedMessage id ="app.hello_world" defaultMessage ="Hello World!" description ="Hello world header greeting" /> <div > {props.intl.formatMessage(messages.helloWorld2)} </div > </div > ); App.propTypes = { intl : intlShape.isRequired, }; export default injectIntl(App);
上面我們增加了不少程式碼。首先,我們必須要使用 injectIntl 將我們的元件包起來,其作用是傳入 intl 物件。為了取得翻譯後的訊息,我們必須要使用 formatMessage 方法和傳入 message 物件。一個 message 物件必須要有一個全域唯一的 id 和 defaultValue 屬性。使用 react-intl 提供的 defineMessages 來定義該物件。
關於 react-intl 最棒的事情就是其生態系。接著,我們可以加入 babel-plugin-react-intl。
注意如果您參考的是原文的檔案庫,請使用 babel-plugin-react-intl@2.4.0 版本。
該 babel 擴充套件會從我們的元件中讀取 FormattedMessages 並建立字典檔。然後我們可以把這份字典檔交給翻譯人員。
事實上您可以單純傳入 formatMessage 一個具備相同屬性的物件即可。使用 defineMessages 的原因是它會加入 babel-plugin-react-intl 的 Hook 協助該套件擷取字典檔。
安裝該套件
1 $ npm i babel-plugin-react-intl -D
之後 .babelrc 加入設定
1
2
3
4
5
6
7
8
9
10
11
12
13
14
15
{ "presets" : [ "@babel/preset-env" , "@babel/preset-react" ], "env" : { "development" : { "plugins" : [ ["react-intl" , { "messagesDir" : "build/messages/" }] ] } } }
注意:package.json 需加入環境變數 NODE_ENV=development。
重啓 Express npm start 或者 npm run express 即可看到 build/messages 目錄被建立在專案根目錄下。內部的檔案結構則是對照原始專案。我們需要合併所有檔案變成單一 JSON 檔案。可以參考scripts 。儲存在 scripts/translate.js 。然後在 package.json 加入新的 script 指令:
1
2
3
4
5
"scripts" : { ... "build:langs" : "babel scripts/translate.js | node" , ... },
接著,試試指令
您應該會看到 build/lang/en.json 被建立了。其內容為:
1
2
3
4
{ "app.hello_world" : "Hello World!" , "app.hello_world2" : "Hello World 2!" }
現在最有趣的部分來了。在 Server 端,我們可以載入所有的翻譯到記憶體,然後根據請求提供對應的語系。然而在 Client 端這個方法並不適用,Client 端只能依據需求一次取得所需的 JSON 檔案,然後自動套用提供給所有元件。
讓我們複製編譯的輸出結果到 public/assets
1 $ cp build/lang/en.json public/assets/en.json
接著,建立一份 public/assets/ru.json
1
2
3
4
{ "app.hello_world" : "Привет мир!" , "app.hello_world2" : "Привет мир 2!" }
處理好字典檔之後我們開始調整 Server 和 Client 端的程式碼。
首先是 src/server.js ,因為修改的地方比較多,下面先把重點點出,再列出完整程式碼方便對照:
1 2 3 4 5 6 7 8 9 10 11 12 13 14 15 16 17 18 19 20 21 22 23 24 25 26 27 28 29 30 31 32 33 34 35 36 37 38 39 40 41 42 43 44 45 46 import { addLocaleData, IntlProvider } from 'react-intl' ;import fs from 'fs' ;import path from 'path' ;import en from 'react-intl/locale-data/en' ;import ru from 'react-intl/locale-data/ru' ;addLocaleData([…ru, …en]); const messages = {};const localeData = {};['en' , 'ru' ].forEach((locale ) => { localeData[locale] = fs.readFileSync(path.join(__dirname, '../node_modules/react-intl/locale-data/${locale}.js' )).toString(); messages[locale] = require ('../public/assets/${locale}.json' ); }); const renderHTML = (componentHTML, locale ) => ` <!DOCTYPE html> <html> <head> <meta charset="utf-8"> <meta name="viewport" content="width=device-width, initial-scale=1.0"> <title>Hello React</title> </head> <body> <div id="root">${componentHTML} </div> <script type="application/javascript" src="${assetUrl} /public/assets/bundle.js"></script> <script type="application/javascript"> ${localeData[locale]} </script> </body> </html> ` ;const componentHTML = ReactDOMServer.renderToString( <IntlProvider locale ={locale} messages ={messages[locale]} > <App /> </IntlProvider > ); return res.end(renderHTML(componentHTML, locale));
完整 src/server.js
1
2
3
4
5
6
7
8
9
10
11
12
13
14
15
16
17
18
19
20
21
22
23
24
25
26
27
28
29
30
31
32
33
34
35
36
37
38
39
40
41
42
43
44
45
46
47
48
49
50
51
52
53
54
55
56
57
58
59
60
61
62
63
64
65
66
import express from 'express' ;import React from 'react' ;import ReactDOMServer from 'react-dom/server' ;import cookieParser from 'cookie-parser' ;import acceptLanguage from 'accept-language' ;import fs from 'fs' ;import path from 'path' ;import { IntlProvider, addLocaleData } from 'react-intl' ;import App from './components/App' ;import en from 'react-intl/locale-data/en' ;import ru from 'react-intl/locale-data/ru' ;addLocaleData([...ru, ...en]); const messages = {};const localeData = {};['en' , 'ru' ].forEach((locale ) => { localeData[locale] = fs.readFileSync(path.join(__dirname, `../node_modules/react-intl/locale-data/${locale} .js` )).toString(); messages[locale] = require (`../public/assets/${locale} .json` ); }) const assetUrl = process.env.NODE_ENV !== 'production' ? 'http://localhost:8050' : '/' ;const renderHTML = (componentHTML, locale ) => ` <!DOCTYPE html> <html> <head> <meta charset="utf-8"> <meta name="viewport" content="width=device-width, initial-scale=1.0"> <title>Hello React</title> </head> <body> <div id="root">${componentHTML} </div> <script type="application/javascript" src="${assetUrl} /public/assets/bundle.js"></script> <script type="application/javascript"> ${localeData[locale]} </script> </body> </html> ` ;const detectLocale = (req ) => { const cookieLocale = req.cookies.locale; return acceptLanguage.get(cookieLocale || req.headers['accept-language' ] || 'en' ); }; acceptLanguage.languages(['en' , 'ru' ]); const app = express();app.use(cookieParser()); app.use((req, res ) => { const locale = detectLocale(req); const componentHTML = ReactDOMServer.renderToString( <IntlProvider locale ={locale} messages ={messages[locale]} > <App /> </IntlProvider > ); res.cookie('locale' , locale, { maxAge : (new Date () * 0.001 ) + (365 * 24 * 3600 ), }); return res.end(renderHTML(componentHTML, locale)); }); const PORT = process.env.PORT || 3001 ;app.listen(PORT, () => { console .log(`Server listening on: ${PORT} ` ); });
這裡我們完成了下列幾件事:
快取字典檔(messages)以及針對特定語系(locale-data)、環境為 JavaScript 提供 DateTime,Number 格式
調整 renderHTML 方法,因此我們可以插入特定語系的 locale-data
提供字典檔資源給 IntlProvider
對於 Client 端 src/client.js
1
2
3
4
5
6
7
8
9
10
11
12
13
14
15
16
17
18
19
20
21
22
23
24
25
26
27
import React from 'react' ;import ReactDOM from 'react-dom' ;import { IntlProvider, addLocaleData } from 'react-intl' ;import Cookie from 'js-cookie' ;import App from './components/App' ;const locale = Cookie.get('locale' ) || 'en' ;fetch(`/public/assets/${locale} .json` ) .then((res ) => { if (res.status >= 400 ) { throw new Error ('Bad response from server' ); } return res.json(); }) .then((localeMessages ) => { addLocaleData(window .ReactIntlLocaleData[locale]); ReactDOM.render( <IntlProvider locale ={locale} messages ={localeMessages} > <App /> </IntlProvider > , document .getElementById('root' ), ); }) .catch((error ) => { console .error(error); });
接著我們需要調整 src/server.js 讓 Express 提供字典檔 JSON
1
2
app.use(cookieParser()); app.use('/public/assets' , express.static('public/assets' ));
在 JavaScript 初始化之後,client.js會從 cookie 取得 locale 並請求 JSON 字典檔。執行完此步驟之後, SPA 應用程式應該要跟之前一樣運作。
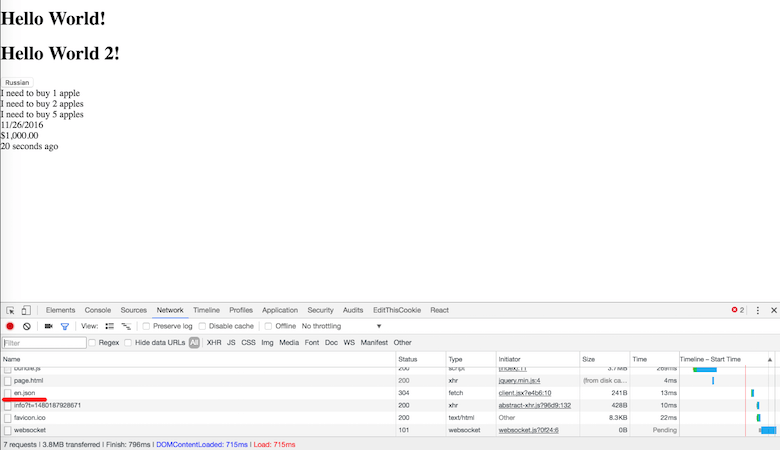
是時候來檢查一下是否運作正常了。開啟開發者工具並切換至 Network 頁籤查看 JSON 是否有被成功下載。
為了完成這個段落的功能。讓我們加入 src/components/LocaleButton.js
1 2 3 4 5 6 7 8 9 10 11 12 13 14 15 16 17 18 19 20 21 import React from 'react' ;import PropTypes from 'prop-types' ;import Cookie from 'js-cookie' ;const LocaleButton = (props ) => { const handleClick = () => { Cookie.set('locale' , props.locale === 'en' ? 'ru' : 'en' ); window .location.reload(); }; return ( <button onClick ={handleClick} > {props.locale === 'en' ? 'Russian' : 'English'} </button > ); }; LocaleButton.propTypes = { locale : PropTypes.string.isRequired, }; export default LocaleButton;
接著,在 src/components/App.js 中匯入使用
1 2 3 4 5 6 7 8 9 10 11 12 13 14 15 16 17 18 19 20 21 22 23 24 25 26 27 28 import React from 'react' ;import { FormattedMessage, intlShape, injectIntl, defineMessages } from 'react-intl' ;import LocaleButton from './LocaleButton' ;const messages = defineMessages({ helloWorld2 : { id : 'app.hello_world2' , defaultMessage : 'Hello World 2!' , }, }); const App = (props ) => ( <div className ="App" > <FormattedMessage id ="app.hello_world" defaultMessage ="Hello World!" description ="Hello world header greeting" /> <div > {props.intl.formatMessage(messages.helloWorld2)} </div > <LocaleButton locale ={props.intl.locale} /> </div > ); App.propTypes = { intl : intlShape.isRequired, }; export default injectIntl(App);
一旦使用者變更 locale 我們將會重載頁面確保對應的 JSON 和翻譯被下載。
現在我們已經學會如何偵測用戶的本地資訊和切換語系。在繼續之前讓我們先來討論兩個重要的議題。
複數和樣版 在英文大部分的單字有單數和複數的形式 One apple 和 Many apples 。其他語言甚至更複雜例如俄語有 4 種形式。我們希望 react-intl 能夠協助我們處理這個問題。因此它也支援樣版讓我們可以提供多個變數插入樣版之中。下面我們來看看這是如何完成的。
在 src/components/App.js 我們可以如下:
1 2 3 4 5 6 7 8 9 10 11 12 const messages = defineMessages({ counting : { id : 'app.counting' , defaultMessage : 'I need to buy {count, number} {count, plural, one {apple} other {apples}}' }, }); <div > {props.intl.formatMessage(messages.counting, { count: 1 })}</div > <div > {props.intl.formatMessage(messages.counting, { count: 2 })}</div > <div > {props.intl.formatMessage(messages.counting, { count: 5 })}</div >
上面我們定義了一個樣版搭配 count 變數。當 count 為 1 時顯示 1 apple 其他例如 2 則為 2 apples 。
formatMessage(descriptor, values) 有兩個參數,這時我們必須要將變數傳入 formatMessage 的第二個參數。
接著重新編譯我們的字典檔並加入俄語的翻譯來檢查我們可以正確的支援英文和俄語。
重點整理
本範例開發環境下,只要有使用 FormattedMessage 元件或 defineMessages 方法 babel-babel-plugin-react-intl 就會把需要翻譯的字串擷取到 build/messages
然後我們使用 npm run build:langs 去建立字典檔,不過這只會包含預設語系的而已
將字典檔複製到 public/assets 並翻譯至其他語系
下面是俄語的翻譯:
1 2 3 4 5 { "app.hello_world2" : "Привет мир 2!" , "app.counting" : "Мне нужно купить {count, number} {count, plural, one {яблоко} few {яблока} many {яблок}}" , "app.hello_world" : "Привет мир!" }
到此所有情境我們都處理了。可以繼續下一個階段了。
3. 提供特定地區習慣的內容格式,例如日期、貨幣與數字 資料應該要依據不同的地區呈現不同格式。舉例來說俄文顯示 500,00 $ 和 10.12.2016 在美國則是 $500.00 和 12/10/2016。
react-intl 提供處理元件處理像是日期,還有相對時間(自己會自動每10秒更新一次)
我們在 src/components/App.js 加入此功能:
1 2 3 4 5 6 7 8 9 10 11 12 13 14 15 import { FormattedDate, FormattedRelative, FormattedNumber, FormattedMessage, intlShape, injectIntl, defineMessages, } from 'react-intl' ; <div > {this.props.intl.formatMessage(messages.counting, { count: 5 })}</div > <div > <FormattedDate value ={Date.now()} /> </div > <div > <FormattedNumber value ="1000" currency ="USD" currencyDisplay ="symbol" style ="currency" /> </div > <div > <FormattedRelative value ={Date.now()} /> </div >
重新載入頁面您可以注意到 10 秒後 FormattedRelative 會自動更新。您可以在文件 上找到更多元件和範例。
現在,我們可能要面對影響通用渲染的問題:
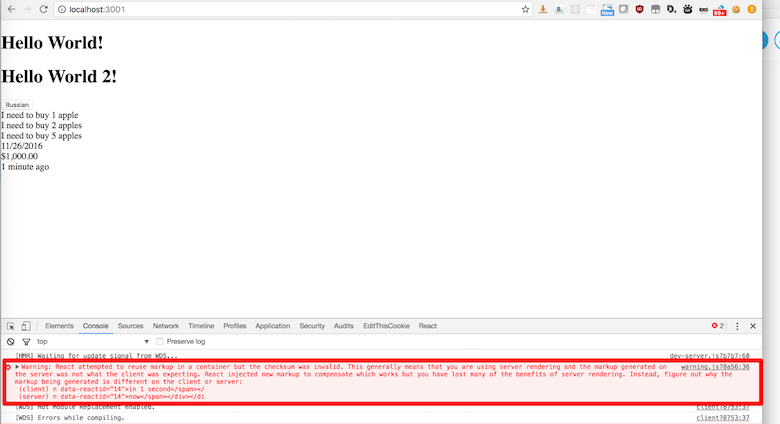
一般來說當伺服器端回傳 HTML 到客戶端,然後客戶端的 JavaScript 初始化大概會產生 2 秒的誤差。這意味著當我們使用 Date.now() 的時候在 Server 端渲染的資料和 Client 端重新渲染的資料會有誤差。為了解決這個問題 react-intl 提供了特殊的屬性 initialNow。它會提供一個 Server 的時間戳記給 Client 端的 JavaScript 使用。通過這種方式 Server 和 Client 校驗就會一致。在所有元件都掛載完畢之後就會使用瀏覽器當前的時間。
下面是 src/server.js 主要變更的地方:
1 2 3 4 5 6 7 8 9 10 11 12 13 14 15 16 17 18 19 20 21 22 23 24 25 26 27 28 29 30 31 32 33 34 const renderHTML = (componentHTML, locale, initialNow ) => ` <!DOCTYPE html> <html> <head> <meta charset="utf-8"> <meta name="viewport" content="width=device-width, initial-scale=1.0"> <title>Hello React</title> </head> <body> <div id="root">${componentHTML} </div> <script type="application/javascript" src="${assetUrl} /public/assets/bundle.js"></script> <script type="application/javascript"> ${localeData[locale]} </script> <script type="application/javascript">window.INITIAL_NOW=${JSON .stringify(initialNow)} </script> </body> </html> ` ;app.use((req, res ) => { const locale = detectLocale(req); const initialNow = Date .now(); const componentHTML = ReactDOMServer.renderToString( <IntlProvider locale ={locale} messages ={messages[locale]} initialNow ={initialNow} > <App /> </IntlProvider > ); res.cookie('locale' , locale, { maxAge : (new Date () * 0.001 ) + (365 * 24 * 3600 ), }); return res.end(renderHTML(componentHTML, locale, initialNow)); });
然後是 src/client.js
1 <IntlProvider initialNow={parseInt (window .INITIAL_NOW, 10 )} locale={locale} messages={localeData}>
重啟 npm start 問題被解決了。
注意:initialNow 在 3+ 版本中被移除了。
問題 因為 react-intl 使用瀏覽器原生的 Intl API 來處理 DateTime 與 Number 格式。雖然這個規範 2012 年就出現了但是還是有主流的瀏覽器並沒有全面支援。甚至像是 Safari 只有在 iOS 10 之後才部分支援。
這意味著如果您要涵蓋所有沒有支援 Intl 的瀏覽器您需要 Polyfill。感謝 Intl.js ,看起來是完美的解法不過根據經驗它有些缺點。首先是你需要把它加入您的 Bundle 而且它很肥。為了減少下載檔案大小,您可能想只在瀏覽器不支援的情況下才下載 Polyfill 你可以在Intl.js 文件 找到解法,不過最大的問題是 Intl.js 不是 100% 精準。意思是 Server 端和 Client 端的 DateTime 和 Number 可能有些許誤差。
我曾試圖嘗試其他解決方案。但都有缺點。因此實作了非常簡易的 polyfill 它只有局部的功能,無法應用在所有情境,但只有 2 KB 。使用它您甚至不需要實作只針對老舊瀏覽器動態加載,使專案簡單一點,您可以 Fork 並擴展它。
結論 現在您可能覺得事情變得很複雜,您可能想要自己實作所有的東西。我試過一次,我不建議您這麼做。因為最後您只會完成另一個 react-intl 甚至更糟。您可能想說沒有太多選擇讓這個問題處理的更好一些。
也可能想說可以靠 Moment.js 解決 Intl API 的問題。
幸運的是我都試過了所以我可以節省您的時間。我試過 Moment.js 它或許可以解決部分問題但很肥所以我不推薦。
開發自己的 Polyfill 聽起來也不是好點子,因為您勢必需要和許多 Bug 奮鬥。
希望這篇文章可以協助您得到一些所需的知識去建立多語系與國際化的 React 應用程式。
參考