手把手設定 MediaConvert 轉檔 HLS 搭配 S3 + CloudFront
使用 S3 + CloudFront + MediaConvert
AWS Elemental MediaConvert 可以編譯您輸入的影音檔案並轉換產出其他格式的影音檔案。MediaConvert 可以從 S3 取得來源檔或者通過 HTTP 或 HTTPS。整體步驟如下:
- 建立 S3 Bucket
- 建立 SSL 憑證,後續 CloudFront 欲使用自訂網址
- 設定 CloudFront
- 設定 IAM 權限
- 上傳 Video 使用 MediaConvert 轉譯
建立 S3 Bucket
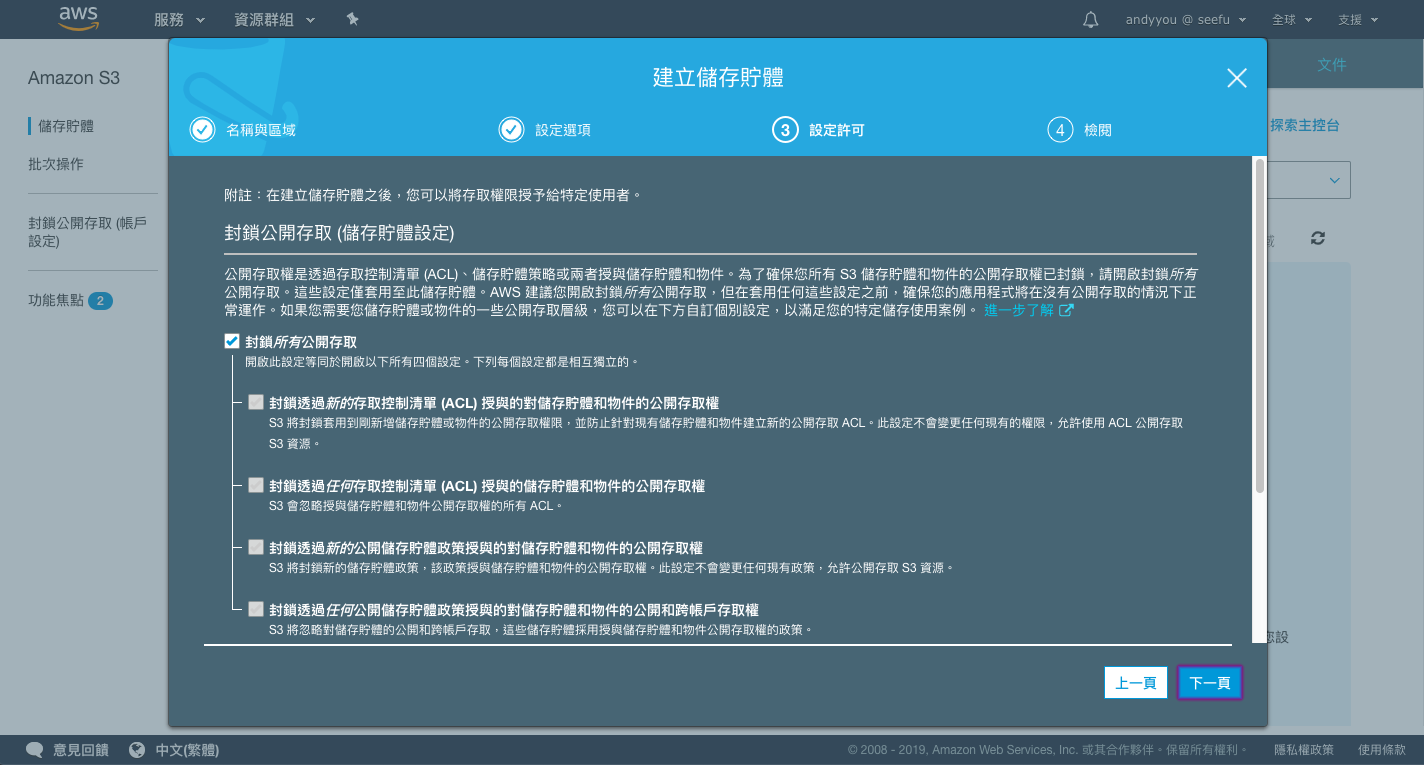
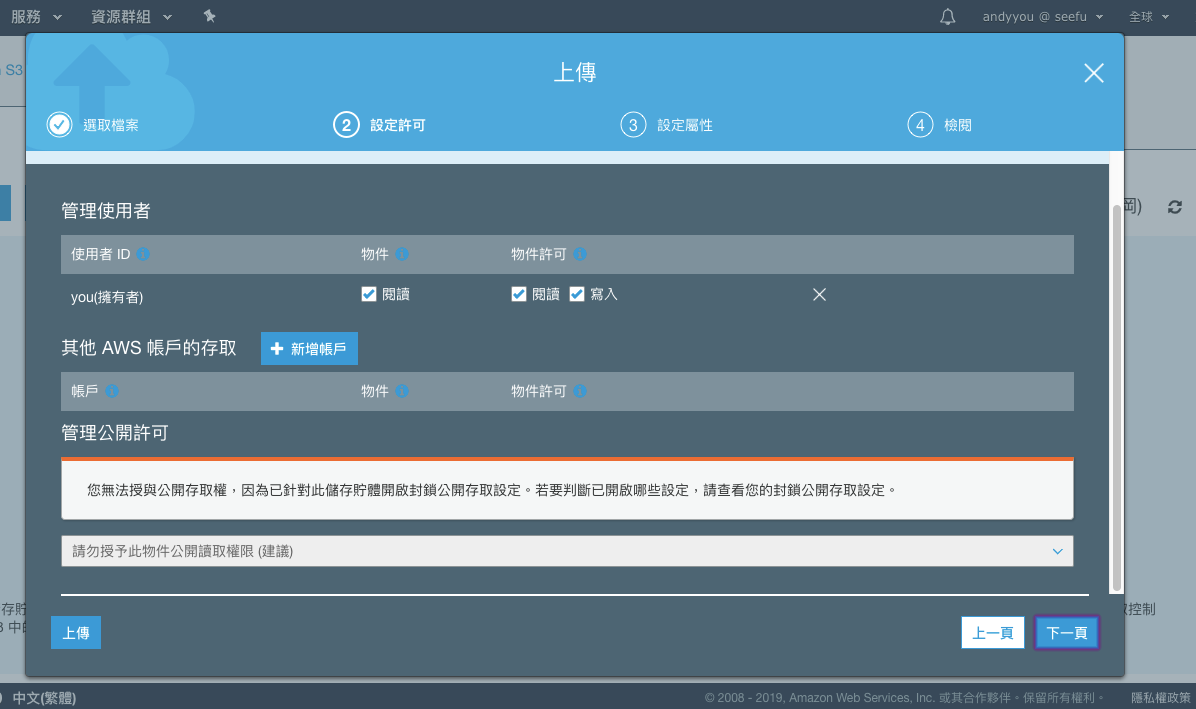
S3 Bucket 僅允許 CDN 存取。
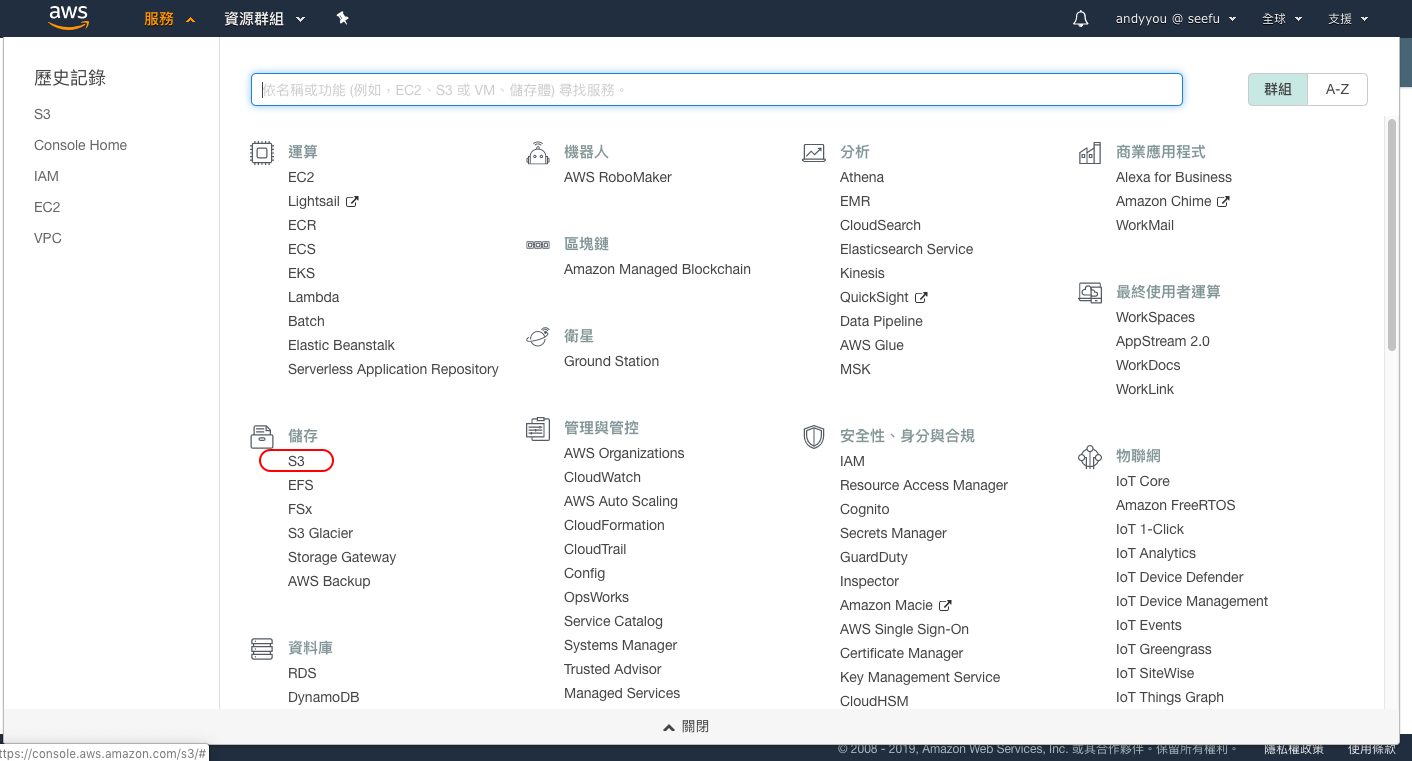
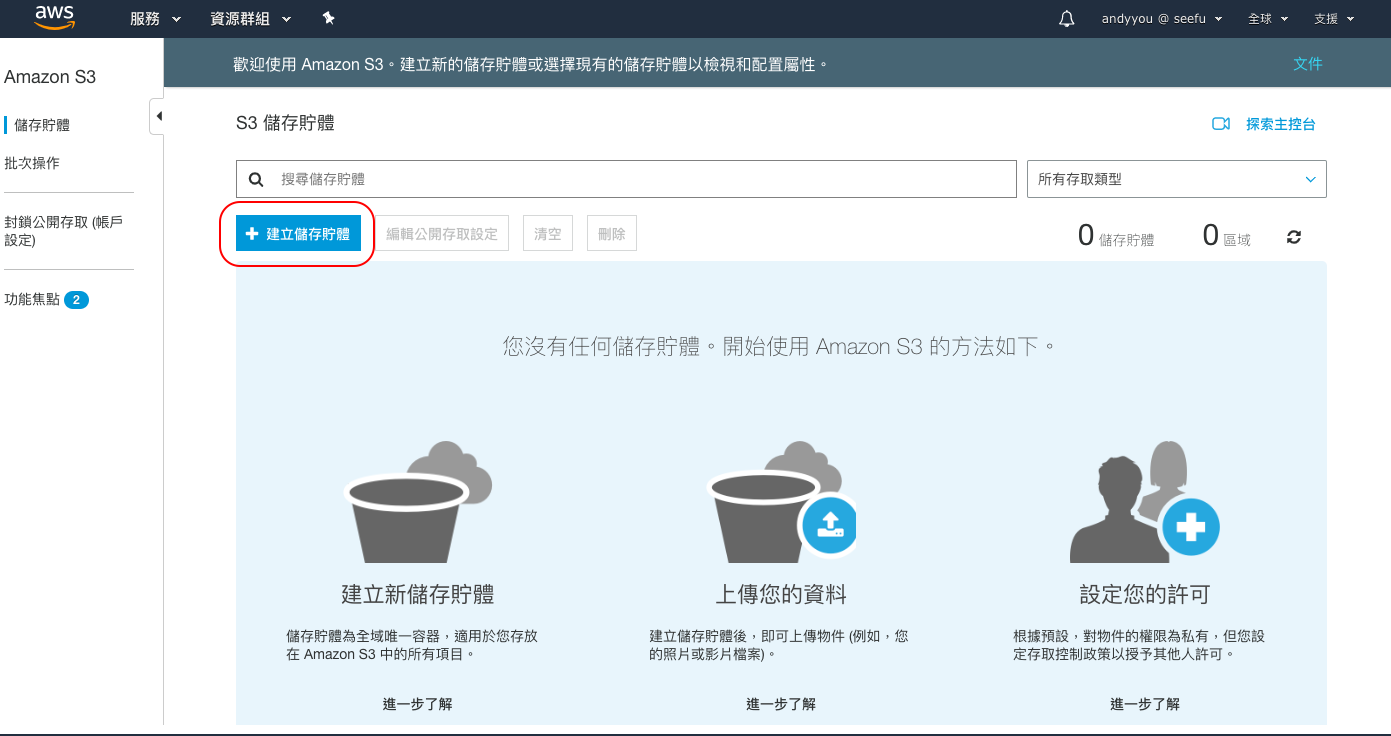
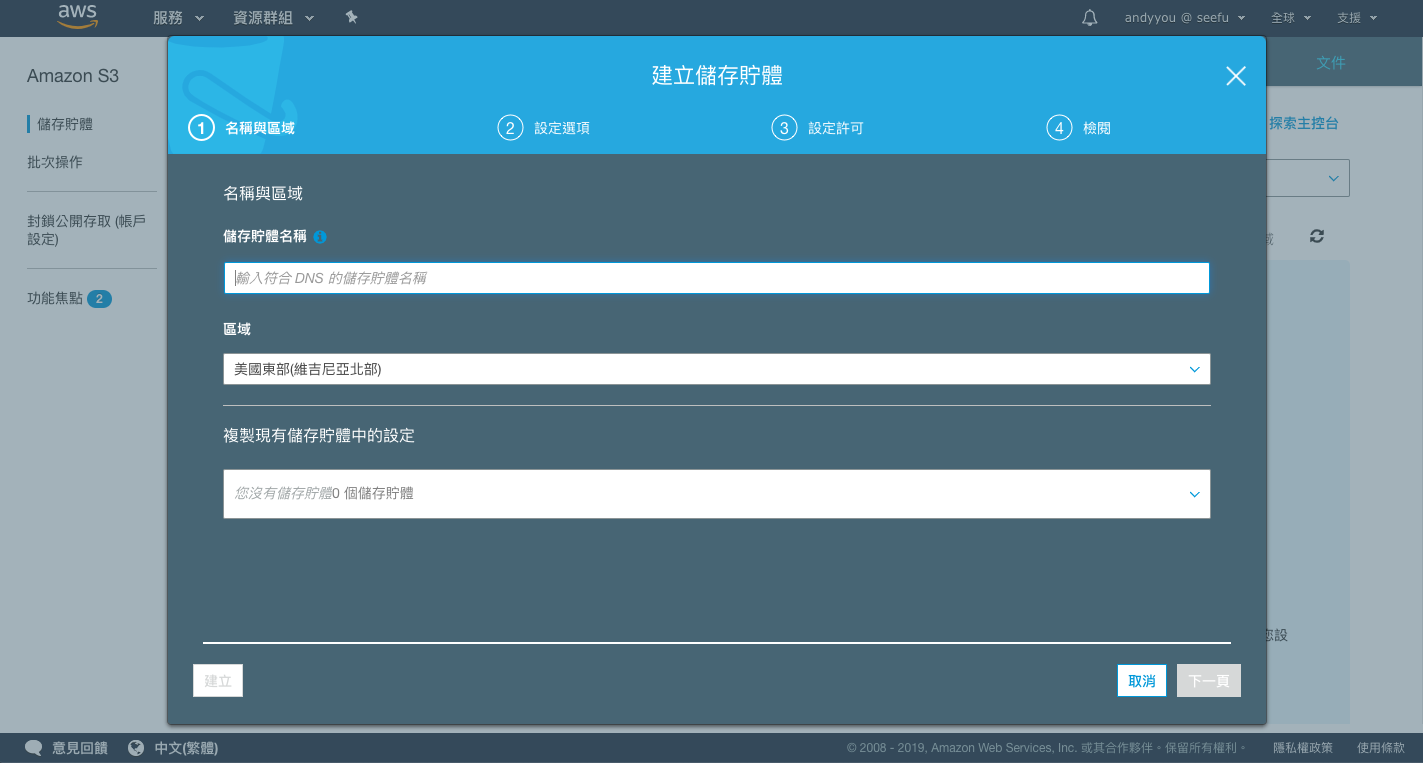
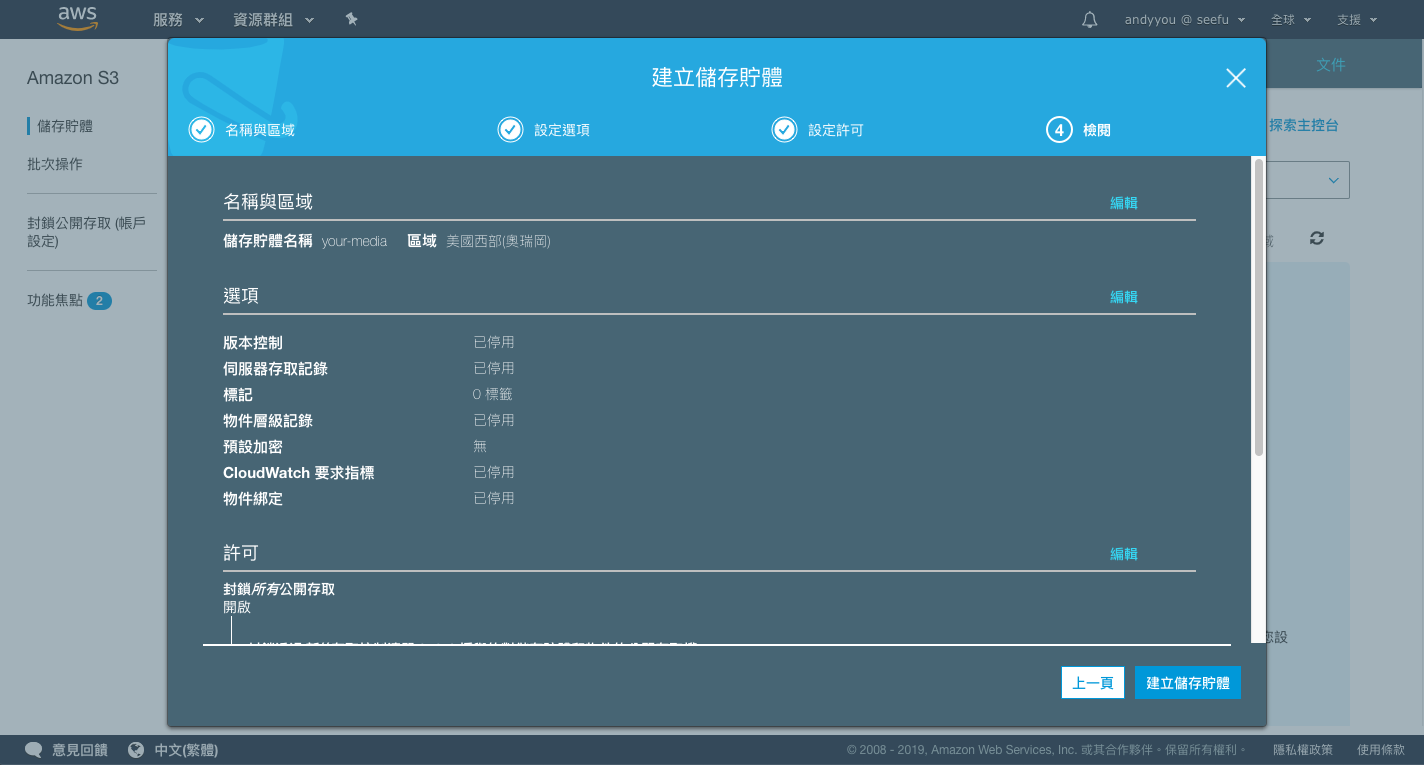
建立儲存體
輸入名稱
預設值即可。
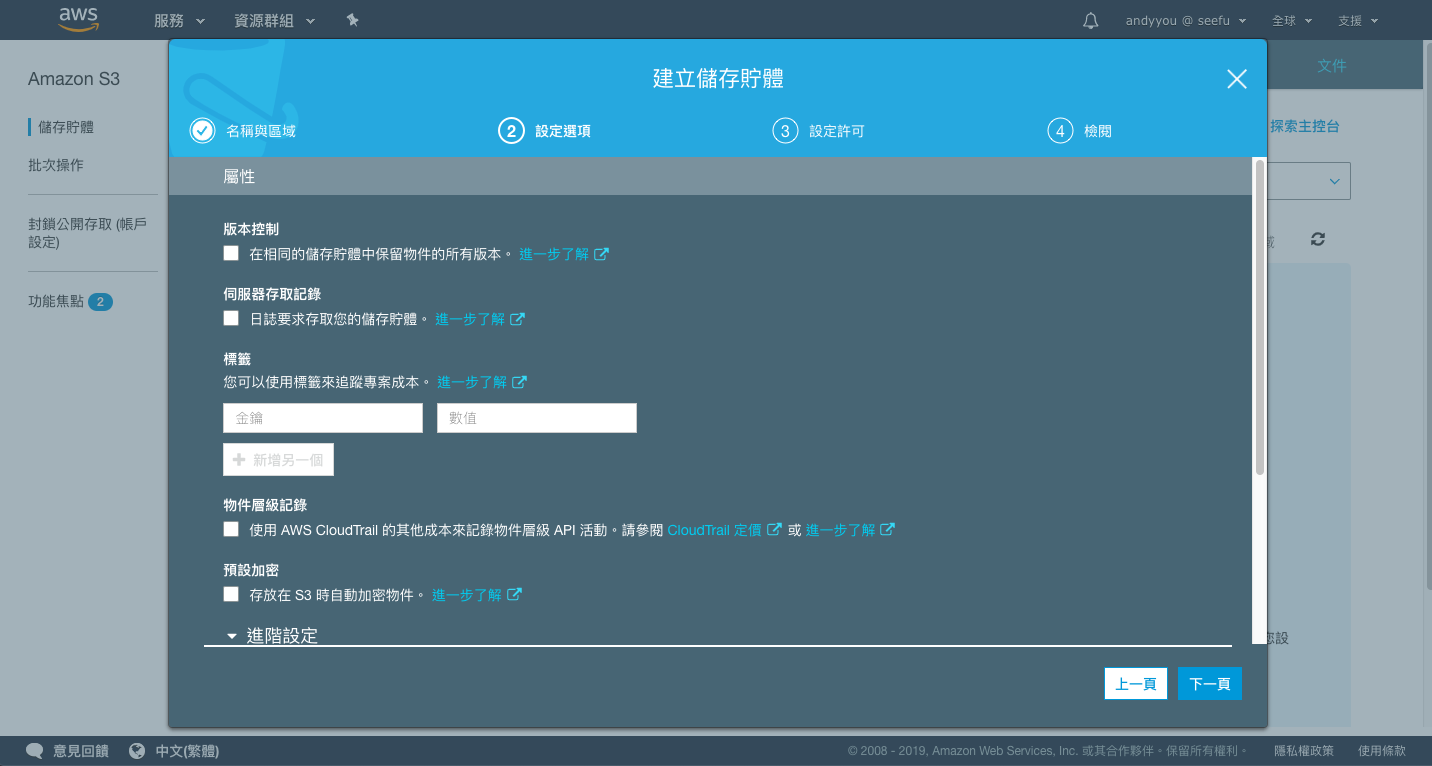
預設值即可。
上傳圖片測試。
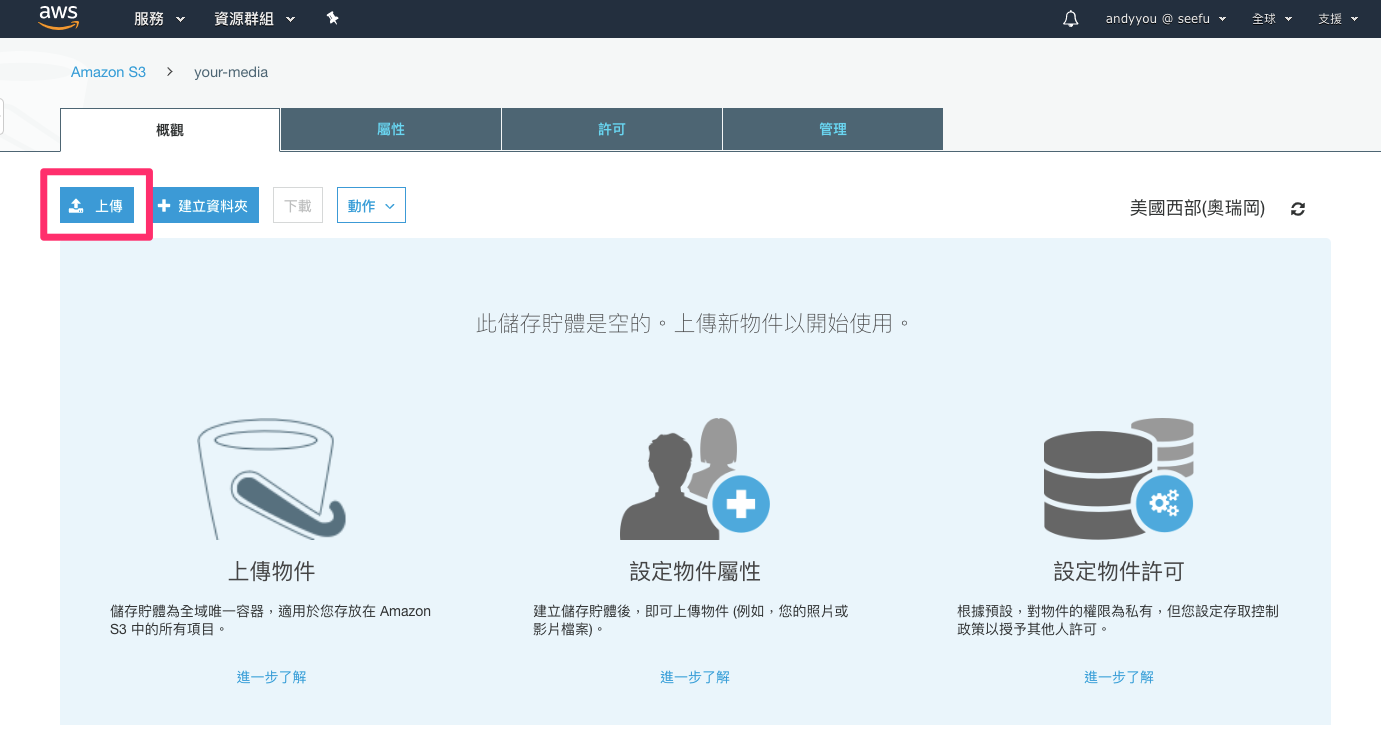
選擇圖檔
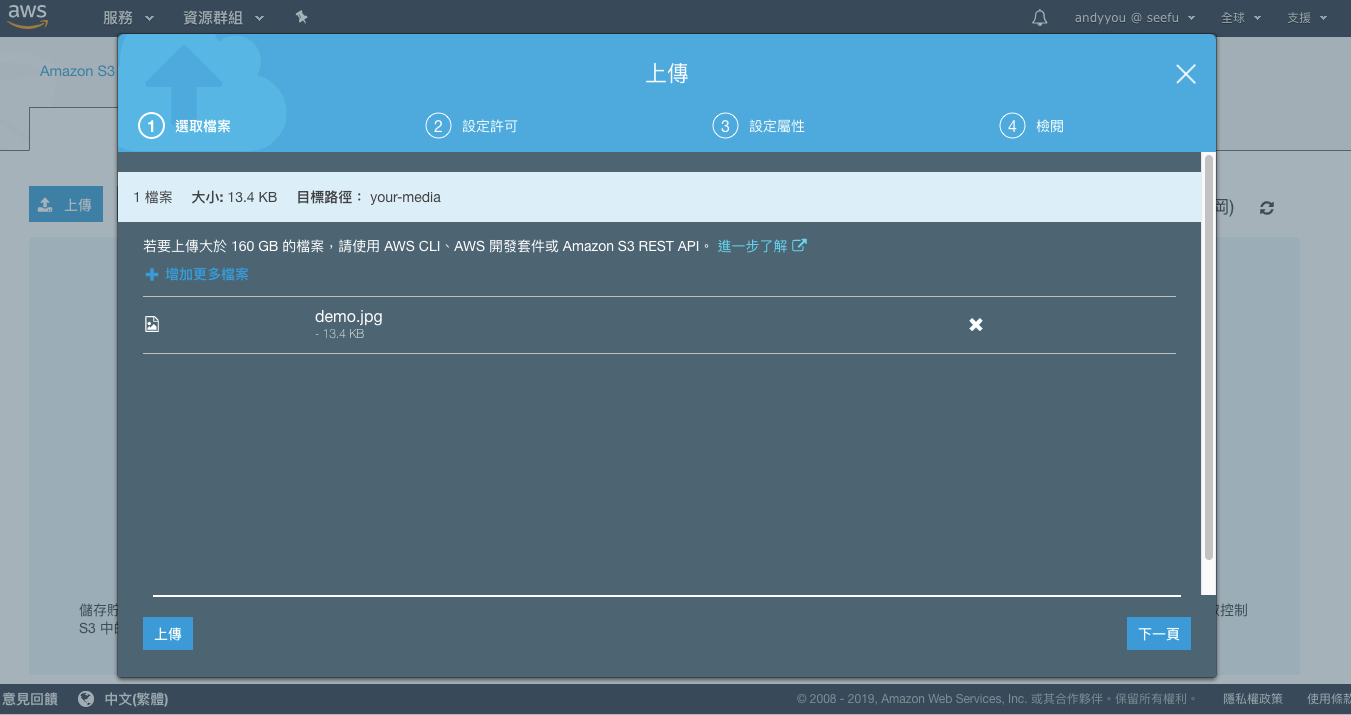
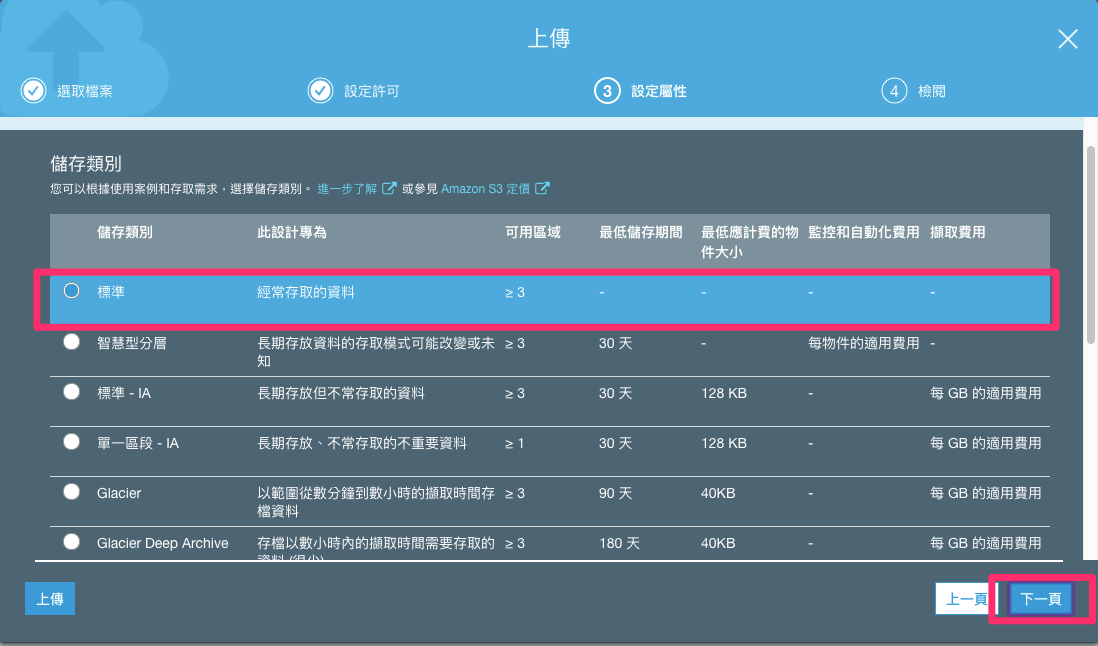
確認上傳

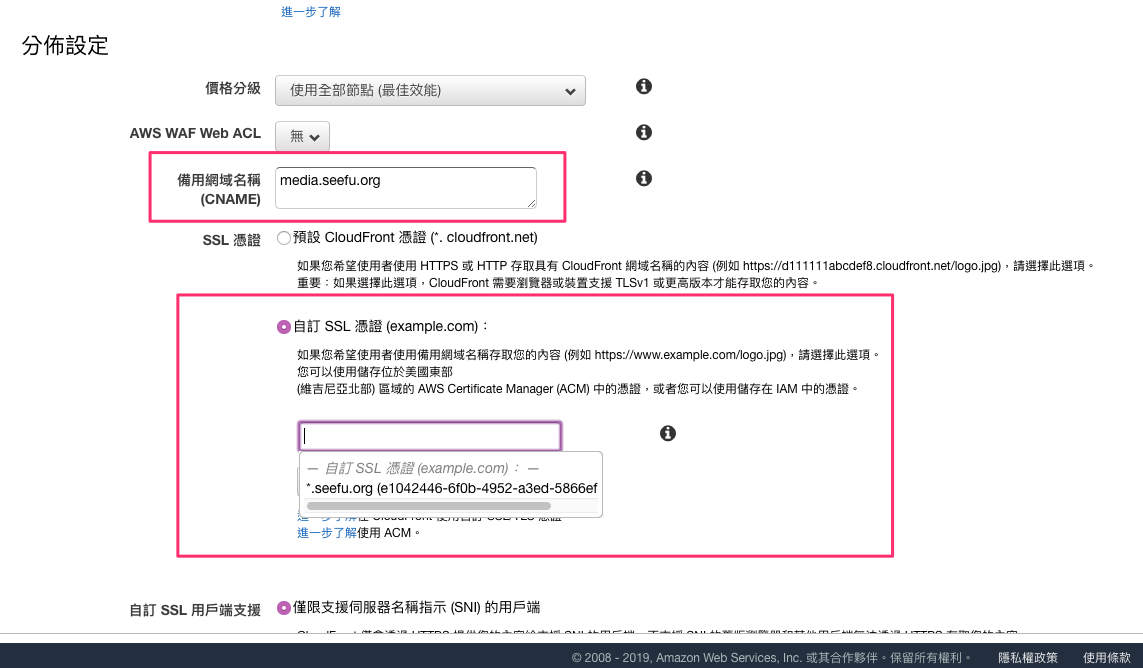
建立 SSL 憑證
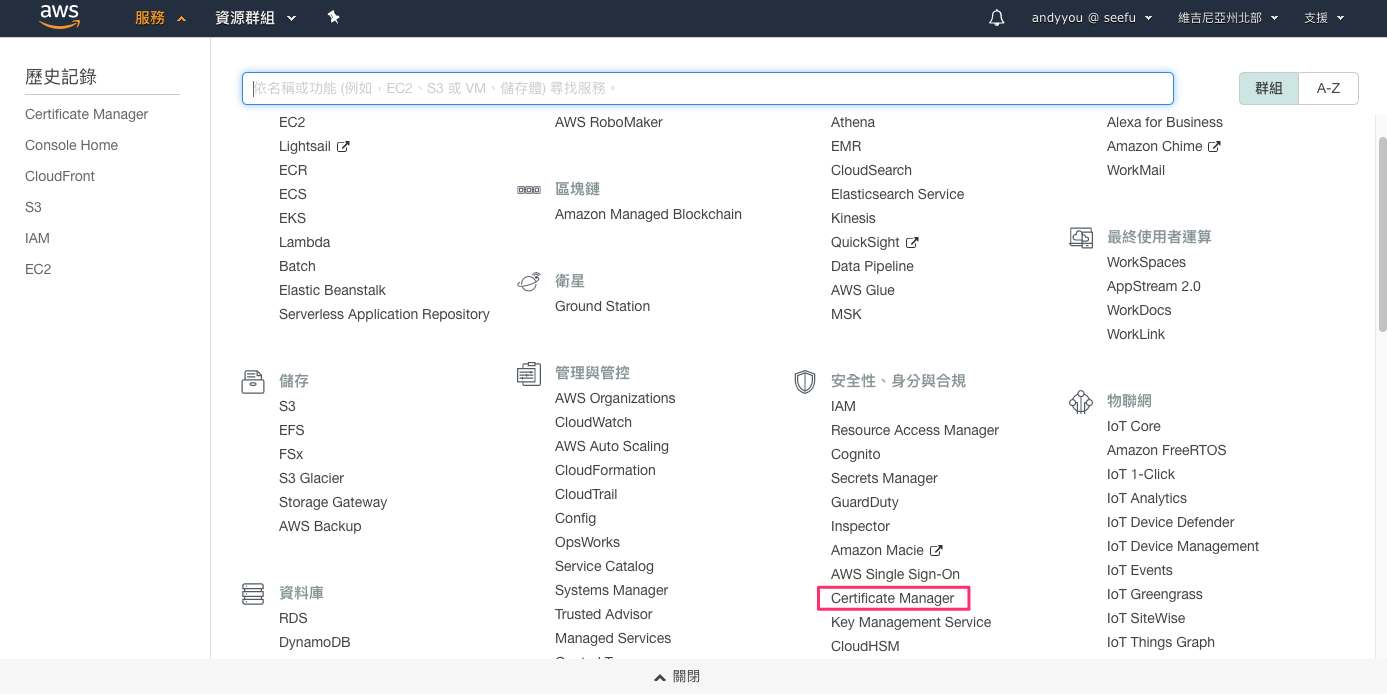
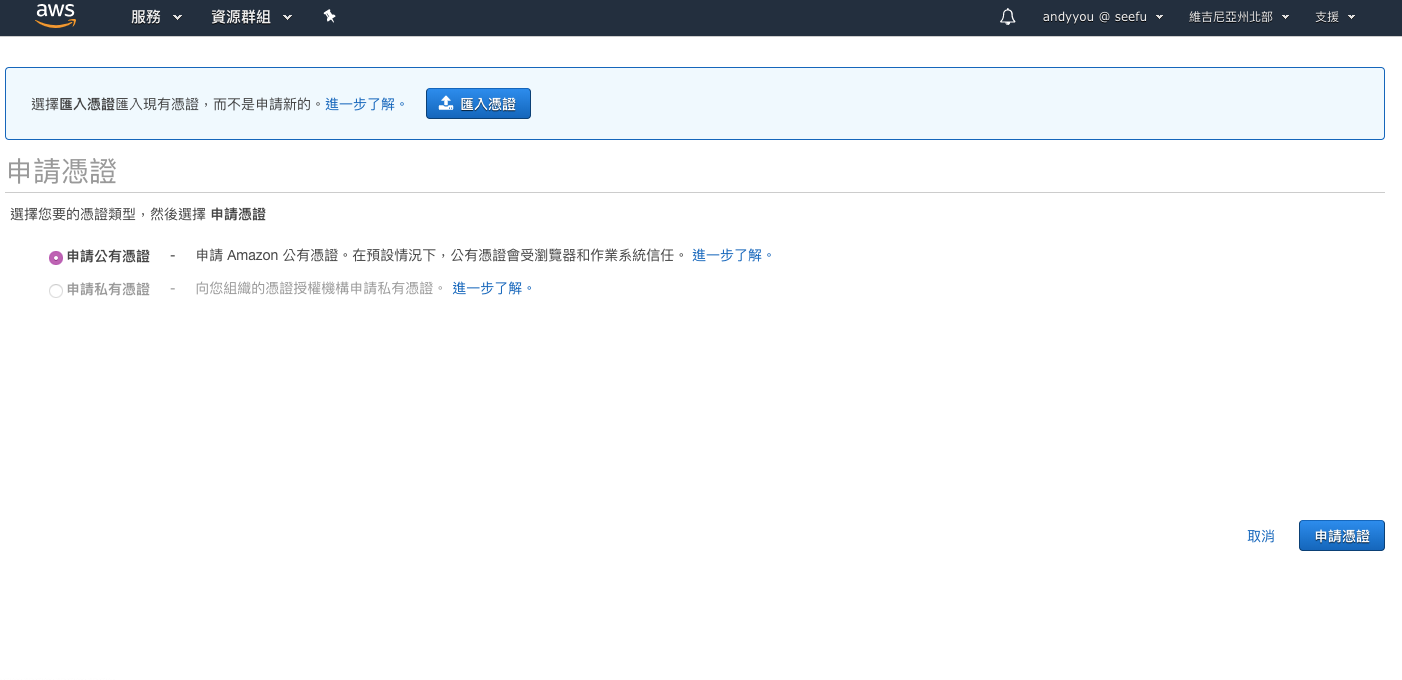
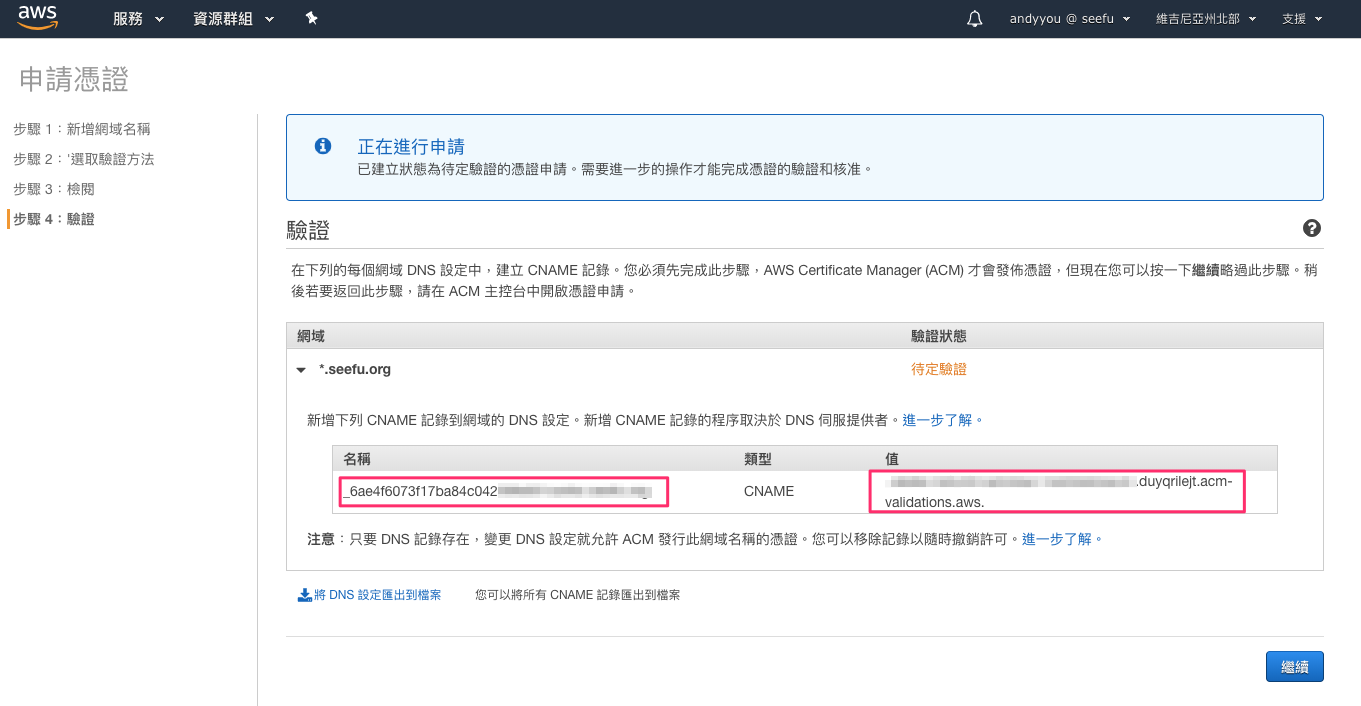
由於 CloudFront 我們想使用自己的網址,因此需要建立 SSL 憑證。登入 AWS Console 選擇 Certificate Manager。
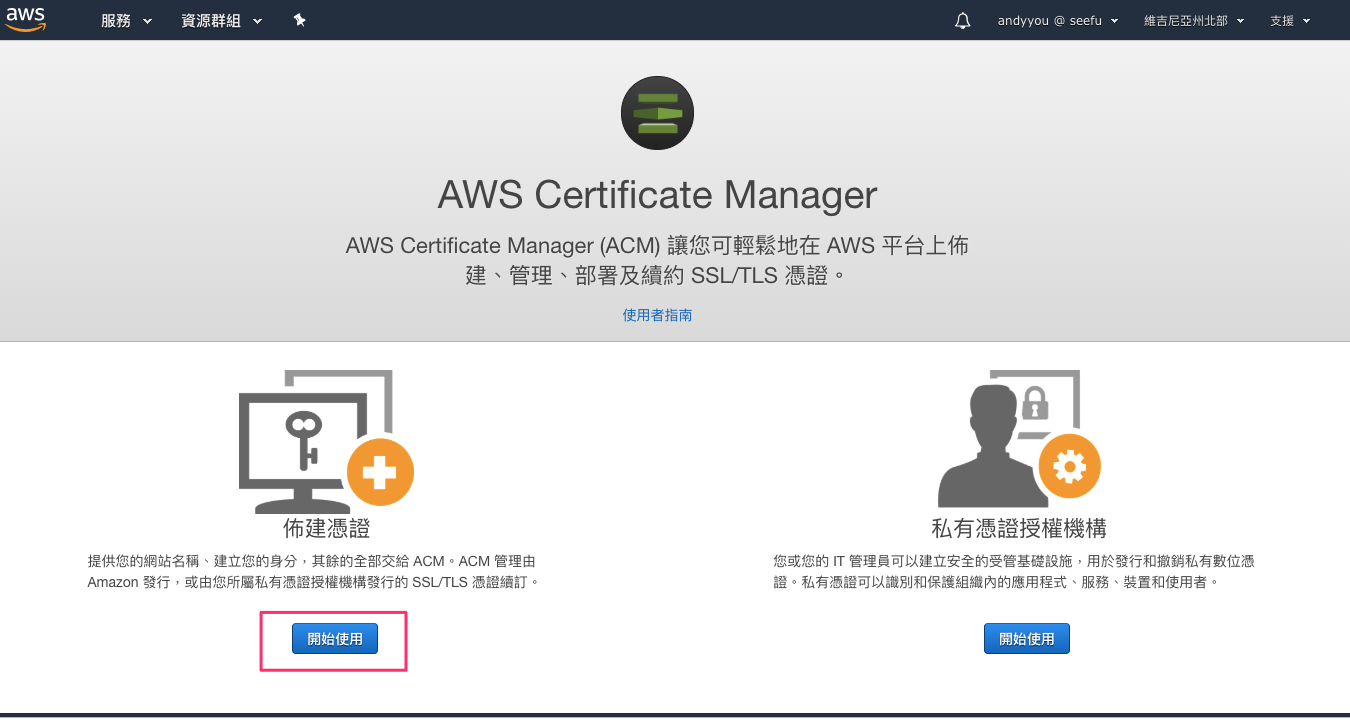
使用佈建憑證
為了示範流程,選擇【申請公有憑證】
私有憑證的流程也類似如果您使用的是私有憑證請選擇
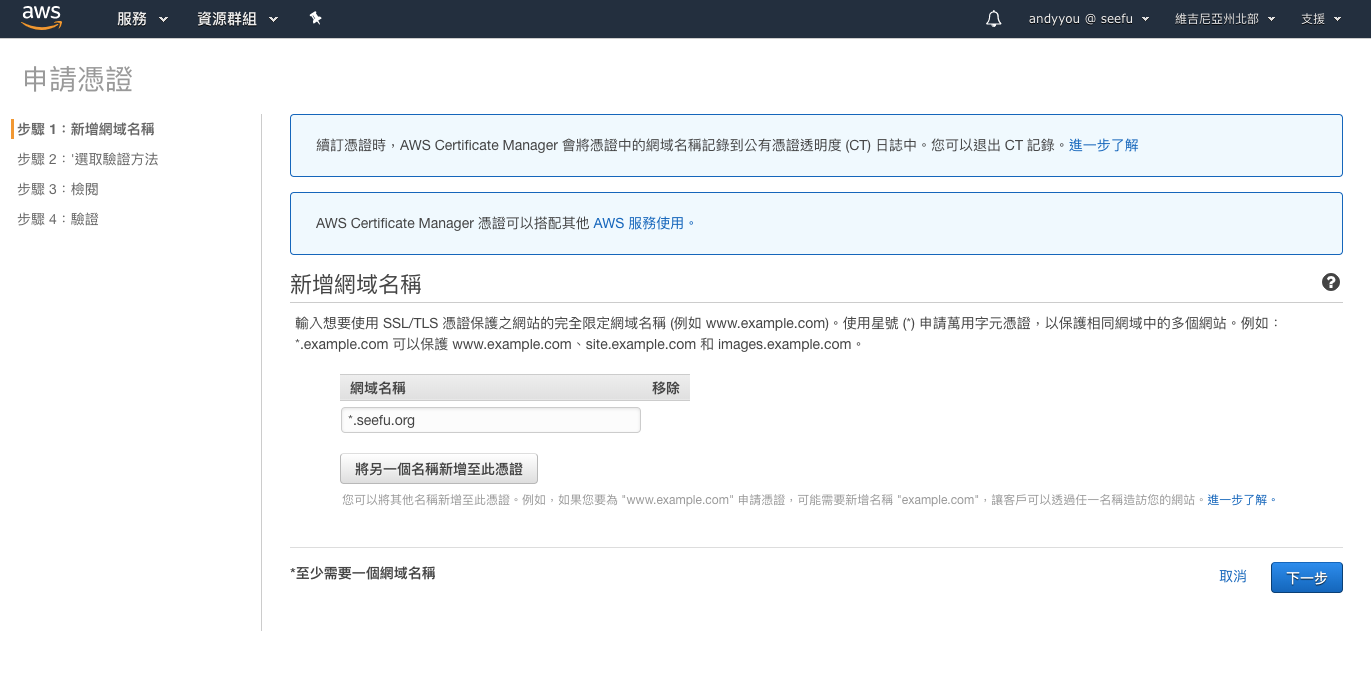
輸入網域,我們使用 Wildcard *
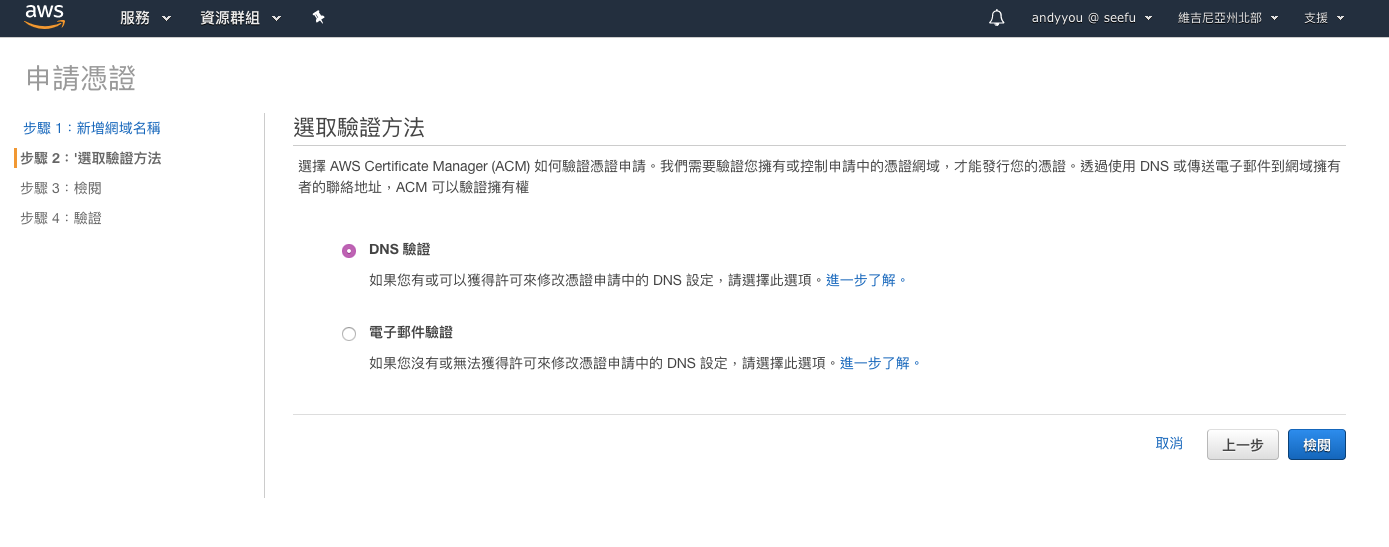
依照您較方便的方式進行驗證
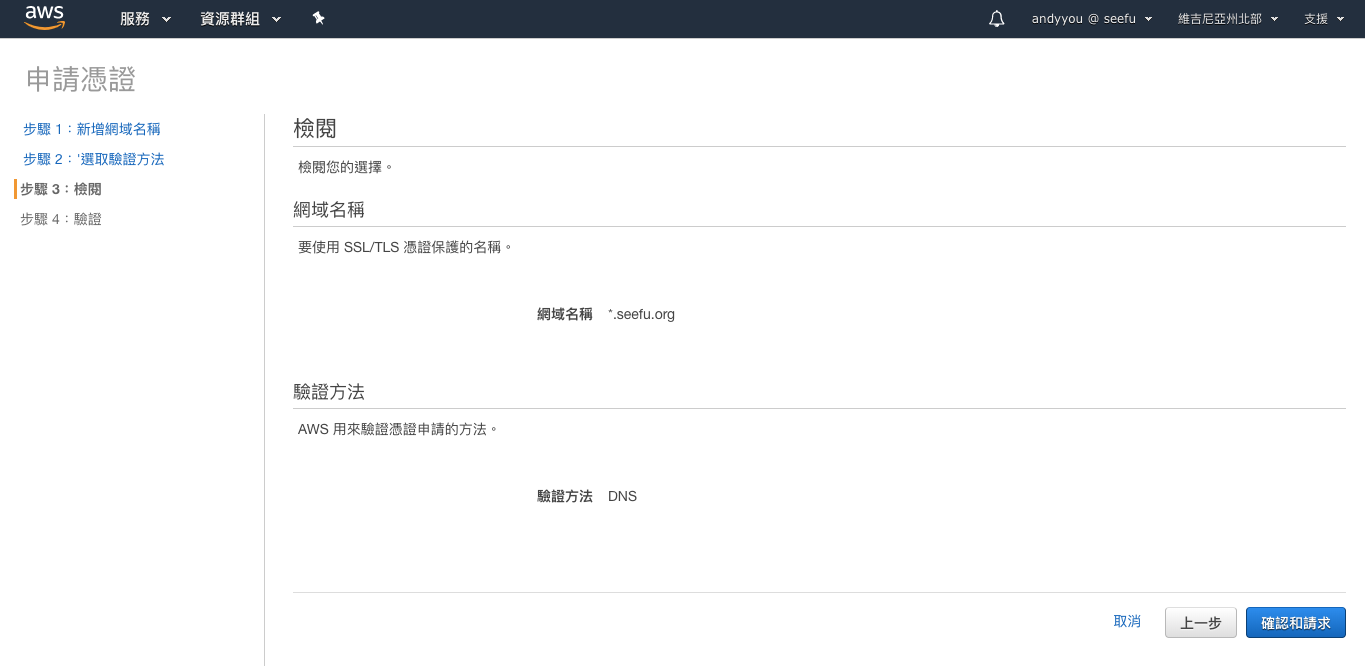
檢視設定結果
取得驗證流程所需的資訊,至您的 DNS 管理介面設定
本文網址為 Gandi 託管
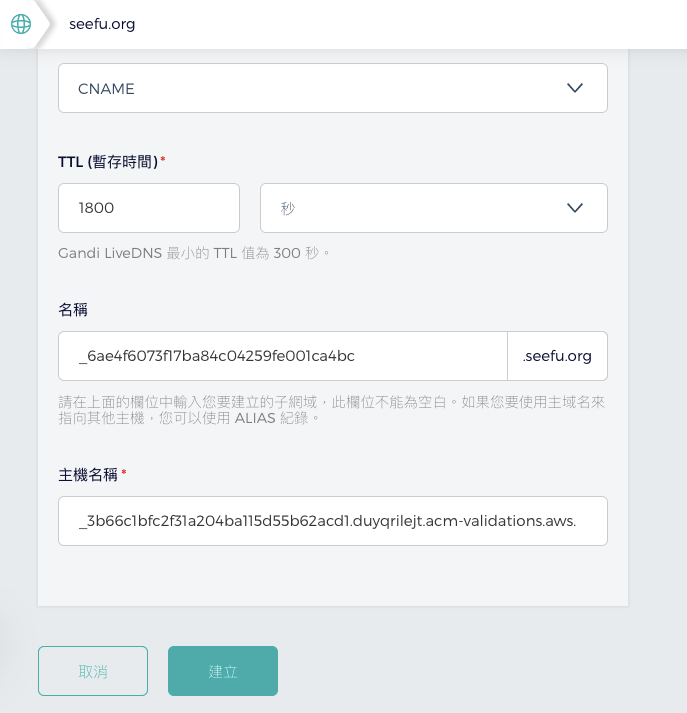
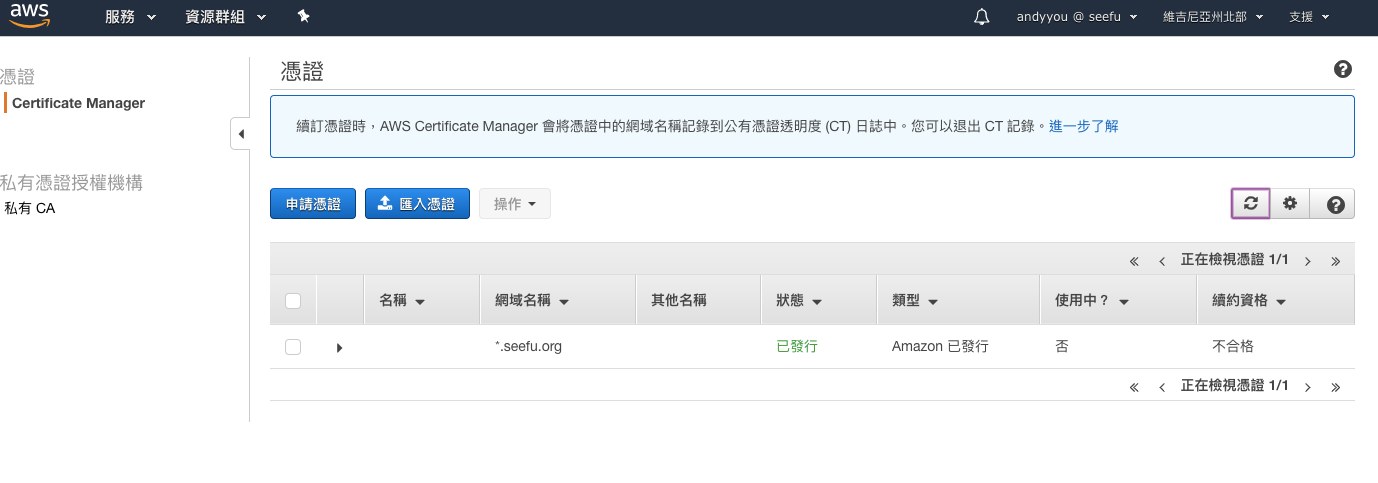
稍後片刻,驗證成功
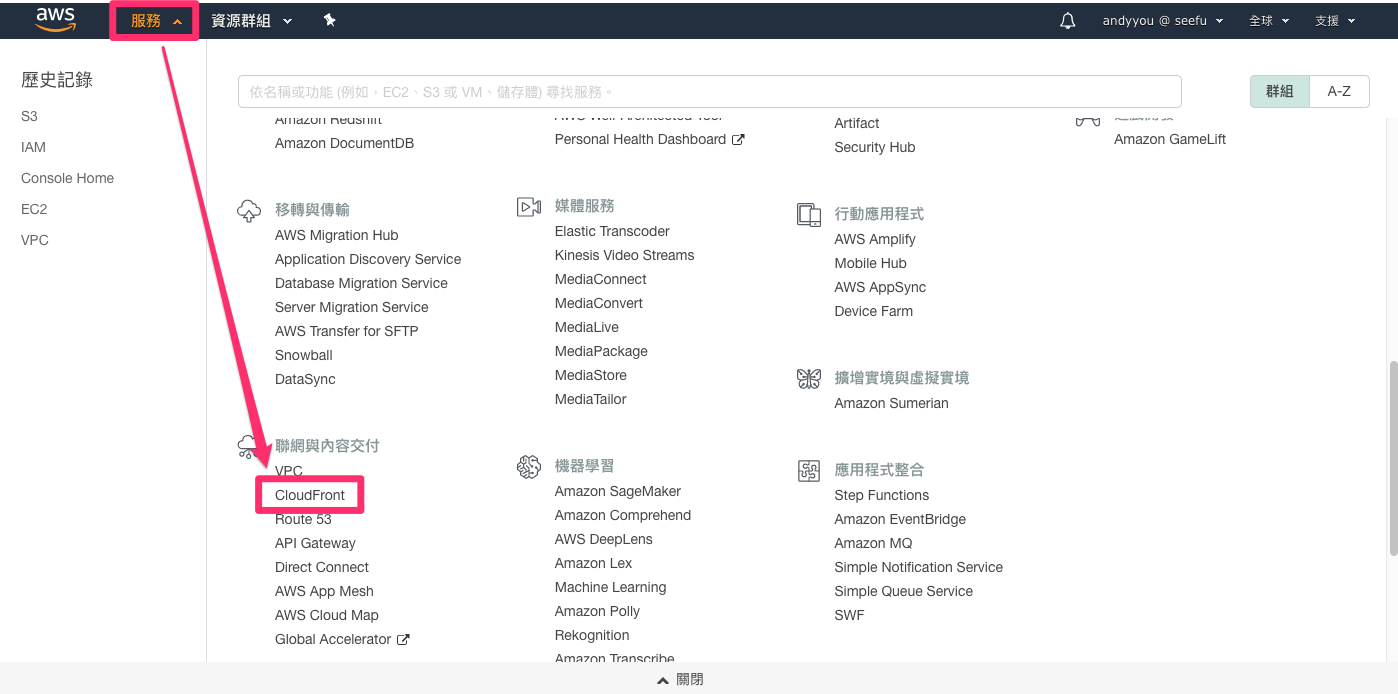
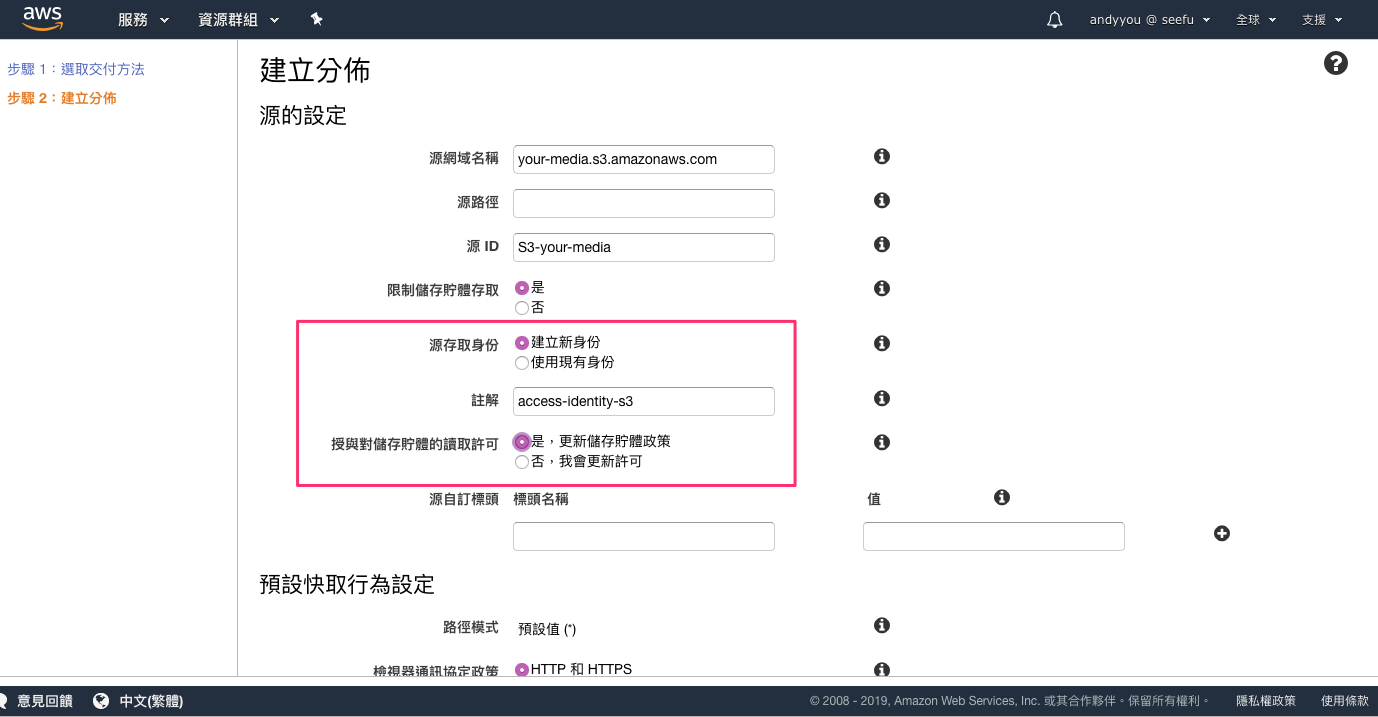
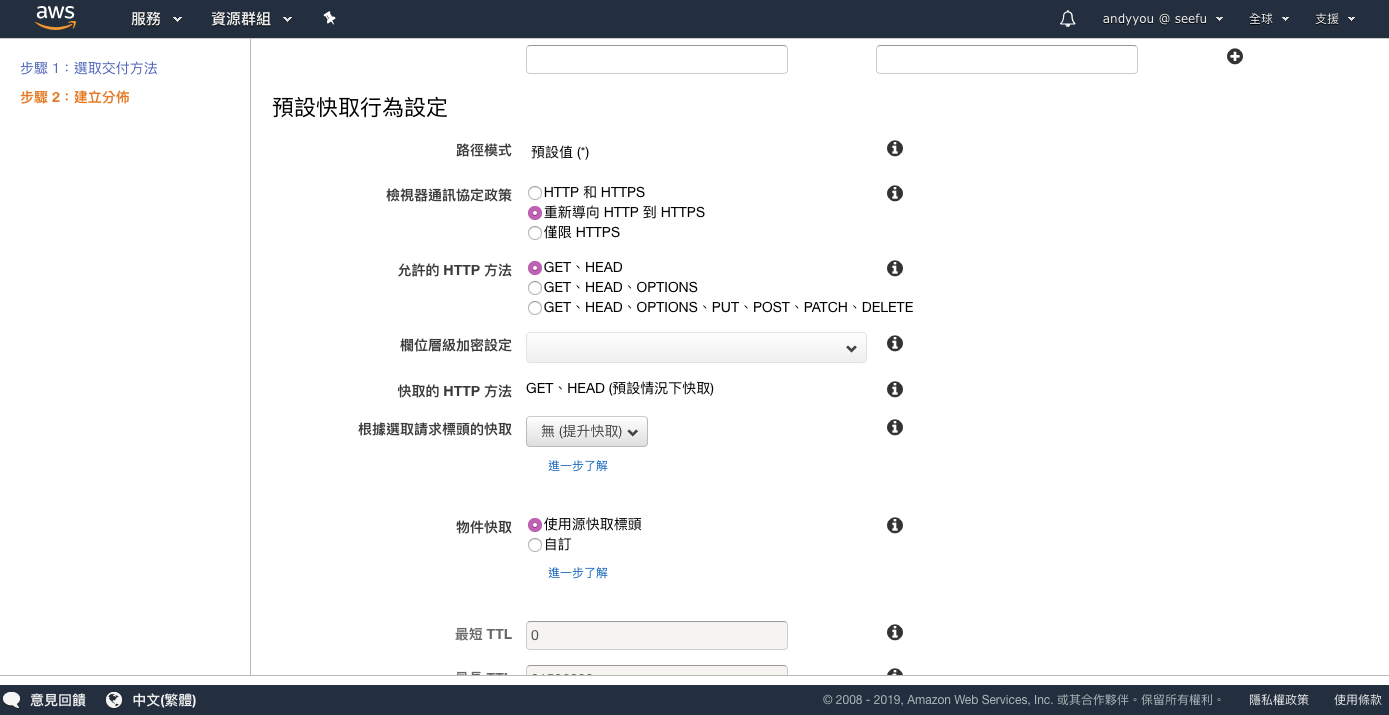
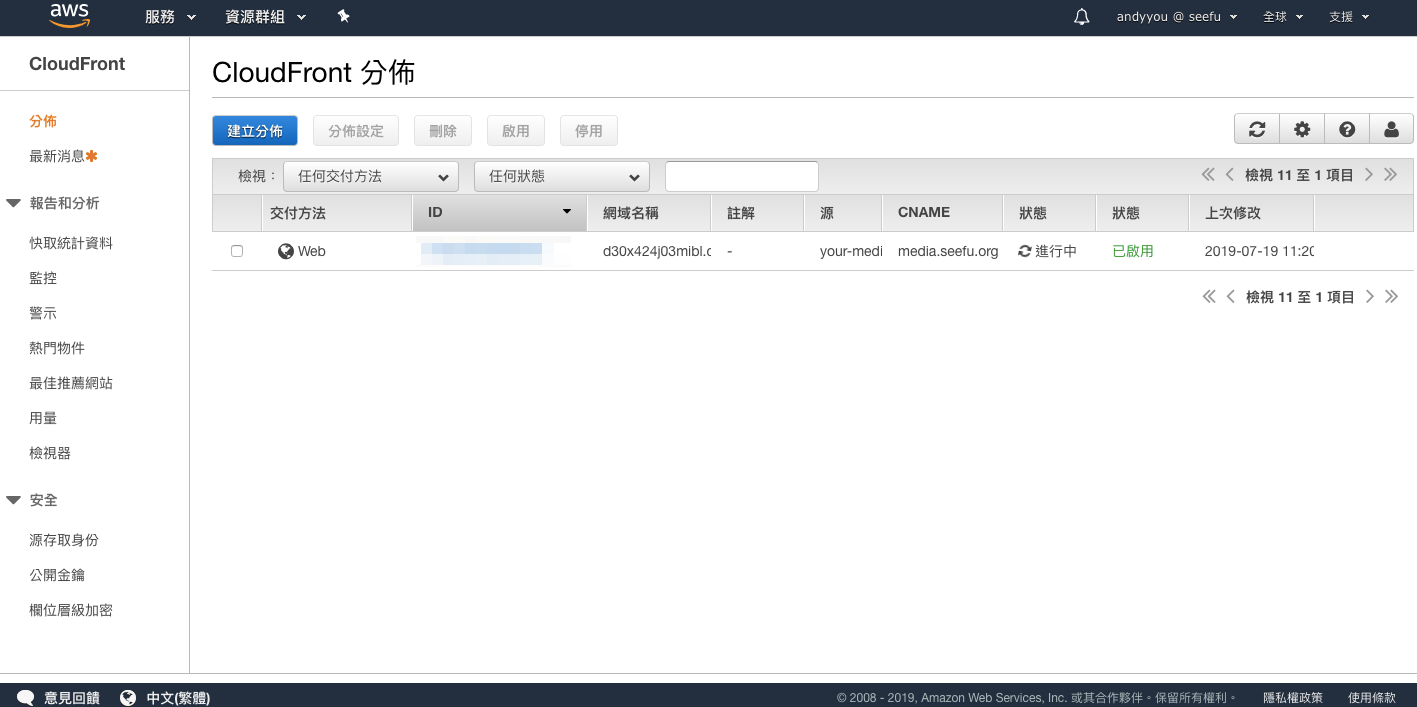
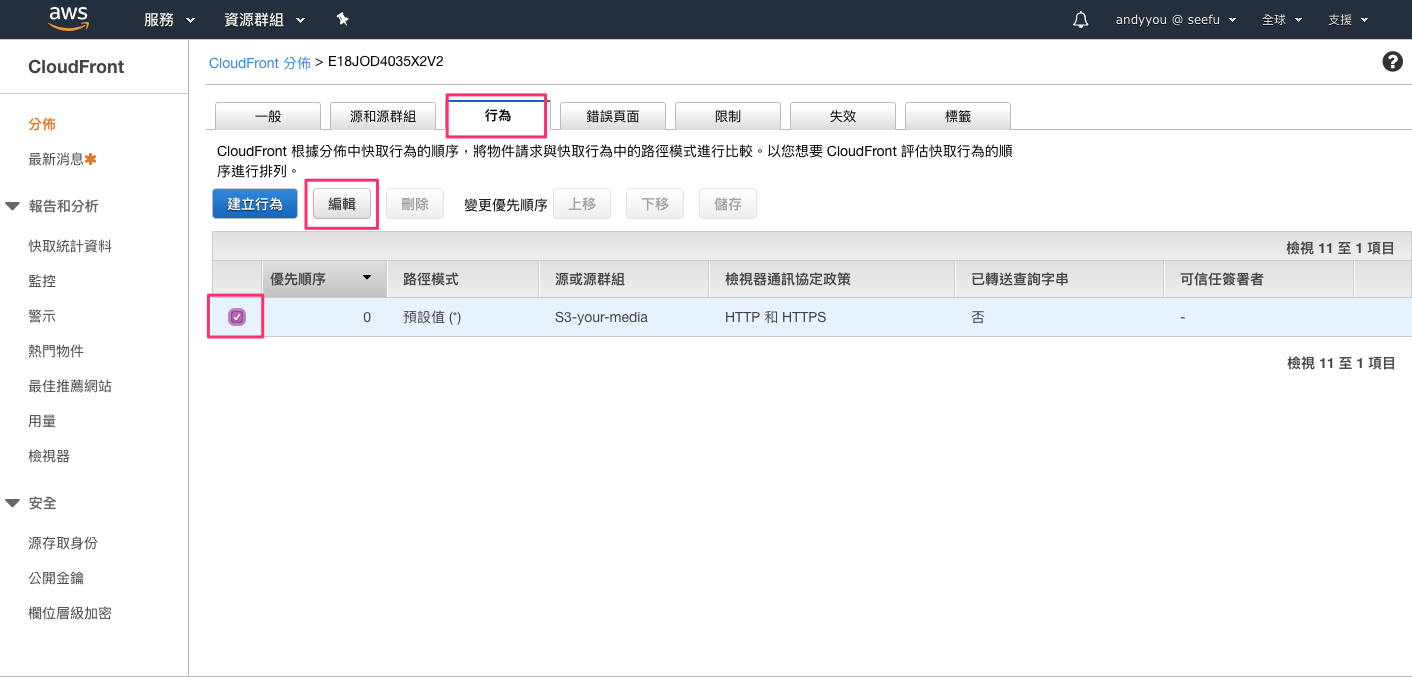
設定 CloudFront
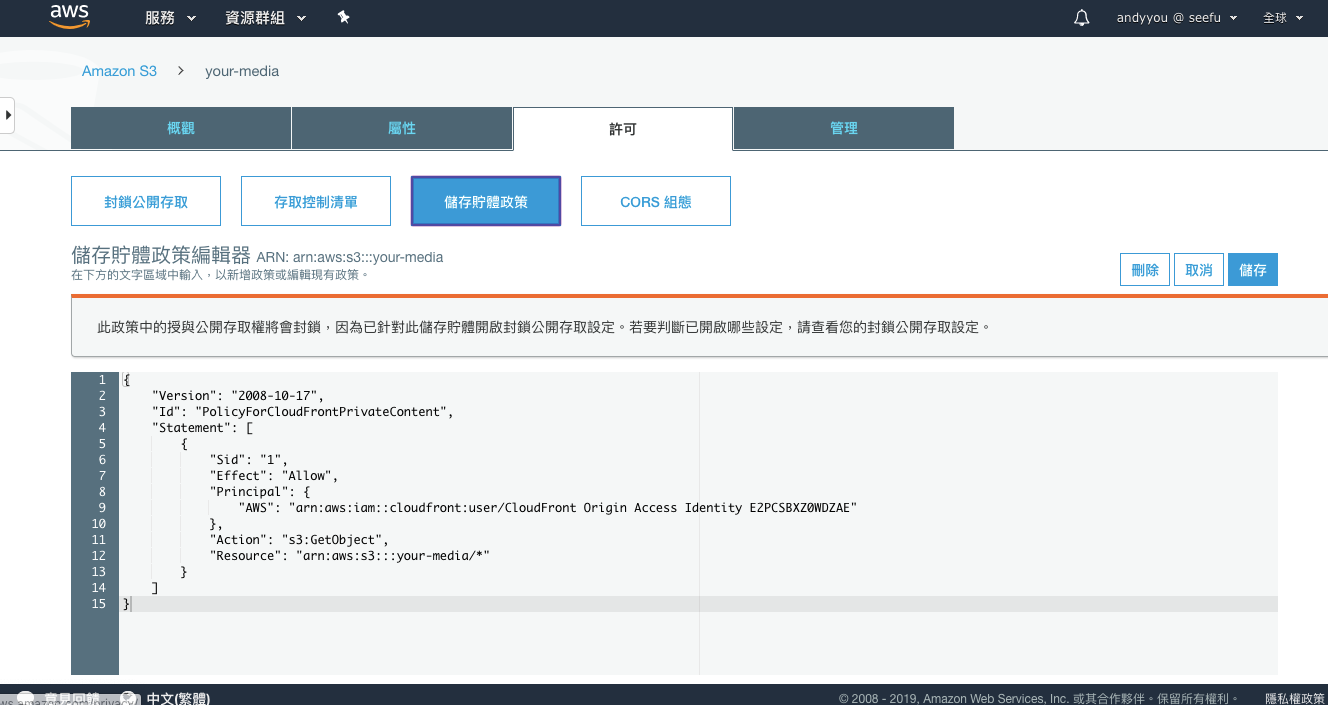
由 CloudFront 取得 S3 資源,S3 本身不提供直接存取。

選擇您的 Bucket
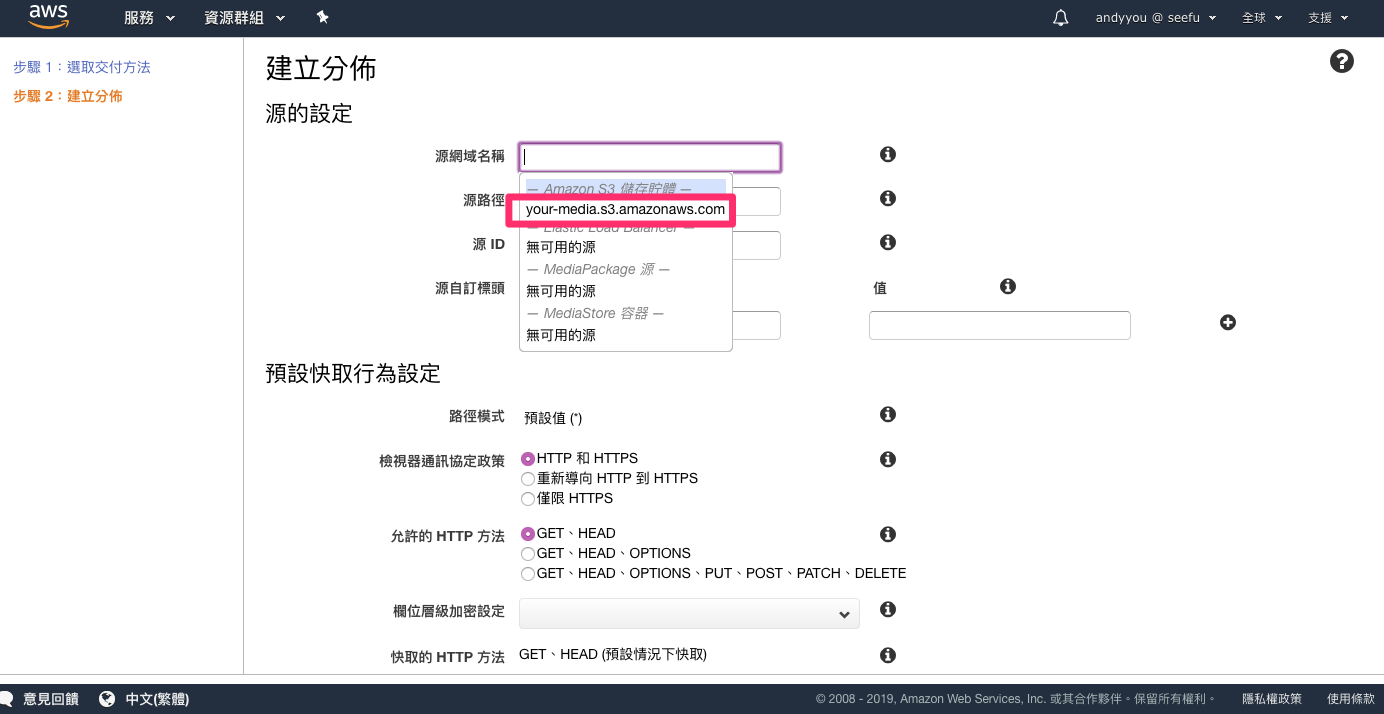
提供我們要使用的自訂網址
下圖為自動設定 S3 的設定檔
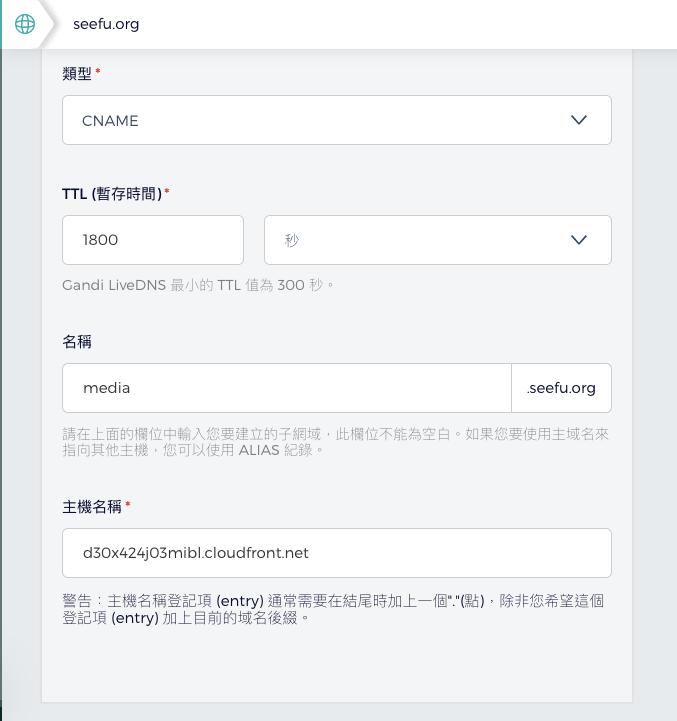
至您的 DNS 設定 CNAME
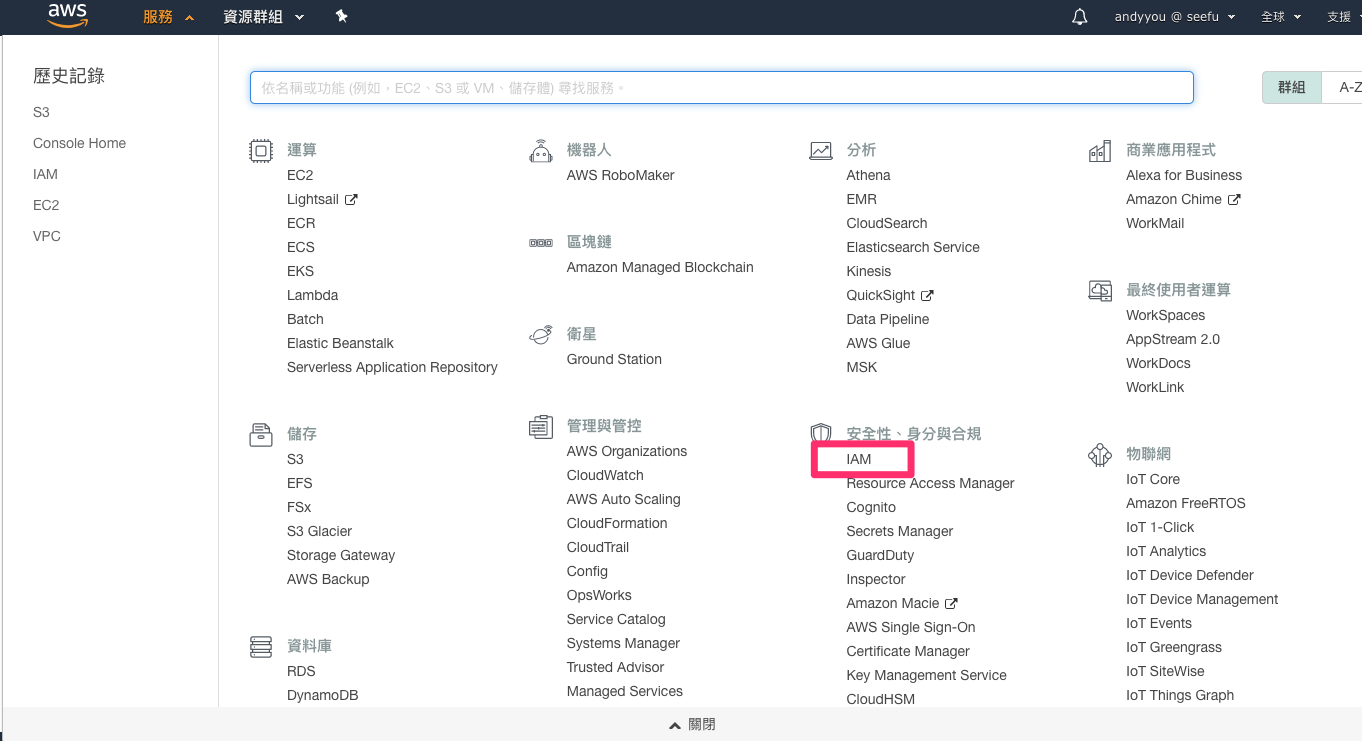
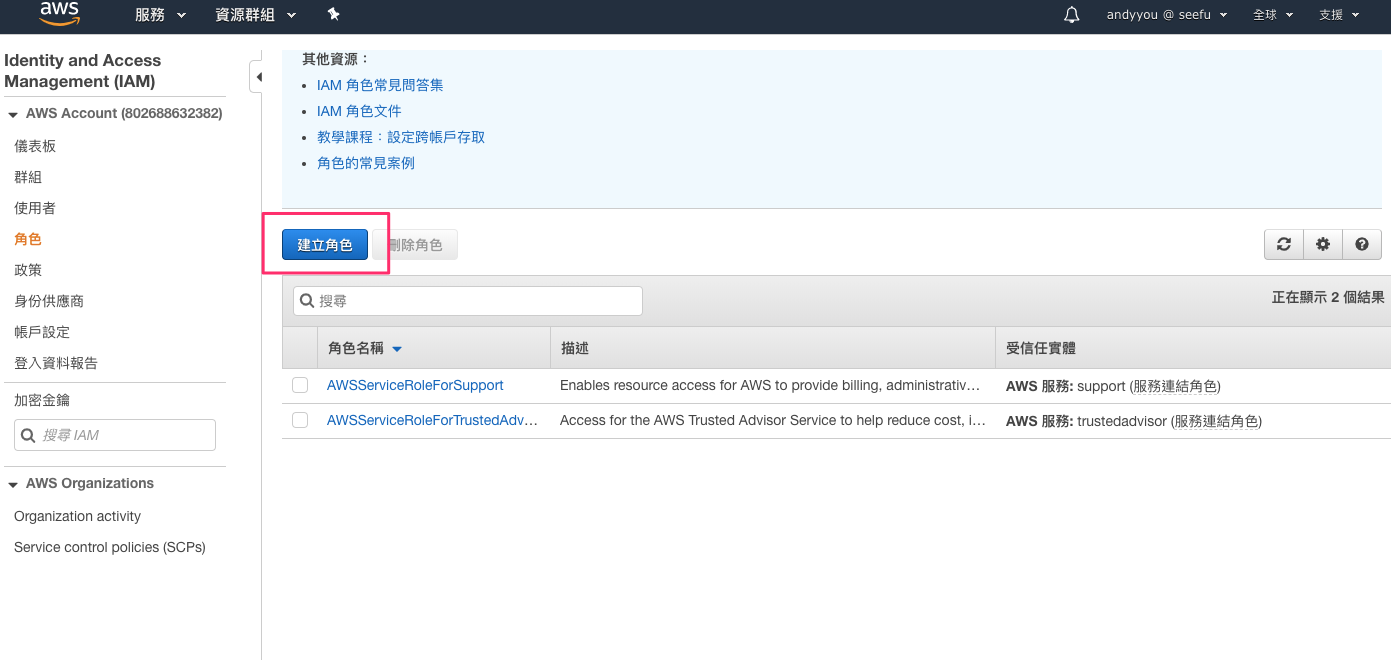
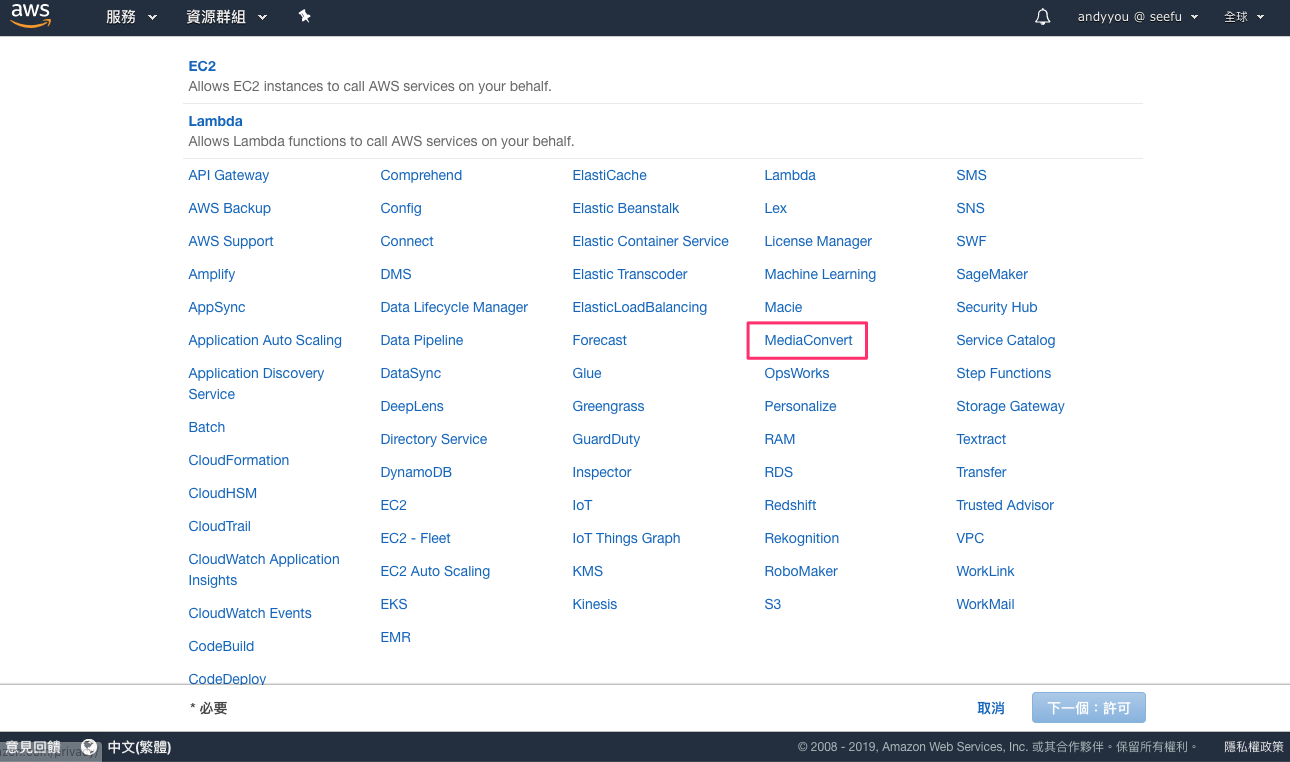
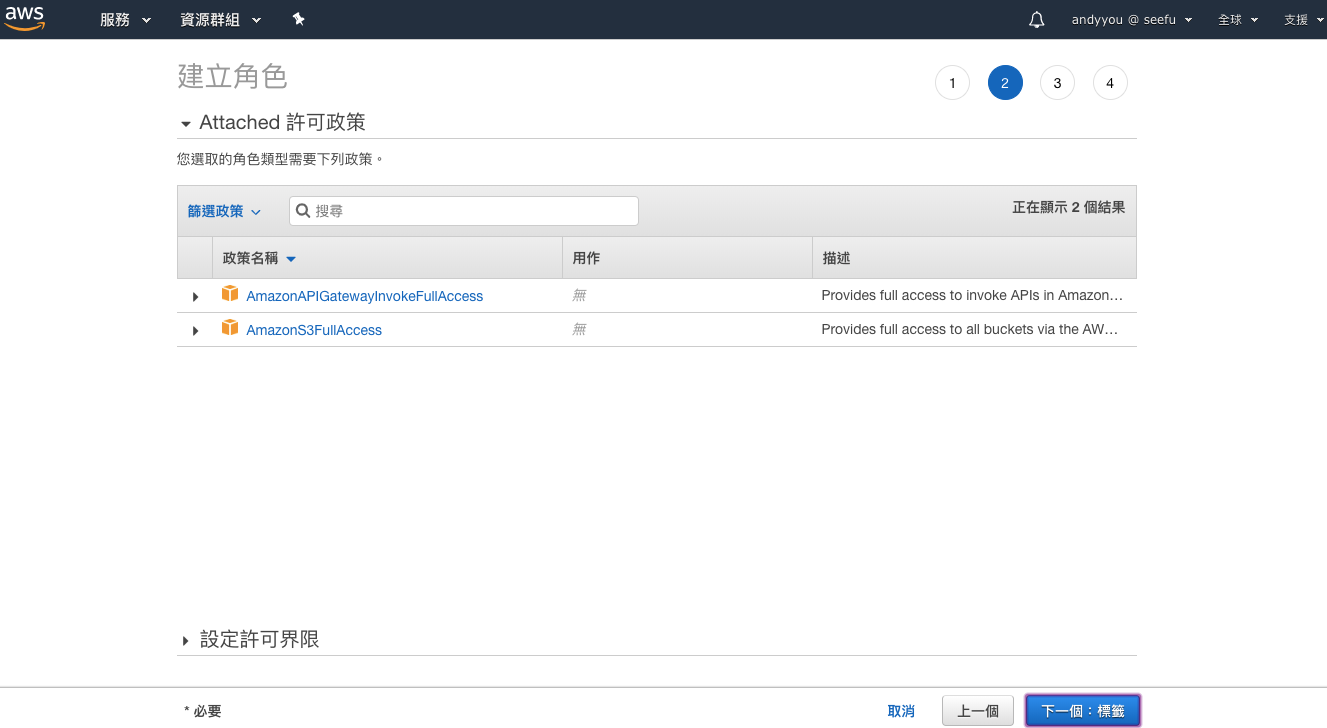
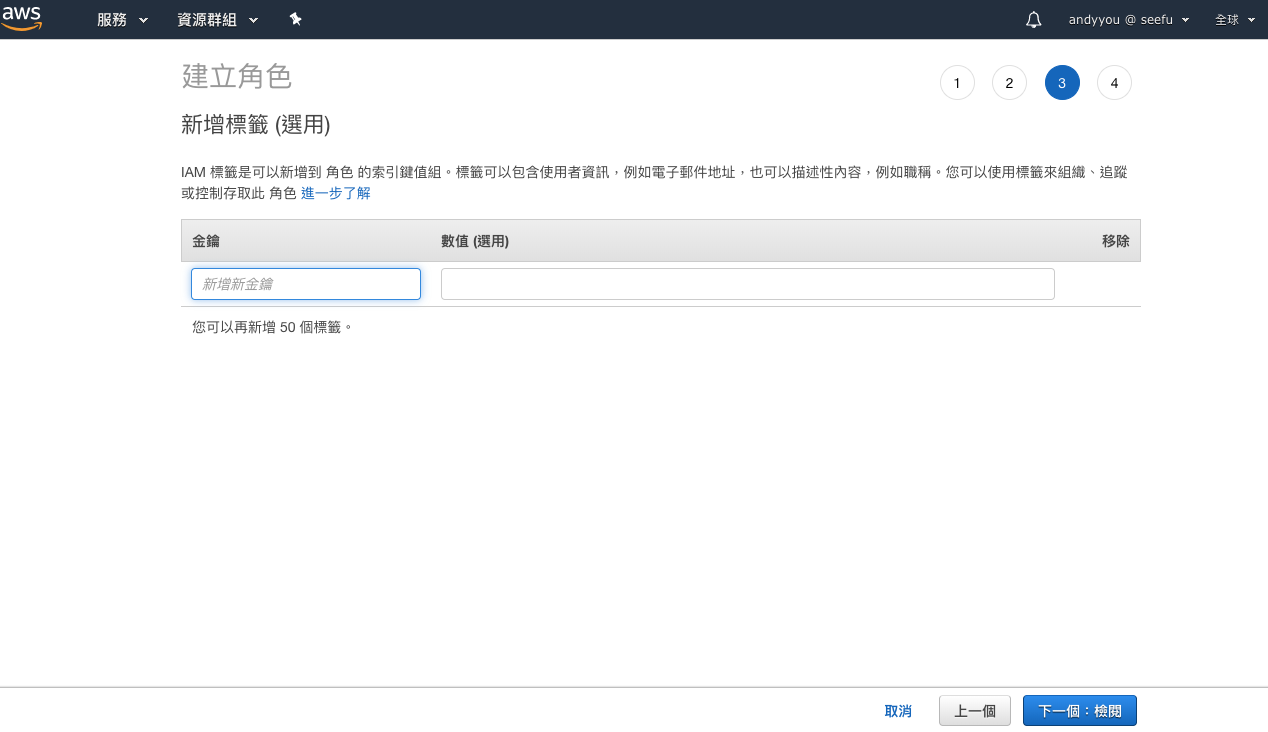
設定 IAM 權限
為了使用 MediaConvert 我們需要先建立角色。
使用 MediaConvert
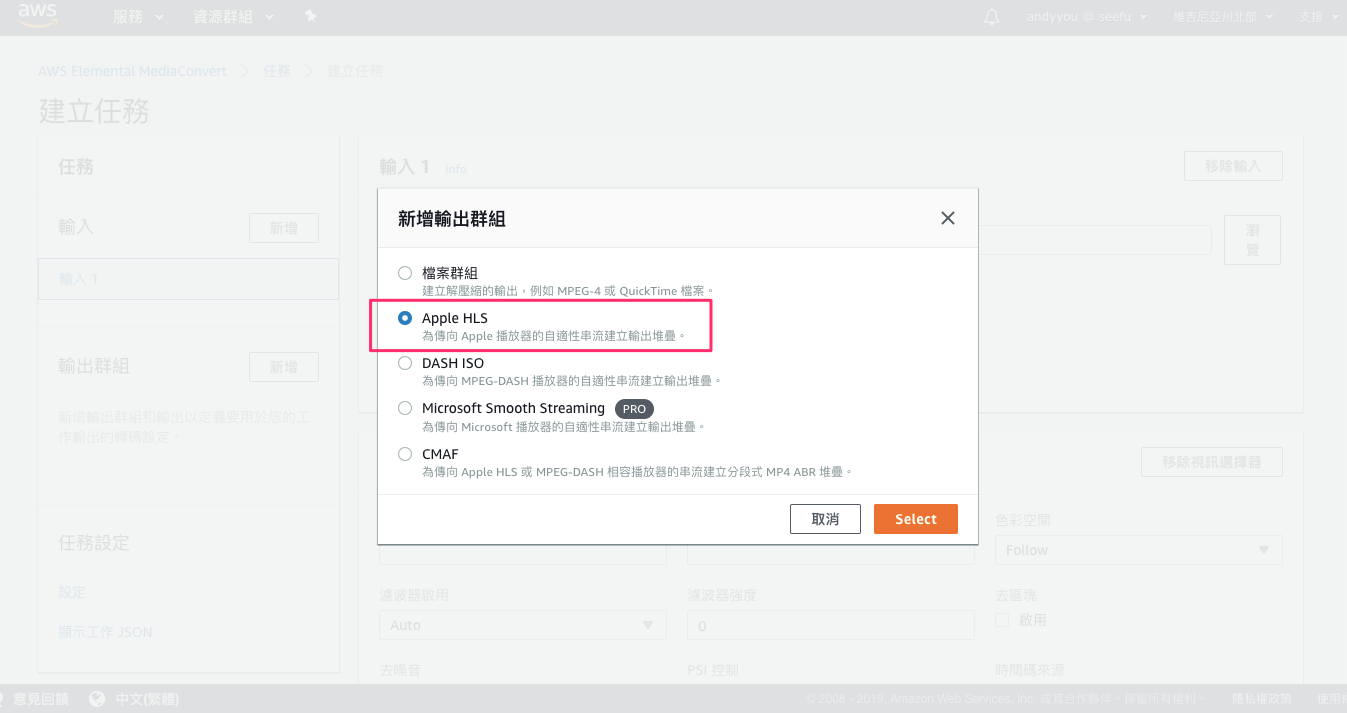
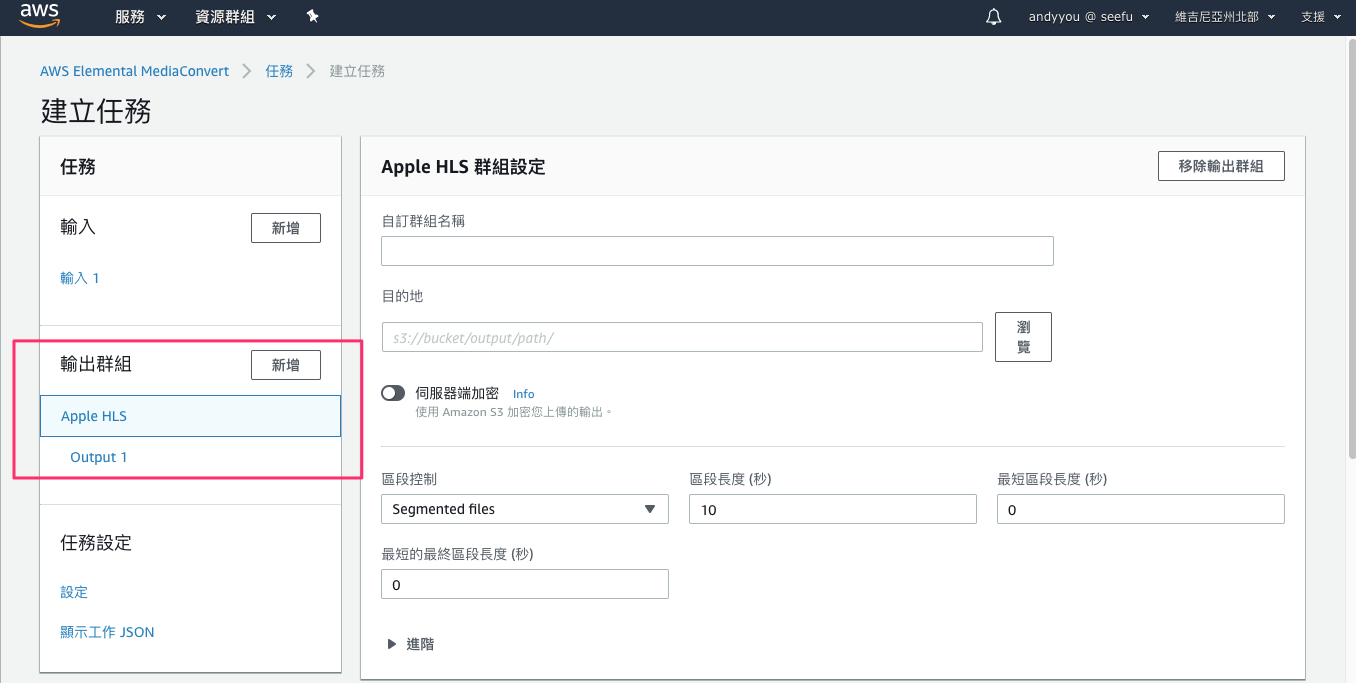
這裡我們練習使用 MediaConvert 將一個 .mp4 轉換成 HLS 串流,您的應用程式可以搭配 AWS SDK 來整合,這裡我們只是要紀錄學習一個使用流程與概念。
第一步我們先回到 S3 上傳一部 mp4
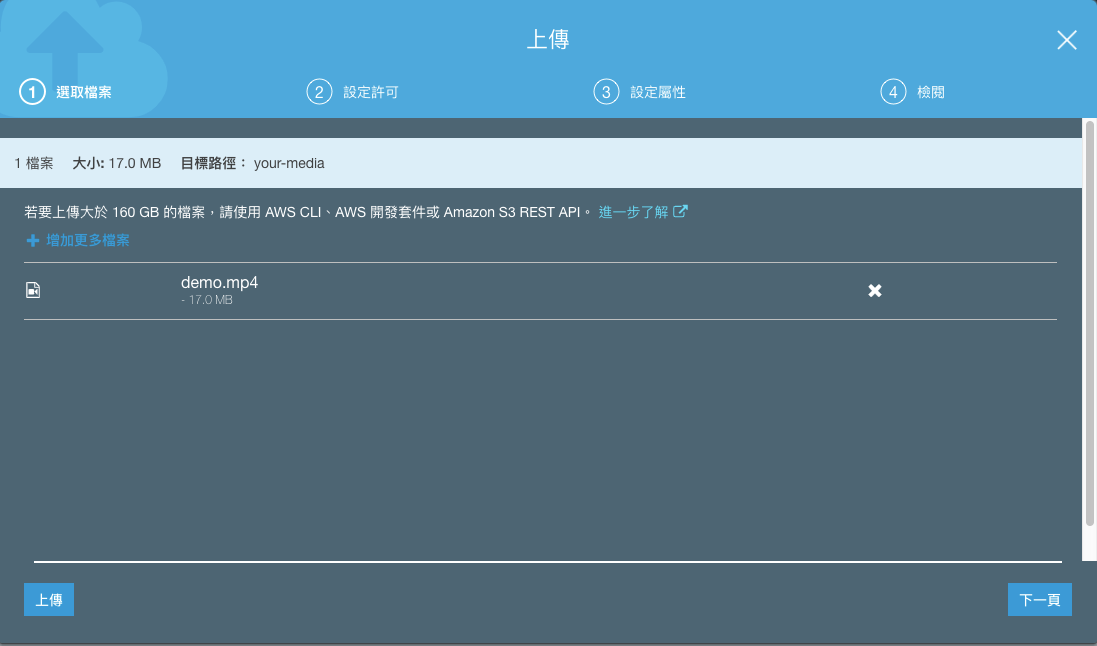
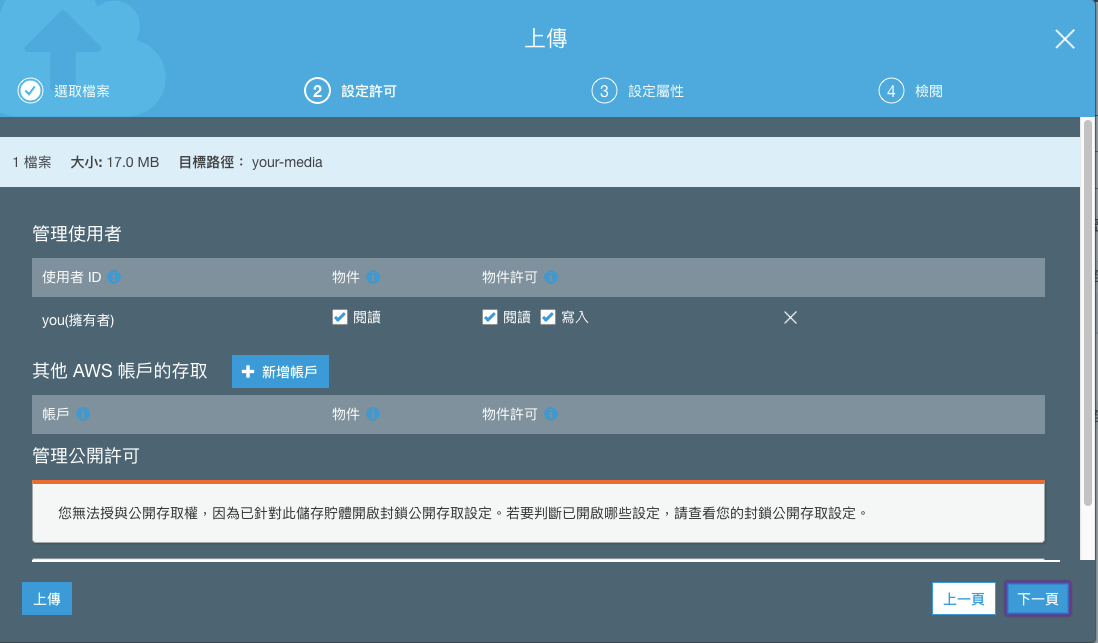
流程跟之前上傳圖片一樣。
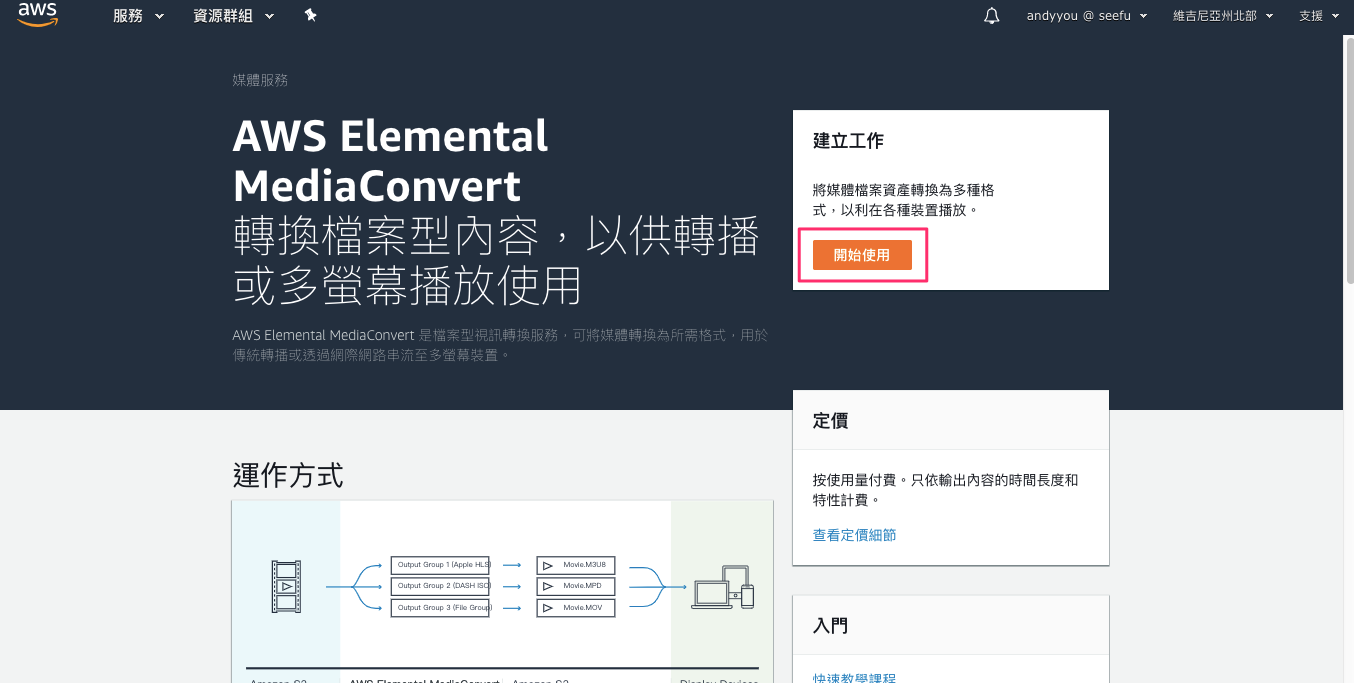
完成上傳,接著我們可以切換至 MediaConvert 服務頁面。
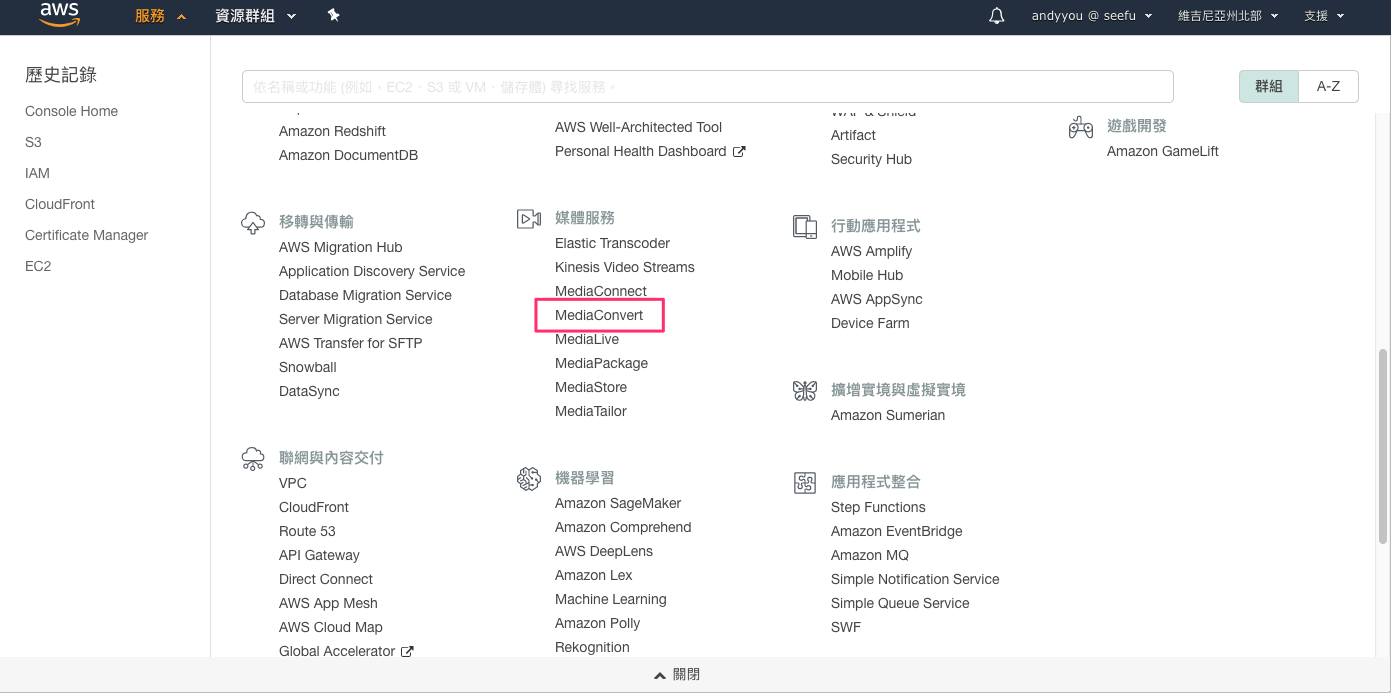
選擇【開始使用】
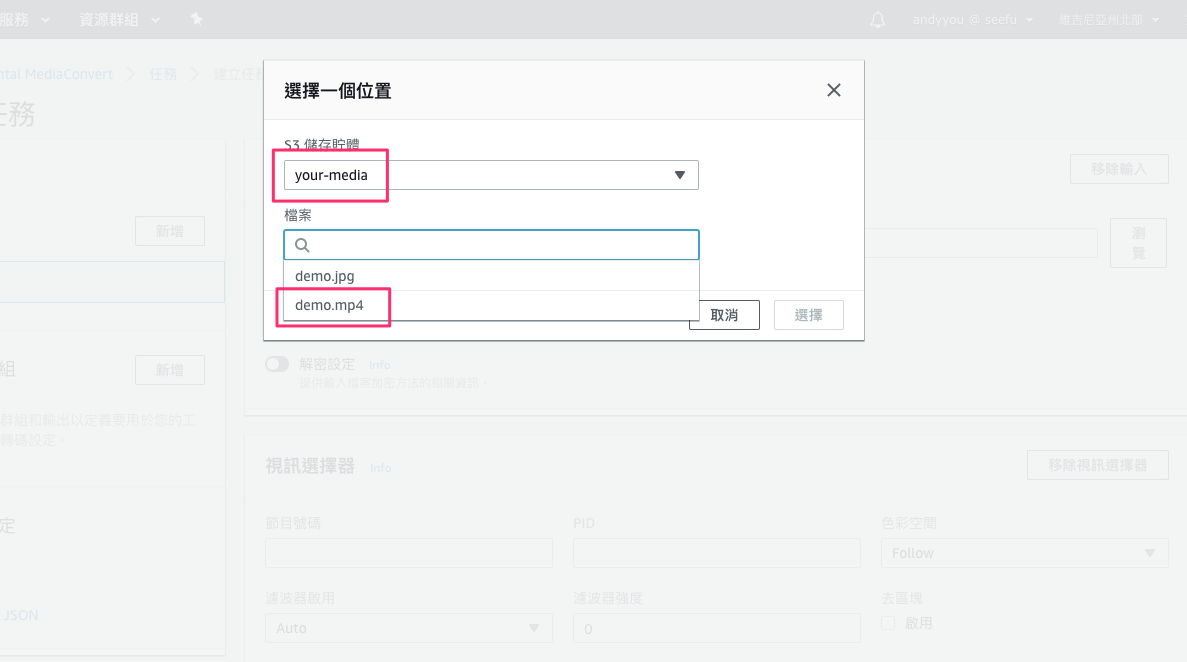
選擇檔案來源
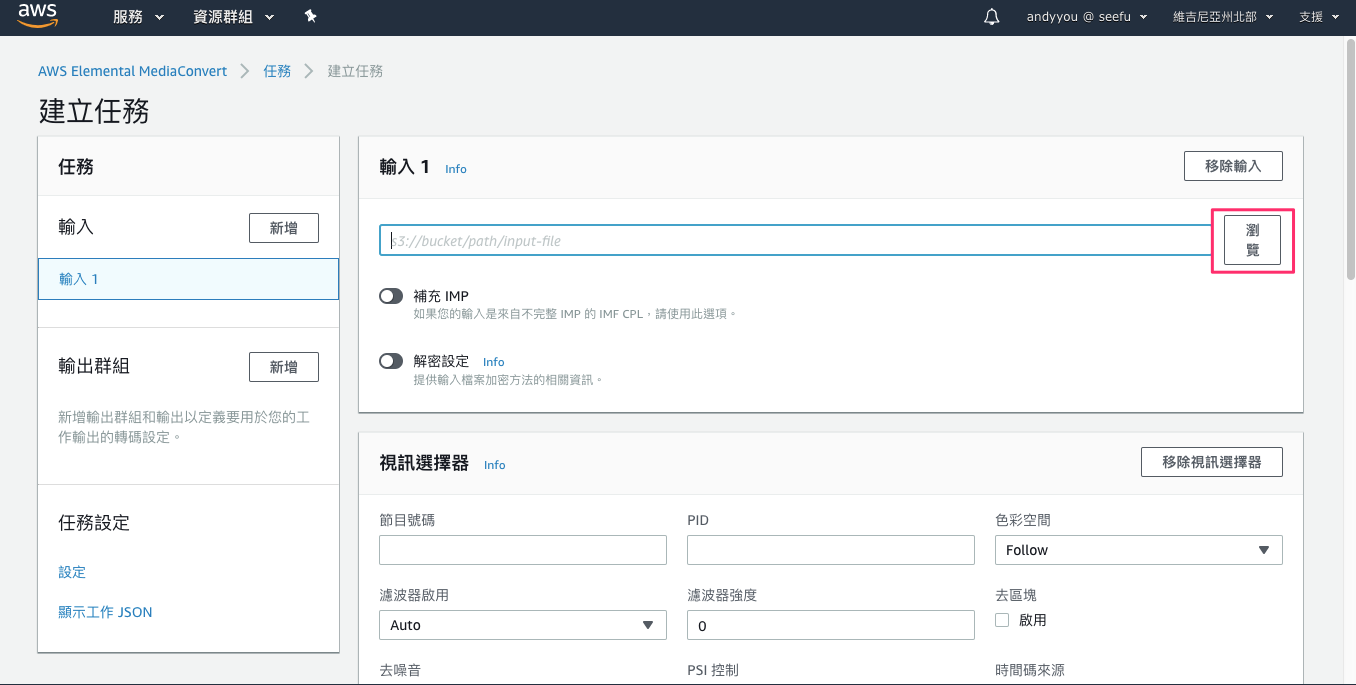
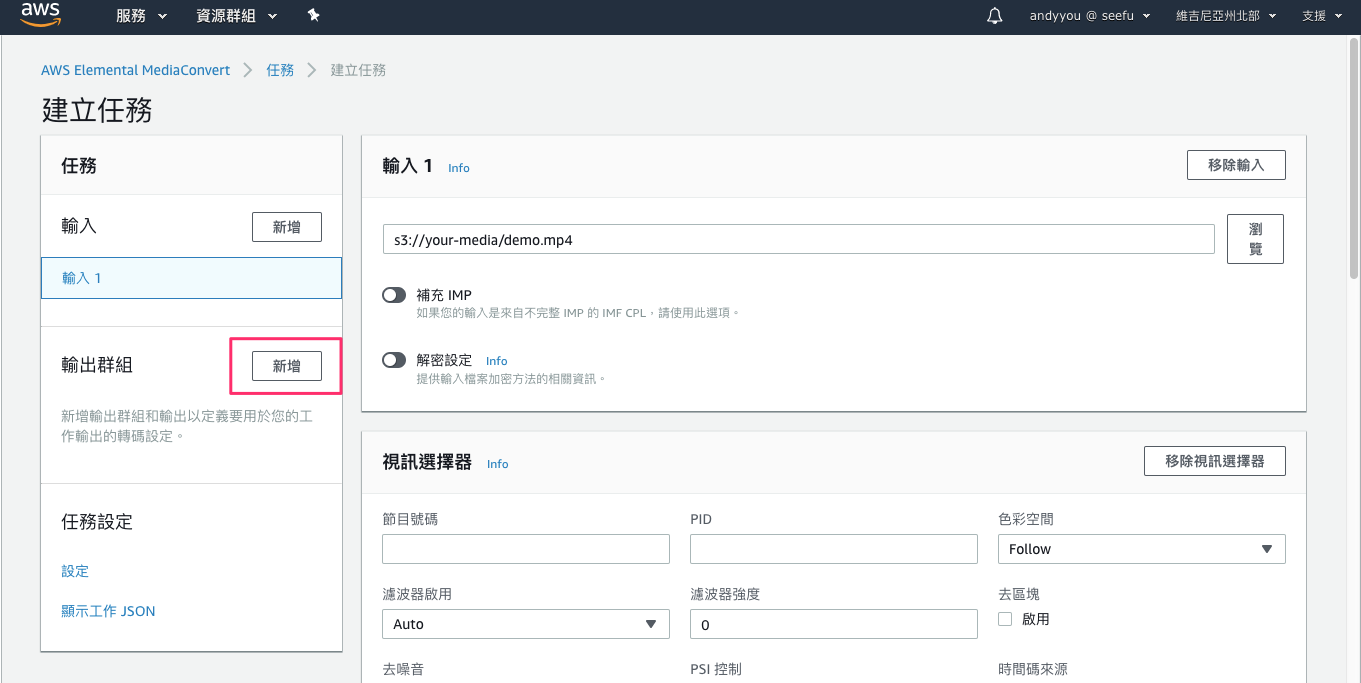
選擇 Bucket 和檔案
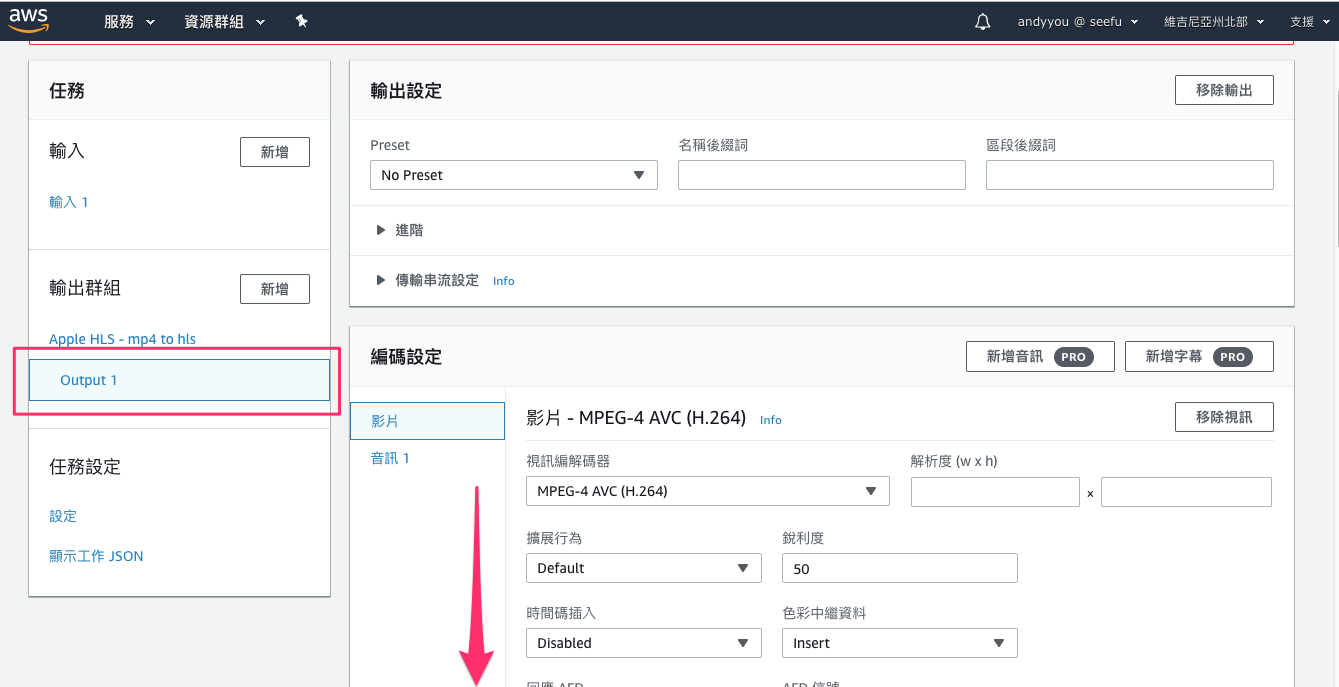
輸入設定,這裡您可以依據您的需求設定 Input Selectors,總共有三種類型。不過這裡的示範我們維持預設值即可
在 Video Selector 的部分,指定您需要的欄位值。您不需要自行建立 Video Selector 因為 AWS Elemental MediaConvert 會在建立 Job 的時候自動建立一組。然而服務不會自動偵測影片來源的資訊。您可以在 Video Selector 提供。如果您在這些欄位使用預設值,您還是可以建立一組合法的 Job。
注意:AWS Elemental MediaConvert 不支援多影音串流格式的影片例如 Quad 4K。每一個輸入只能有一個 Video Selector;因此沒有 Add Video Selector 的按鈕可以點。
Audio Selectors 的部分,在 Audio selector 1 ,設定關於主要音源資源的資訊。您不需要建立 Audio selector 1 因為建立 Job 的時候一樣會自動建立一組。
注意:
音頻資源通常包含對話、背景音,配樂等在一個 Track。Tracks 通常由多個聲道 Channels 組成。例如杜比 5.1 每個 Track 有 6 個聲道
a. 針對 Selector type 選擇識別音頻的方式,通常使用 Track
b. 替主要的音源設定識別(Track number,PID 或 Language code),主要的音源可能是 Track 1對於大部分的情況,每一個 Input Selector 都有一組 Input Track。如果您需要合併多個音軌可以使用
,分隔列表項目或使用*
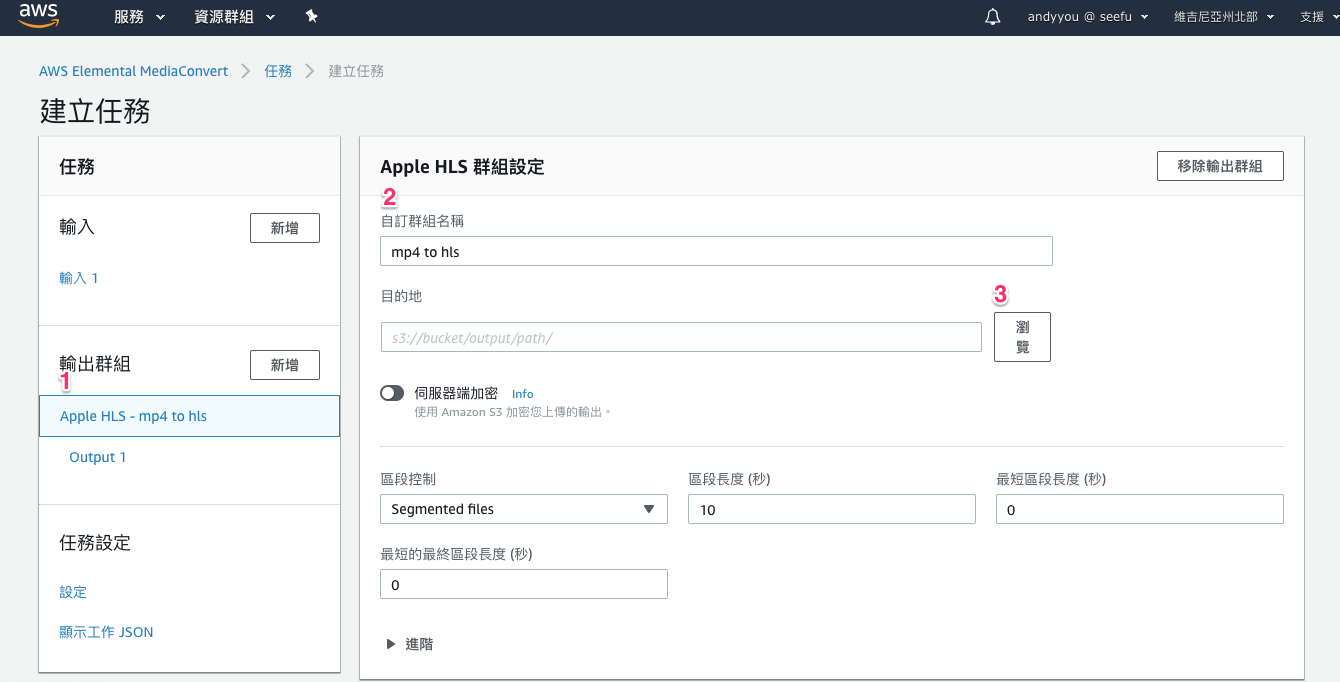
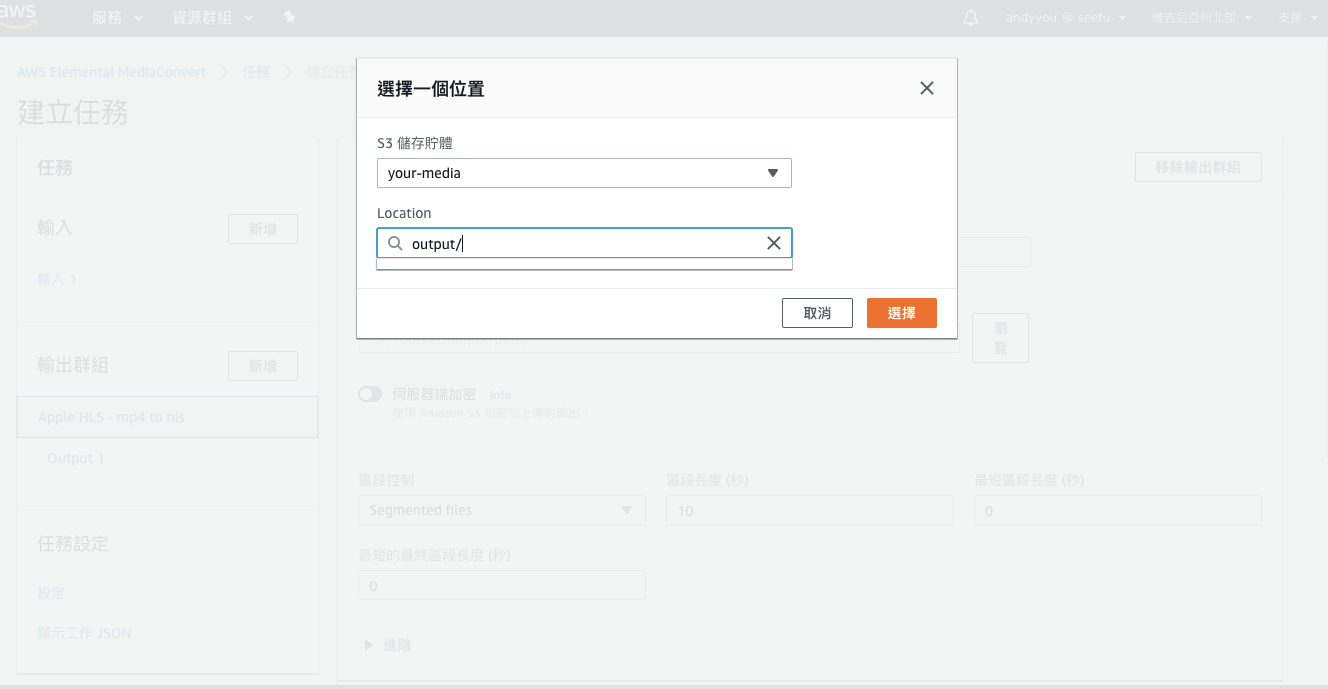
注意:輸出如果要在目錄底下需要以 / 結尾。
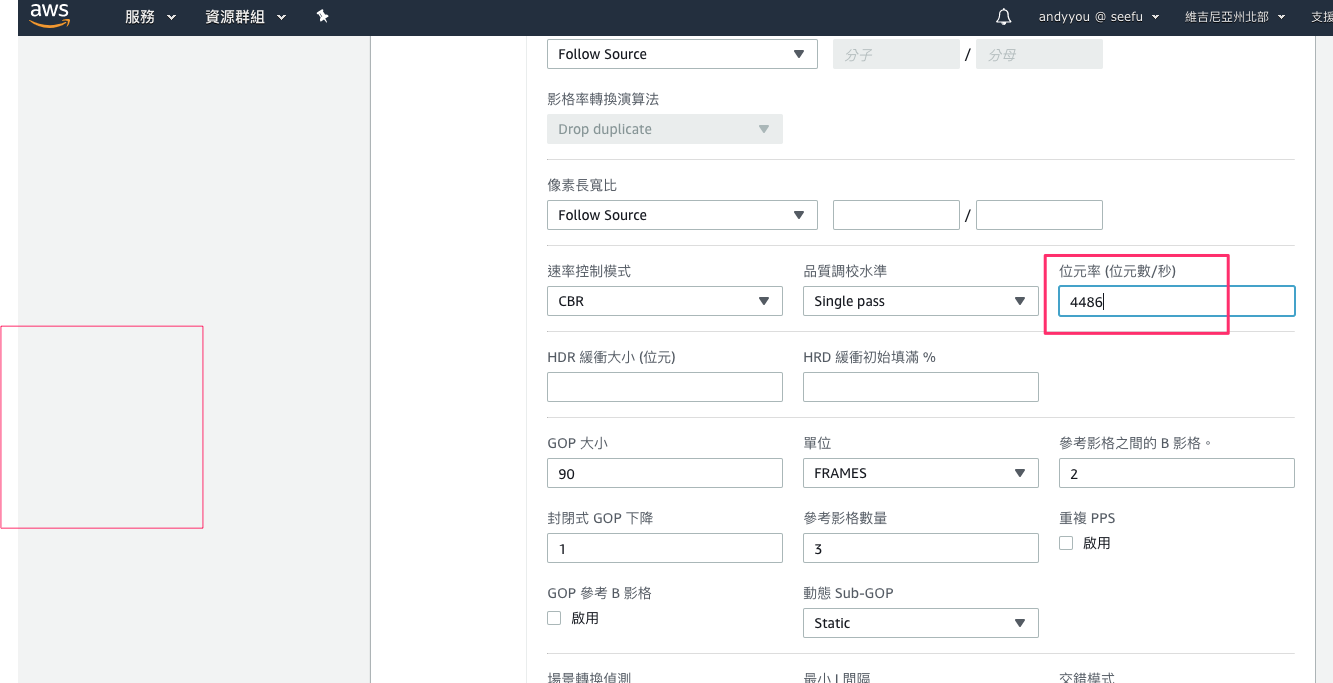
Output 如果輸出設定的 Preset 沒有設定的話,那麼至少 Bitrate 一定要設定。
1 | # 使用 ffmpeg 查詢 Bitrate |
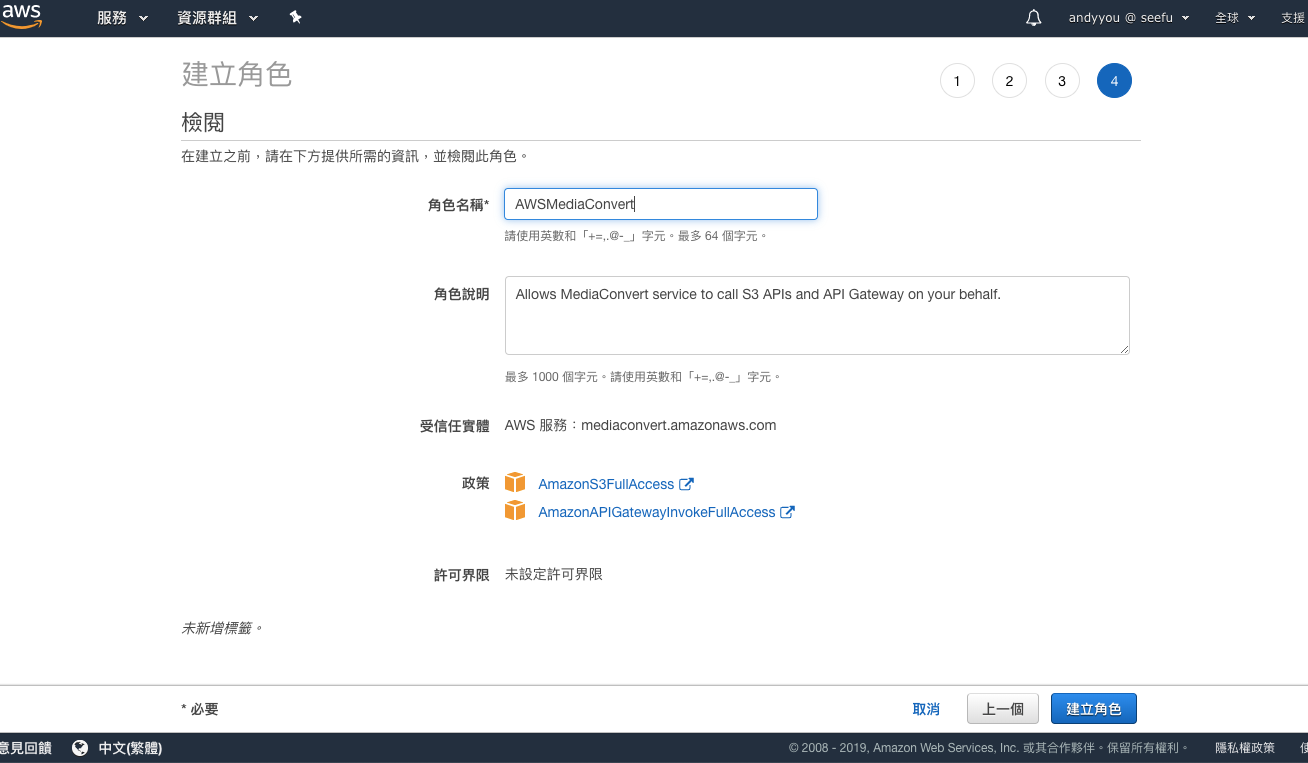
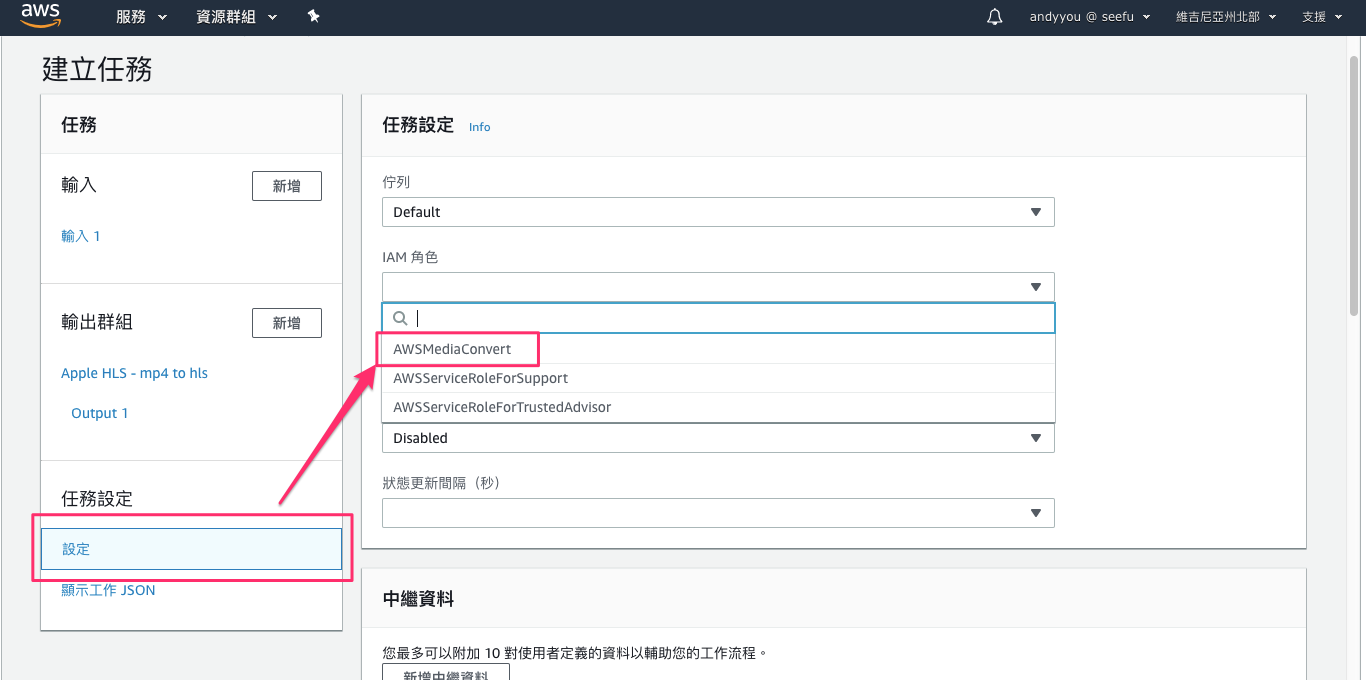
任務設定必須要設定角色,我們選擇剛剛建立的角色。
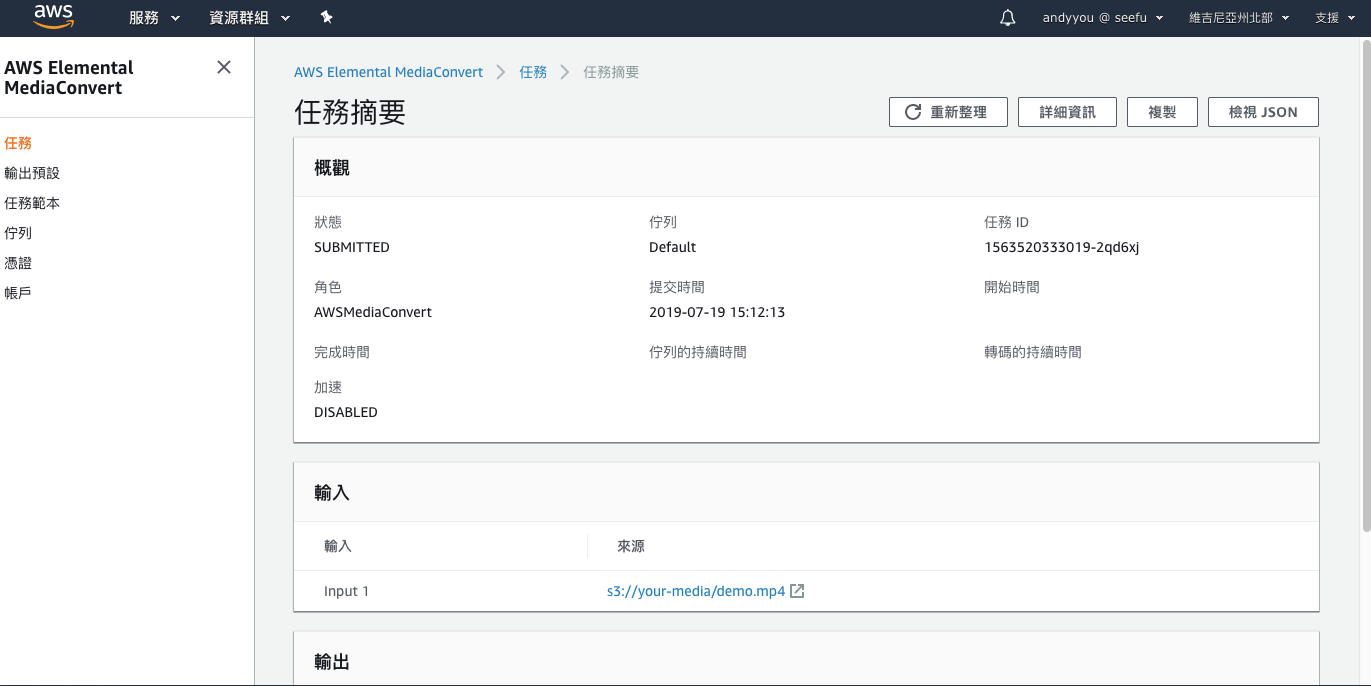
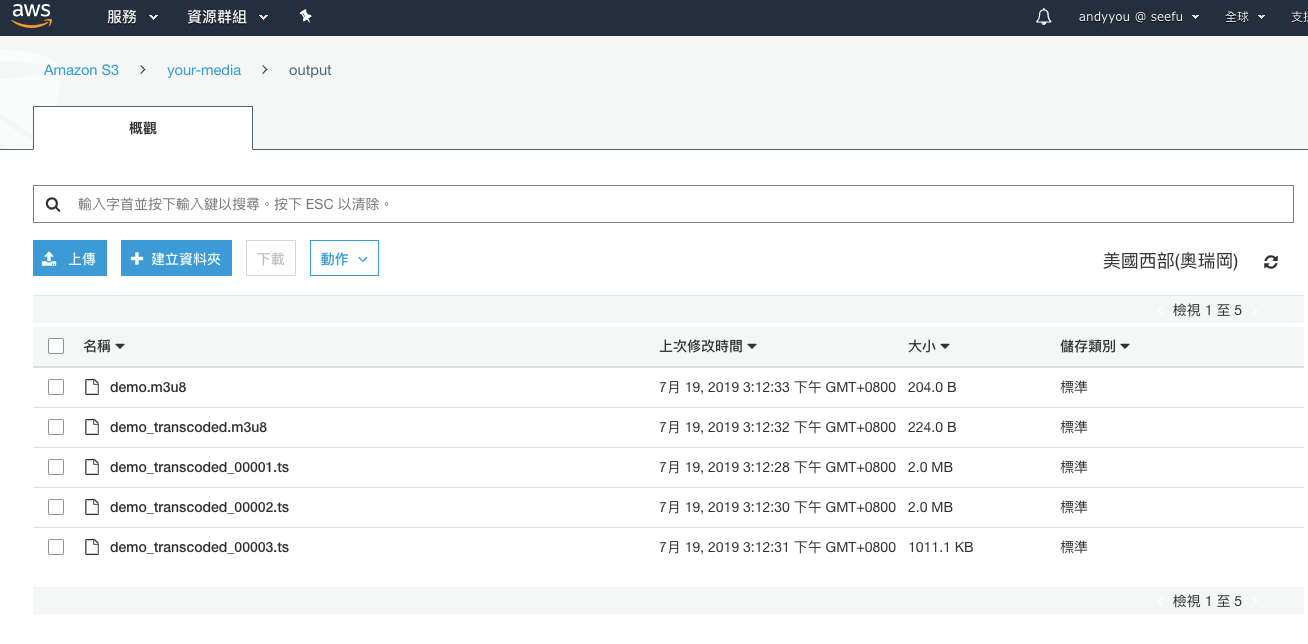
建立 Job 完成執行轉檔。
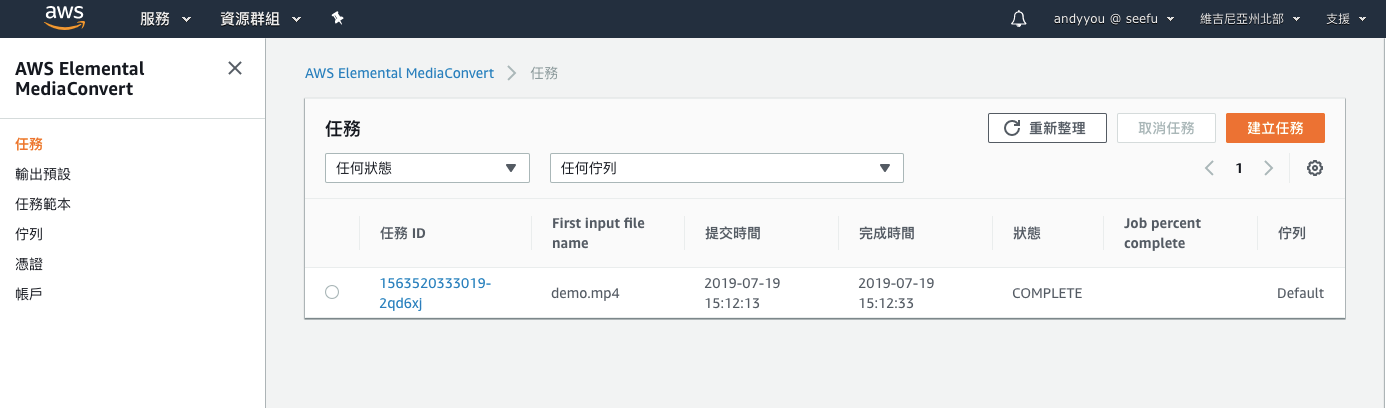
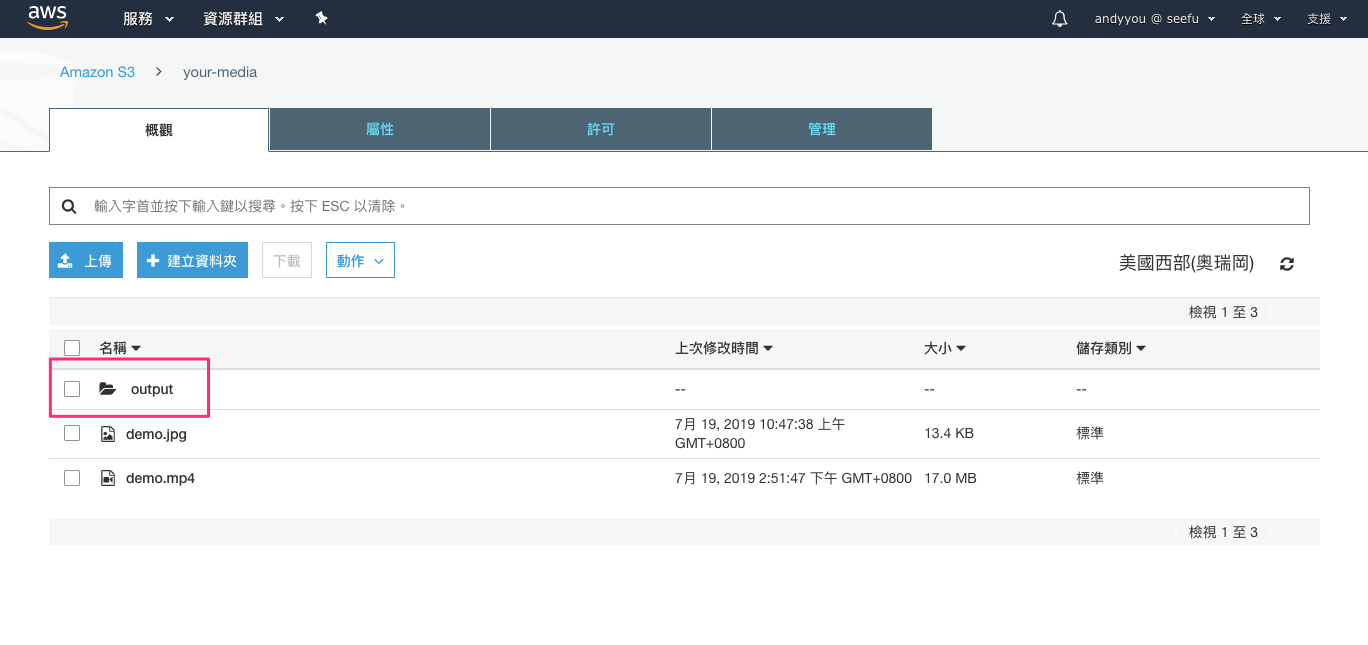
至 S3 檢查產出的結果。
完成 .m3u8 的轉換之後,我們需要調整 S3 和 CloudFront 的設定,因為我們希望可以直接從 CDN 取得 .m3u8 。
S3 先設定 CORS。
1 |
|
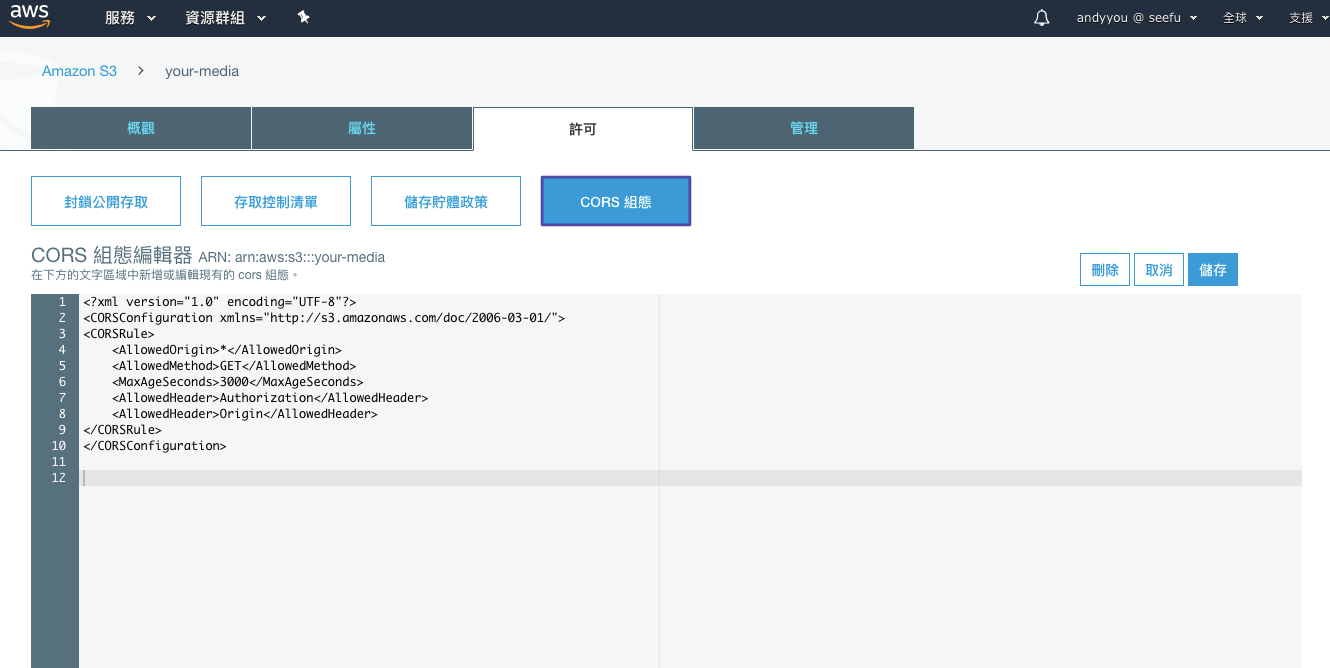
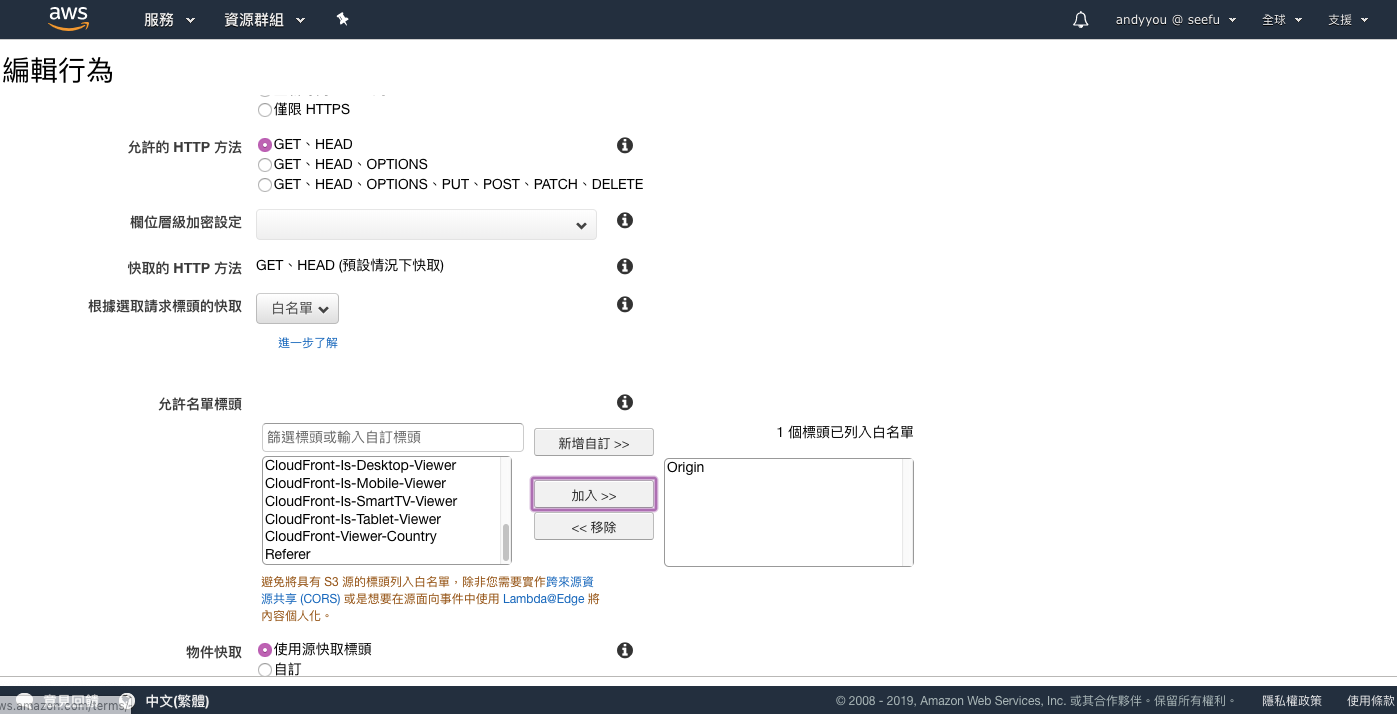
注意:CloudFront 一定要允許 Origin
資源
手把手設定 MediaConvert 轉檔 HLS 搭配 S3 + CloudFront
https://andyyou.github.io/2019/07/19/s3-cloudfront-media-convert-step-by-step/